10 things to do AFTER Installing DEBIAN
Are you looking for things to do after installing Debian? These 10 things to do after installing Debian 9 will help you make your Debian desktop experience better.
These 10 things to do after installing Debian 9 continue the trend from my how to install and configure Debian 9 and also the right way to install Debian testing Xfce. Also, although this post is focused at Debian 9 Xfce stable, many of these things to do after install also work with other Debian flavors. Let’s do the indispensable things after installing Debian 9.
1. Setup SUDO and install Synaptic
These two programs will ease the process of installing programs and performing the administrative task.
Install SUDO
If you set a root account during the Debian 9 installation, you may also want to set up sudo, to be able to perform administrative tasks as a regular user.
To install sudo, log into to your Debian system as root and issue the command:
apt install sudo
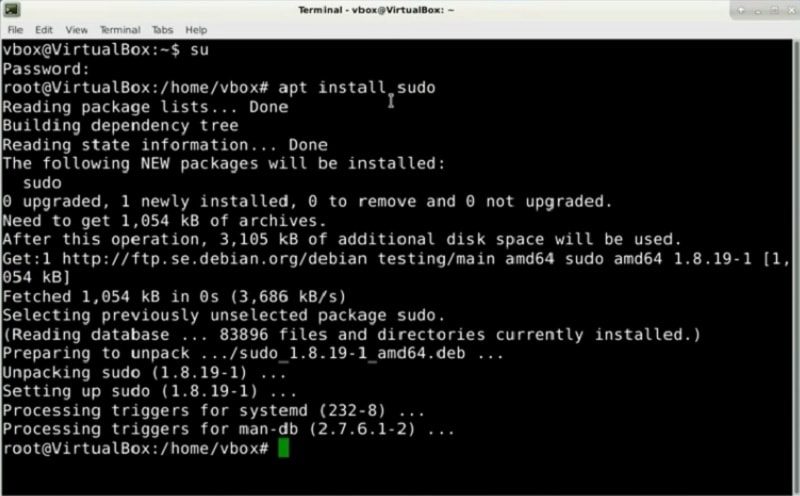
Now, sudo is installed on your system.
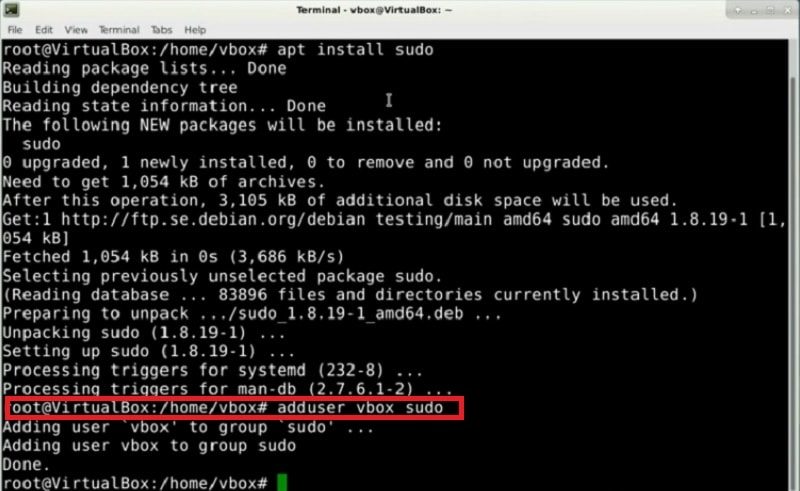
Next, you need to configure your user to be permitted to use it. To achieve that, add your user to the sudo group.
adduser yourusername sudo
Install Synaptic
Synaptic is a graphical package management program for apt. It provides the same features as the apt command line utility with a graphical front-end.
To install Synaptic and some of the accompanying programs, run this command:
apt install gksu synaptic apt-xapian-index policykit-1-gnome
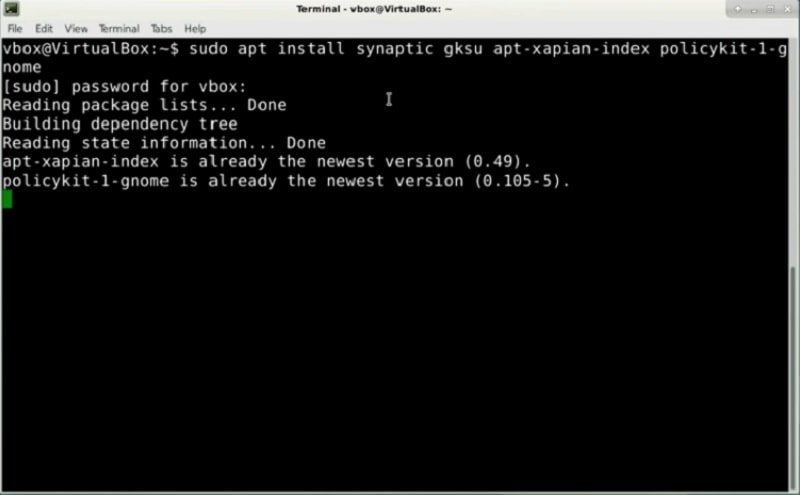
In the above command, gksu allows users run graphical commands with administrative privileges. The apt-xapian-index package index all the packages and allows quick queries over the database of available packages. In addition, PolicyKit is a framework for defining the policy for desktop pieces to configure it.
2. Install Whisker menu
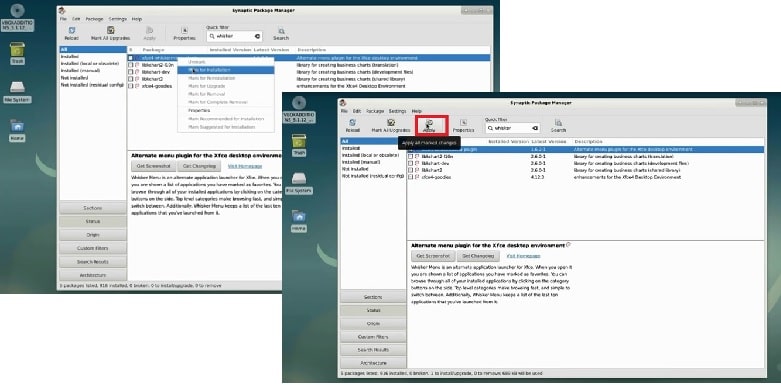
The Whisker menu is an alternate menu plugin for the Xfce desktop environment.
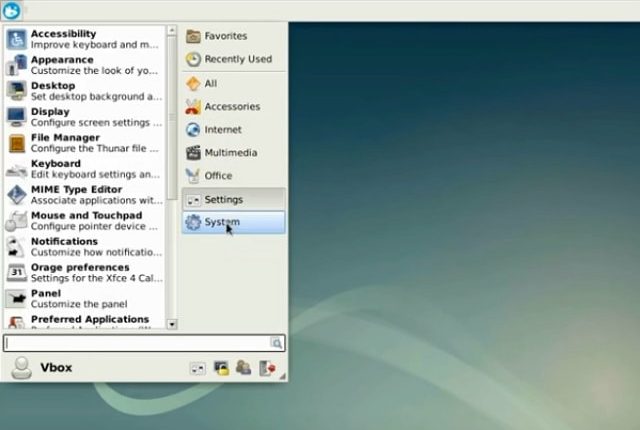
You can the Whisker plugin from the Synaptic package manager. Search for xfce4-whiskermenu-plugin, right-click on it, and select Mark for Installation. Then click on the Apply button in the toolbar. Synaptic will automatically download and install the selected package.
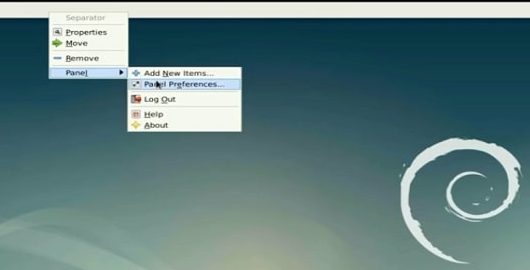
To replace the previously installed application menu and action buttons with the Whisker menu, you need to configure your panel. Open Panel Preferences by right-clicking anywhere on the panel and go to Panel and then Panel Preferences.
Next, click on the Items tab, and you will see your panel current configuration. Remove the Application menu and Action buttons.
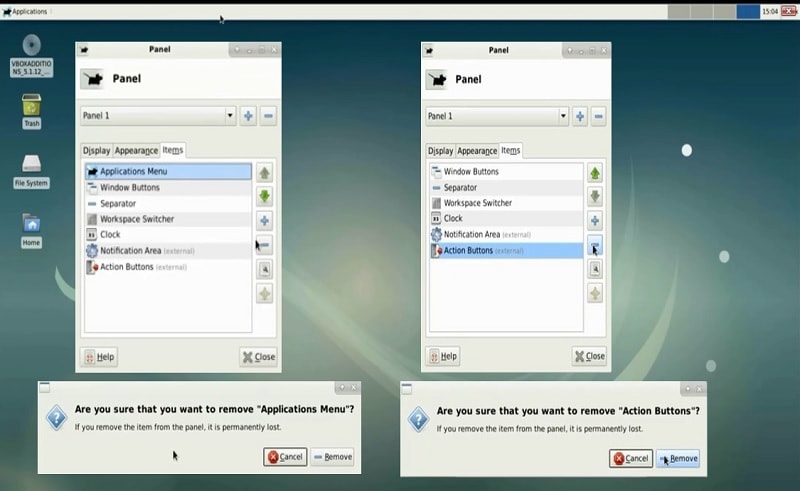
Now, add the Whisker menu plugin and move it to your desired position.
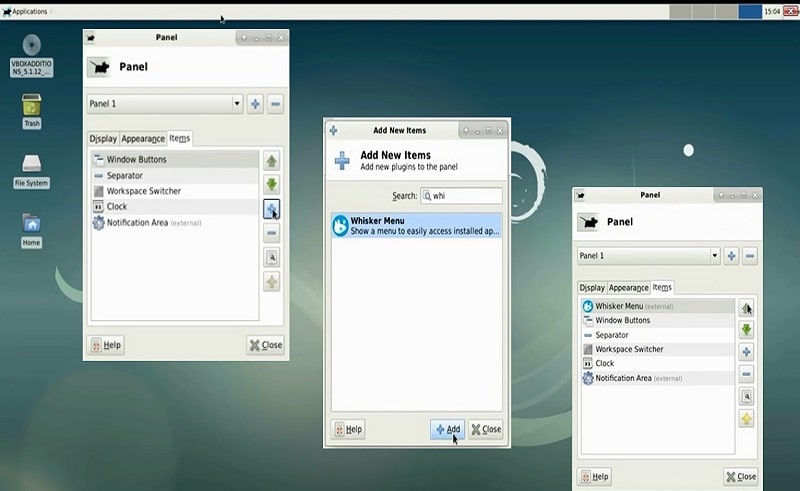
Now, you have the Whisker menu, which is much more convenient and nicer menu.
3. Configure non-free repositories
This is the most essential thing to do after installing Debian. If you want to extend the list of available programs in your Debian repositories, you need to enable contrib and non-free repositories.
The package repository information is stored on the /etc/apt/sources.list file. You need to add new package repositories to this file.
Open /etc/apt/sources.list using Nano text editor:
sudo nano /etc/apt/sources.list
Add contrib non-free after main as shown below:
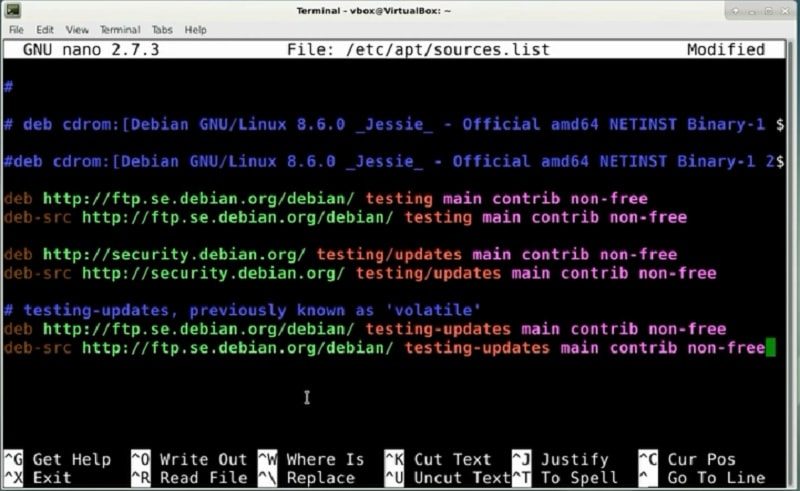
Note: If you run the stable version of Debian 9, you will have stretch instead of testing in the repository names.
To save the changes and close the nano text editor, press Ctrl+O and Ctrl+X keys combinations.
Now, you have made changes to the sources.list file. In order for apt to understand the new changes, you need to update it:
sudo apt update
After updating the list, the best approach is to upgrade the newly installed software and reboot your system.
sudo apt upgrade
sudo reboot
4. Install Key Applications and Packages
These applications include programs that will be required to compile packages in the future and also general usage programs, such as image viewer, network manager, text editor, media music player and of course the office suite. Some of these programs are Xfce specific. So, look through them and if you use any other than Xfce desktop, skip the Xfce packages.
To install all programs, run the following command:
sudo apt install xfce4-taskmanager rsync xfce4-power-manager xfce4-terminal fonts-noto-mono thunar-archive-plugin libreoffice-impress mousepad policykit-1-gnome ristretto xserver-xorg-input-synaptics fonts-dejavu-extra network-manager-gnome mythes-en-us hunspell ttf-dejavu fonts-liberation hunspell-en-us aspell network-manager ttf-bitstream-vera fonts-dejavu p7zip-full libreoffice-writer xfce4-xkb-plugin xfce4-screenshooter xfce4-clipman fonts-droid-fallback xfce4-panel-dev debian-keyring ttf-liberation ttf-dejavu-extra libreoffice-calc aspell-en p7zip unzip xarchiver ttf-freefont fonts-freefont-ttf ttf-mscorefonts-installer ttf-dejavu-core fonts-opensymbol ufw build-essential vlc
If you are curious, below I briefly provide the features of some of the above packages.
The meta package build-essential is required if you are trying to install a program which needs to be compiled.
Keyring is a database of your login information stored on your local computer. More importantly, the package prohibits unauthorized access to your information.
The purpose of the network manager is to make network configuration and setup as painless and automatic as possible.
Next, aspell and hunspell are appropriate as an interactive spell checker for many programs including LibreOffice, Mozilla Firefox, Thunderbird etc.
Ristretto is a fast and lightweight image viewer for the Xfce desktop.
Rsync is needed for copying and synchronizing files and directories remotely as well as locally in Linux systems. I use it to back up my systems.
Thunar Archive plugin allows you to create and extract archive files using the file context menus in the Thunar file manager.
TrueType (TTF) Font packages include some commonly used fonts.
Certainly, LibreOffice is a great open source alternative to Microsoft Office.
The Xfce power manager manages the power on the computer.
Xfce4 screenshooter allows you to capture the screen graphics and save it as image files.
5. Configure drivers
Installing graphics driver and CPU microcode likely will improve the performance of your system.
Video card drivers
If you have a dedicated graphics card, you may gain better performance with proprietary drivers. More importantly, the vendor’s drivers often work better than the open source drivers.
My hardware has the integrated Intel HD graphics, so I cannot show you how to install video card drivers. But you can find all the necessary instructions in the Debian Wiki for Nvidia and AMD.
CPU microcode
Microcode could be considered as firmware of the CPU, which adds more functionality to the processor and patches bugs.
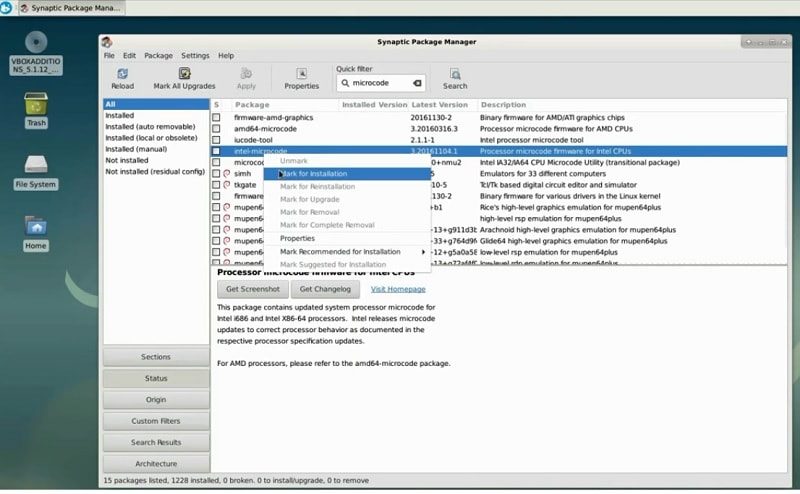
To install microcode, open Synaptic, type microcode in the search tool. You only need to install the package related to the brand of CPU in the system. For example, installing amd64-microcode on a system with an Intel processor makes no sense. Click and select Mark for Installation and then click the Apply button on the toolbar. Synaptic will automatically download and install the selected package. After installation, you must reboot your system.
6. Configure firewall
One widely used strategy to improve system security is to use a firewall. A firewall consists of software and hardware setup between your computer and the Internet.
UFW, or Uncomplicated Firewall, provides an easy to use interface for inexperienced Linux users to set up the Linux firewall.
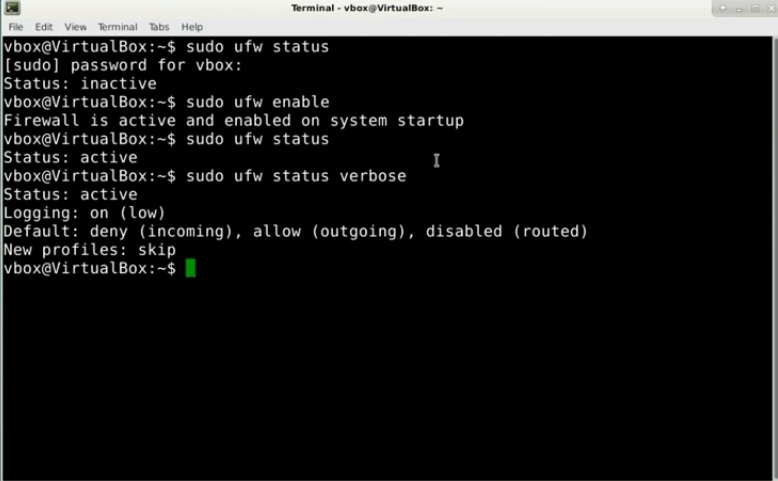
Remember, we have already installed UFW in the step above. At this point, you can check the status of UFW by typing.
sudo ufw status
On the first install, the UFW firewall is disabled by default. So, the result of the above command should be inactive.
To enable UFW, you need to type the following command:
sudo ufw enable
After execution of the above command, you can check the status again by running:
sudo ufw status verbose
The verbose option provides more information from the command on the screen.
This time, the result of the above command must be “active”. By default, the UFW firewall denies every incoming connection and allows only all outgoing connections. This means, no one can access your system, unless you specifically open a port, while all the running services or applications on your Debian are able to access the outside network.
7. Speed up the boot time
Every single time when you start your Debian system, the fact that, you either have to press Enter or wait for five seconds.

Fortunately, it is possible for GRUB to boot directly without any prompt.
The default settings for the GRUB timeout menu selection during the system boot is 5 seconds. To change this value, open the GRUB configuration file by using the following command:
sudo nano /etc/default/grub
Change the delay value to 0 seconds, by setting GRUB_TIMEOUT=0:
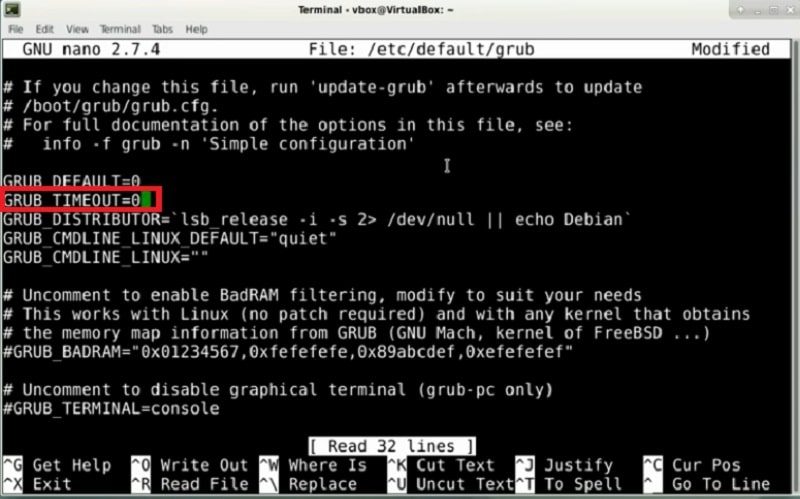
Once you are done, press Ctrl+O and Ctrl+X to save and exit Then update your GRUB settings by using the command:
sudo update-grub
8. Configure lightDM
As you may know, lightDM is the login greeter that prompts the user for credentials. By default, you need to type your username and the password.
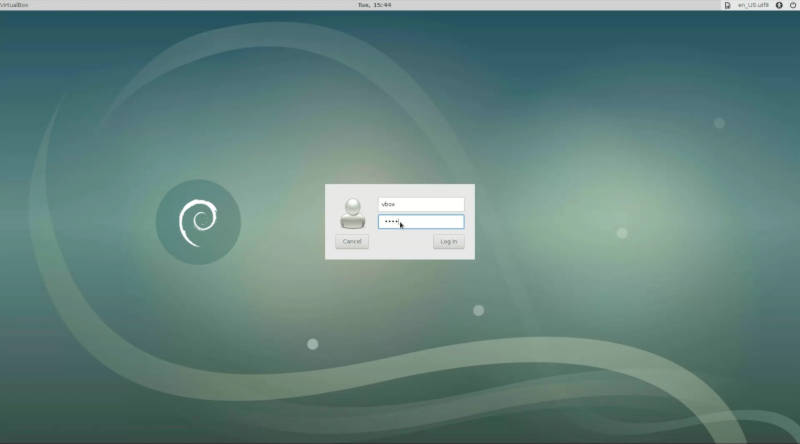
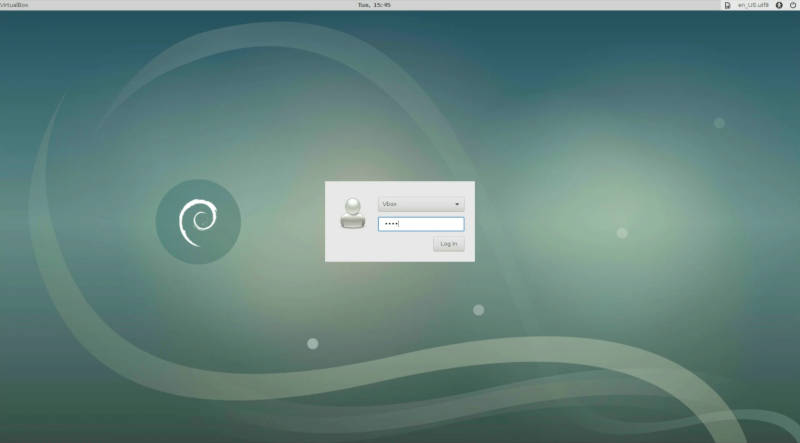
Here, I am going to share how to show the user list on the login screen, so you only need to enter the password.
You need to create a configuration file /usr/share/lightdm/lightdm.conf.d/01_my.conf:
sudo nano /usr/share/lightdm/lightdm.conf.d/01_my.conf
And paste the following text in this file:
[SeatDefaults]
greeter-hide-users=false
To close nano, press Ctrl+O to save and Ctrl+X to exit. Reboot your system and when you log in, you will see your usernames is saved.
9. Some settings tweaks
These tweaks will help you to makeover your Debian desktop. For example, you may not want to use the minimize window button because you like to double-click on the titlebar to maximize. By the way, I think the double-click on the titlebar to maximize is a really smart feature. Below, you will see how to enable this feature and configure the Xfce file manager.
Configure Windows look
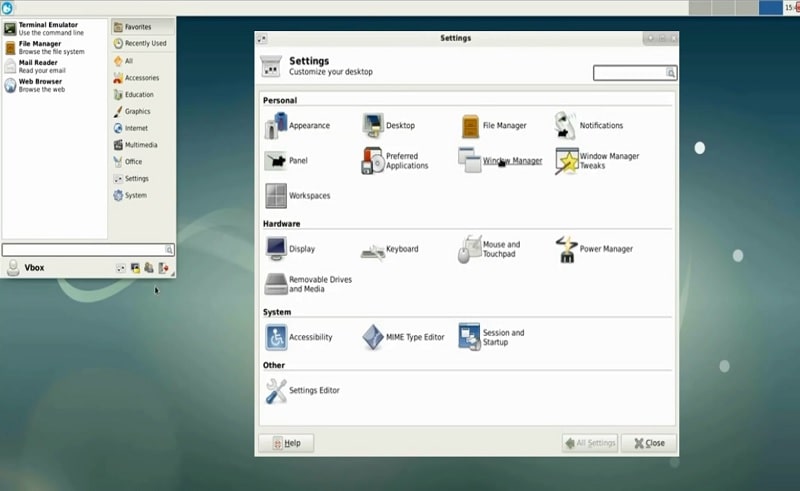
To configure the windows look, go to Xfce Setting and click on the Window manager.
The first tab name is Style. You can change Title font, Title alignment and Button layout using this Style tab.
I usually remove the shade and maximize button. Just drag the shade and maximize button from active block to the hidden block.

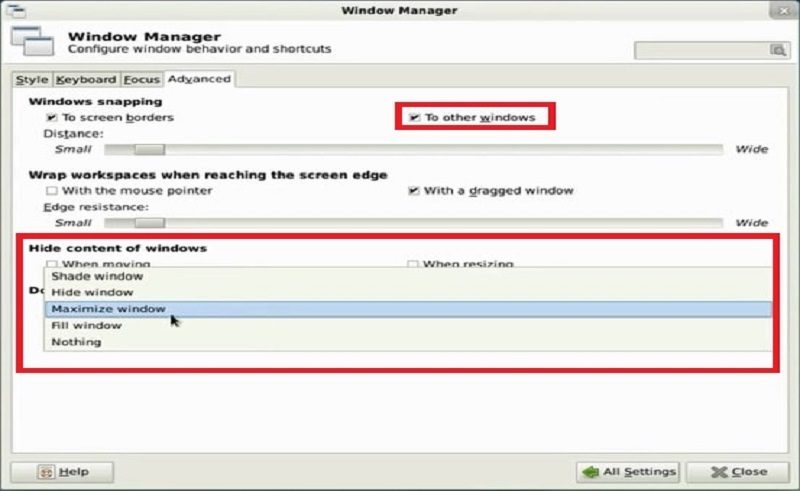
Enable double-click on the titlebar to maximize
In the same settings window as above in the Advanced tab, enable the double-click option. It allows you to maximize the window when you double-click on the titlebar. Moreover, I also recommend enabling the Window snapping to other windows feature here. It makes it easy to line-up your windows side by side.
Configure Windows behavior
By default, open windows will appear somewhere on the desktop. I personally don’t like that. I like when new windows open always in the center.
You can adjust the placement of new open windows on the desktop in the Window Manager Tweaks. Go to Xfce Setting and then click on the Window Manager Tweaks:
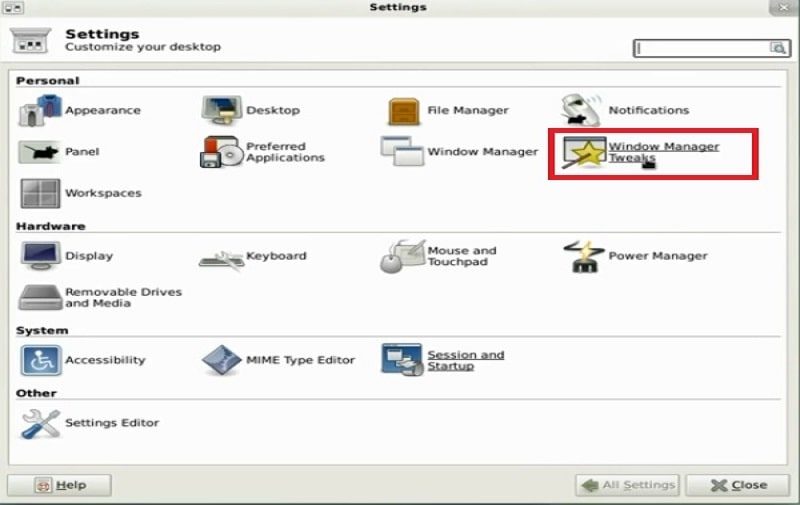
Find the settings for Placement and scroll bar to the maximum left side to set it to Large, so that windows open always in the center of your screen.
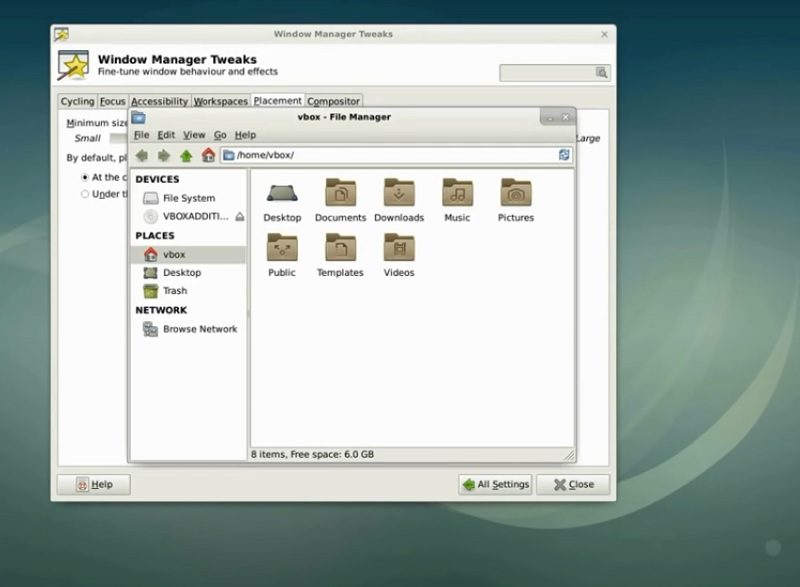
Once you are done, you can see that all windows will open in the center.
Keyboard shortcuts
You can customize keyboard shortcuts to trigger the required command. For example, I usually set a shortcut for the xkill command. xkill is used when you want to kill a process. I use it to kill frozen applications.
For this, go to Xfce Setting and then click on the Keyboard.
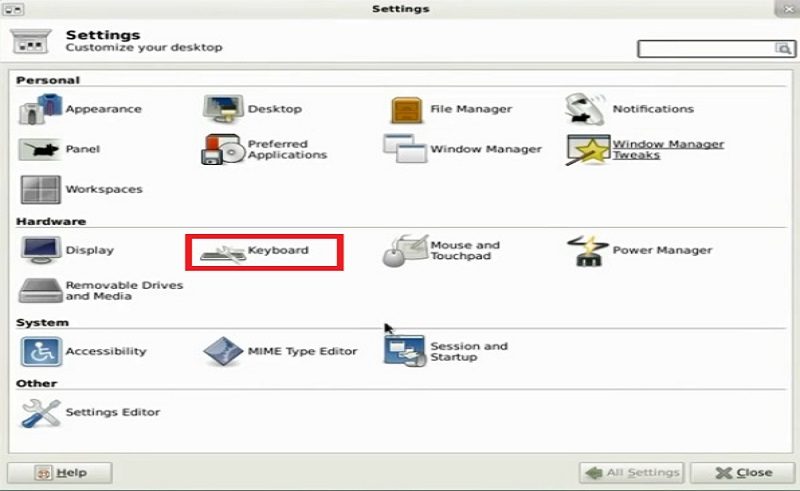
Next, select the Application Shortcuts tab then click on Add button and pick the command. For example, I select xkill here. Next, click OK.
The application then throws up a box telling you to press the key combination. Press the shortcut you want to assign the command to. I press Ctrl+Alt+Esc.
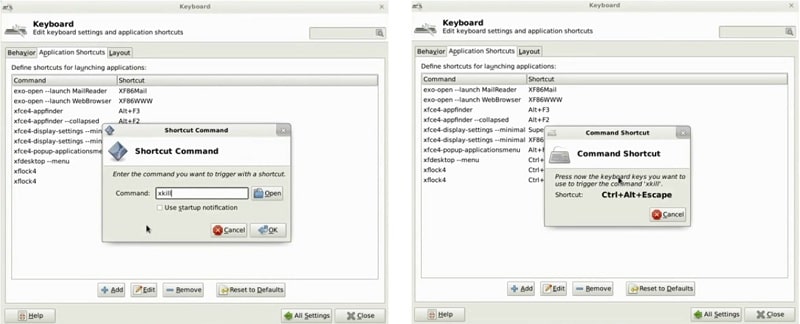
To verify the assigned shortcut, press it. Again, I press Ctrl+Alt+Esc to execute xkill.
The xkill will transform your mouse cursor into an x or into a skull (depending on your icon set). Now you can simply left-click on whatever application and it’ll be killed in an instant.
Session and startup
Auto-starting applications, also known as startup applications, includes programs that automatically launch themselves when you turn on your computer. You may want to disable some programs you don’t use, to save resources of your Linux system, To configure it, go to the Settings -> Session and Startup -> Application autostart tab.
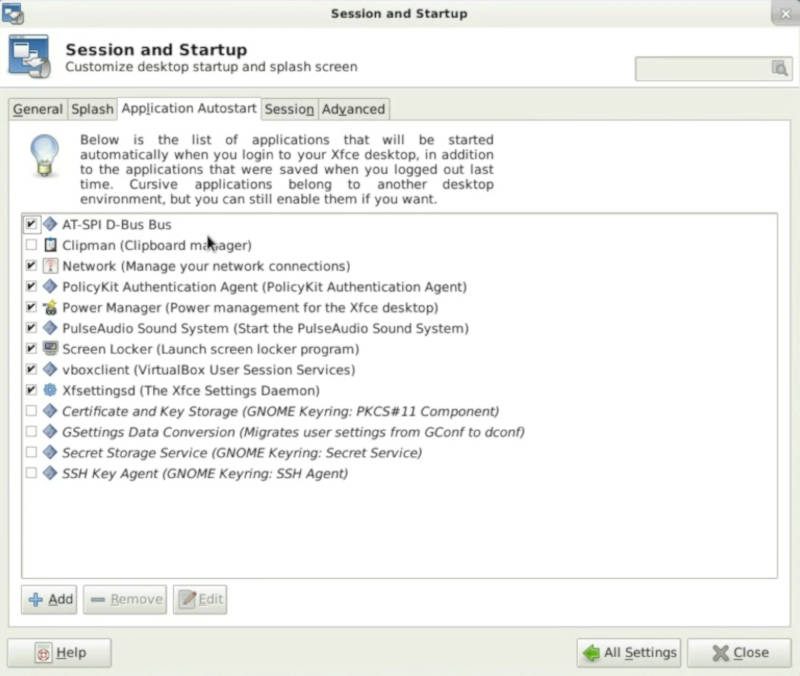
Here, you can check applications that you want to launch automatically when you turn on your Debian system, and uncheck the applications that you want to disable at startup.
10. Remove unneeded application and clean system
At certain time and situation, you might need to completely remove application means you have to remove both the binaries and settings of that application.
In synaptic, search for the program that you want to remove. You can do it by browsing through the categories, or just type the name of the program in the search box. For instance, I want complete removal of mutt.
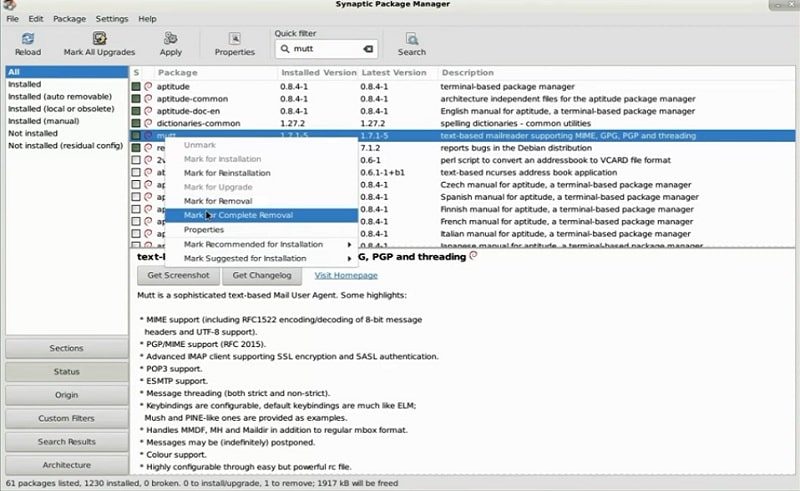
Once you’ve found the program, right-click on it and select the Mark for Complete Removal. Apply the changes.
To clean the system from any orphan files, run these two commands:
sudo apt autoremove
sudo apt clean
There is more...
That’s all from this article, I hope these 10 things after installing Debian 9 will help you to make your Debian 9 Xfce faster and more efficient. If you want to make your Debian 9 Xfce better looking, install some of the best Xfce themes. I also highly recommend you go through my post on How NOT to break Debian.
Let me know what you would add to this list.
Comments
Dave
I installed debian 10.3 and synaptic was already install as was sudo.
Dr. Flores
Excellent Instructions.
Thank you.
Average Linux User
Dr. Flores, Thank you for the comment.
Antonio
Thank you for the tips!! You make a great job!
Average Linux User
Antonio, my pleasure :)
Arunava Basak
sudo nano /usr/share/lightdm/lightdm.conf.d/01_my.conf [SeatDefaults] greeter-hide-users=false also, this is not working for me…..
Average Linux User
Sorry, I have no idea why it doens't work. Do you use XFCE with lightdm? To check, run this command:
cat /etc/X11/default-display-managerDave J.
I found it works by typing “sudo adduser yourusername sudo”
Arunava Basak
as per your instruction when i want to add user name in sudo, 'bash: add: command not found' shows me. what could i do now?
Average Linux User
The command is
adduser yourusername sudo