Linux Mint Installation Guide for Beginners
Using this Linux Mint installation guide, you will be able to install Linux Mint even if you have never installed Linux. I am going to walk you through all the necessary steps.
Introduction to the Linux Mint installation guide
Linux Mint is a highly recommended Linux distribution for novices. However, its installation process may scare some users, especially if it is the first time you make installation of Linux. So, If you are an absolute beginner and you have never installed Linux, this article is for you.
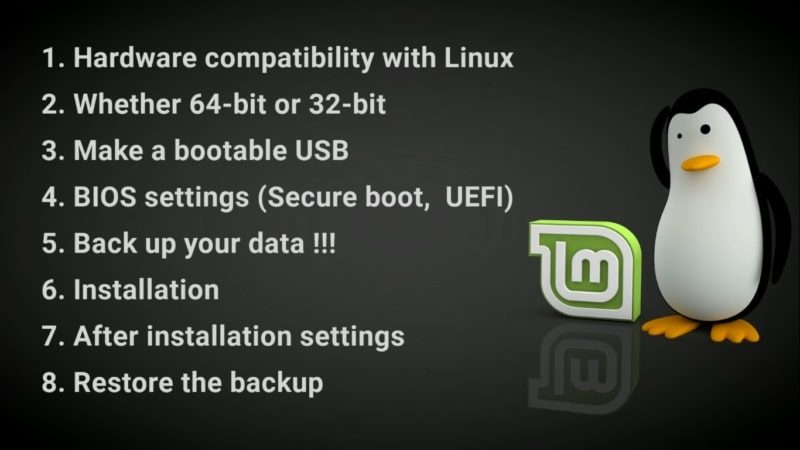
This Linux Mint installation guide has 8 steps to make the process right.
- Hardware compatibility with Linux.
- Whether 64-Bit or 32-Bit.
- Make a bootable USB.
- BIOS settings.
- Back up your data.
- Installation.
- After installations settings.
- Restore the backup data.
So, let us get started!
VIDEO TUTORIAL
1. Hardware compatibility with Linux
The first step in this Linux Mint installation guide is verify the hardware compatibility. Unfortunately, not all hardware is compatible with Linux. This is not a fault of Linux. It is because some manufacturers do not want to open-source their drivers or do not make proprietary drivers for Linux. But do not worry Linux works fine on the most hardware. Nevertheless, before you attempt to install Linux, I recommend you to do some research.
First, you can check the Ubuntu certified hardware list.
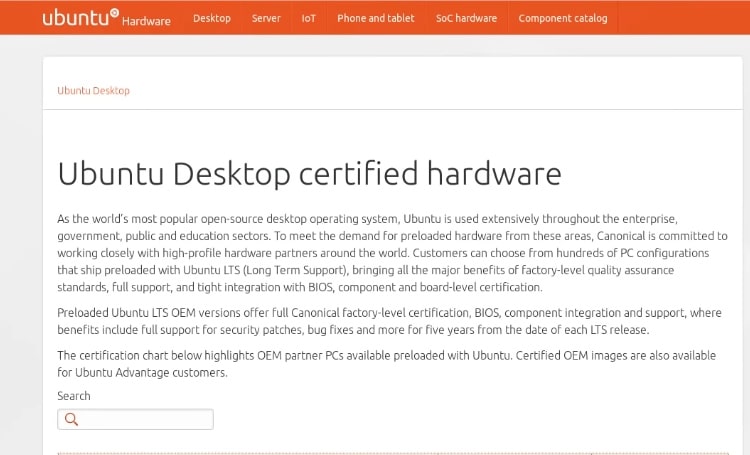
If your computer is on the list, you are lucky, and you should have no problems with Linux on your computer and you can continue with this Linux Mint installation guide.
This database is also useful if you want to buy new hardware and you want to make sure it is compatible with Linux.
Second, you can check the Arch Linux wiki Laptop page. Although this information is not for Linux Mint, if it says that Arch Linux works fine on your laptop, then Linux Mint will work fine too.
Search for errors on Google
Finally, it is always good to google the model of your computer together with the word “Linux” and look if there are any major problems. For example, I searched for “Asus X51R Linux”.
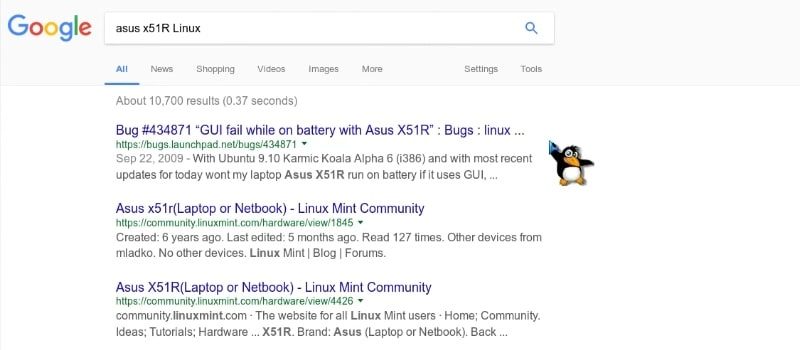
As you can see, the first bug is “Graphical User Interface fail while on battery”. Such kind of messages should make you cautious, and it is better to do more research before you decide to install Linux on this laptop.
If you find no major problems or you find that some problems are possible but solutions are provided, you can continue with this Linux Mint installation guide.
2. Whether 64-bit or 32-bit
The second step of the Linux Mint installation guide is check if your processors supports 64-Bits system. There are many ways to do it. If your hardware is not very old, it is very unlikely that it doesn’t support 64-bit. Nevertheless, it is still good to check it for sure.
If you are on Windows 7, go to Start Menu, right click on your computer and select properties.
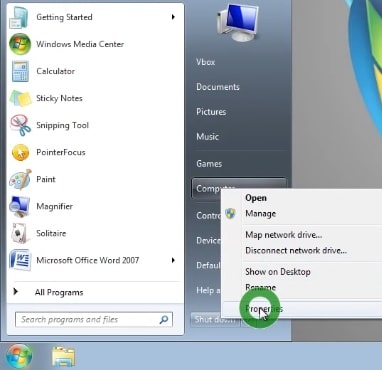
So, you can see the system type. If it says 64 bit, you are fine, and you can go and download Linux Mint 64-bit ISO.

However, it may say that your Windows is 32-bit, but it doesn’t mean that your processor does not support 64 bit. The 64bit processors can work fine with 32bit systems.
In this case, you need to go to the device manager and find the model of your processor.
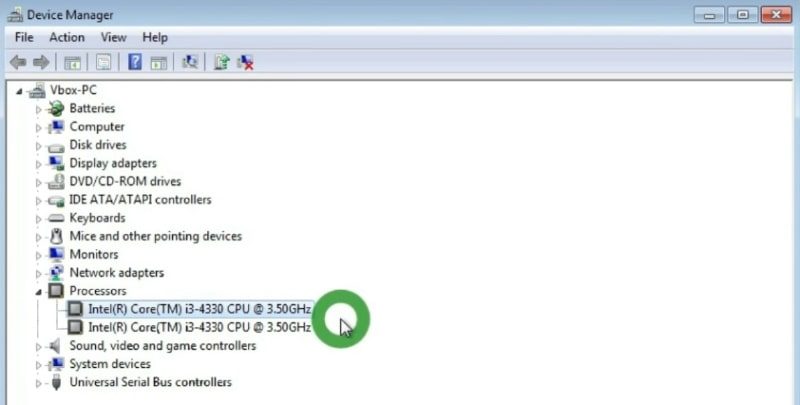
In my case, it is Intel i3-4330 with the frequency 3.5 GHz. Next, google it and go to the official Intel website. Then you need to find what architecture it supports. For example, I can see that my processor is, in fact, 64-bit. So, I can download the 64-bit Linux Mint image.
NOTE: I do not have other Windows versions, and I cannot show you this procedure on Windows 10 or Windows 8. I assume the same steps should work there too.
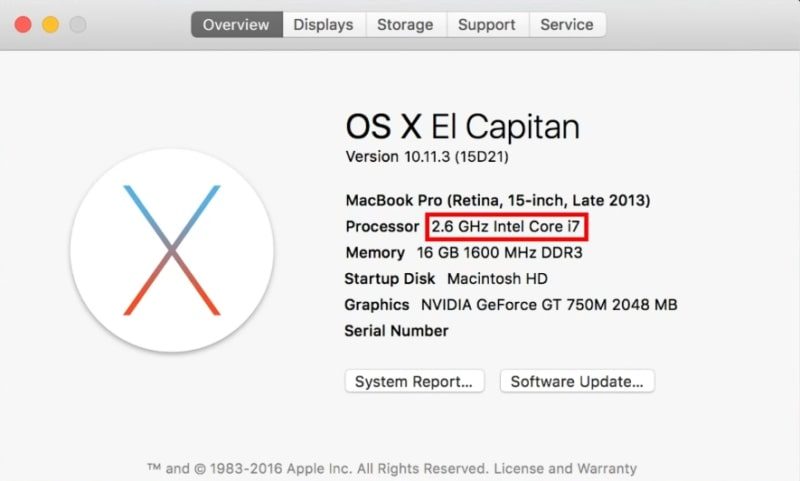
If you are on Mac, you need to go to About This Mac and it will show you the model of your processor. Then you simply google it.
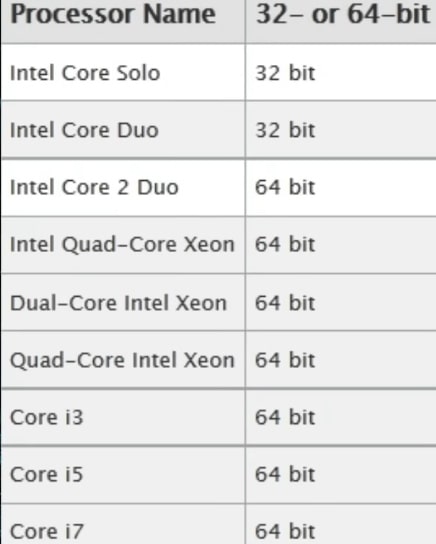
This table can help you with this, if your Mac has a Core Duo processor, it is 32-bit architecture. Otherwise, (Core 2 Duo, Xeon, i3, i5, i7, anything else), you have a 64-bit processor.
As I said before, if your computer is recent, it certainly supports 64-Bits. So do not worry, you can continue with this Linux Mint installation guide.
3. Make a bootable USB
The next step of this Linux Mint installation guide is create a bootable USB.
When you know the architecture of your processor, you need to download the Linux Mint installer. So, you go to the Linux Mint website, then go to download and select the left-most menu. It is the latest stable version of Linux Mint.
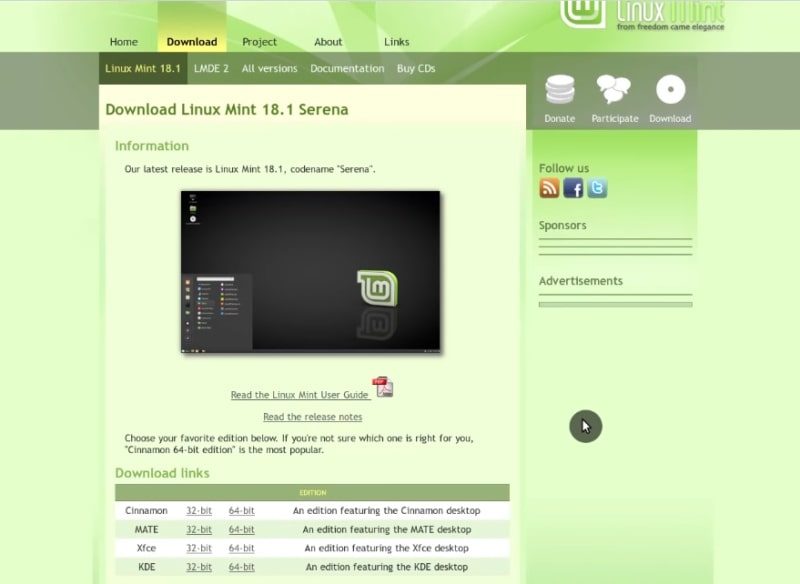
Linux Mint has several Desktop Environments: Cinnamon, Mate, and XFCE. It is up to you which desktop environments to choose. The difference between these environments deserves a separate post. If you do not know which desktop environment to choose, I recommend downloading Cinnamon because it is default in Linux Mint. If your hardware is old, you will benefit from installing XFCE. Mate is somewhere in between.
I will download Cinnamon 64bit.
There are two download options. First, you can use torrent. If you do not know how to use torrent, then download using a direct link. You need to find your country, and click on any link that is available. If there several links for your country, just use one that you think is the closest to your location. This will download the ISO file, which is an image of the Linux Mint installer.
Making a bootable USB
In this Linux Mint installation guide you need to write this image to a USB drive. Of course, you can also burn this image to a DVD drive, but I do not recommend doing so because the performance will be very reduced.
NOTE: I assume that most of the people watching this video use Windows.
Using Windows
To make a bootable UBS from within Windows, I recommend using Universal USB Installer. It works the best in my opinion. Go to its website and download it.
Then double click on the file of Universal USB Installer. Agree with terms of the License. Next, select Linux Mint as your distribution. Browse for the downloaded Linux Mint ISO file and select it. Finally, select your USB Flash drive letter.
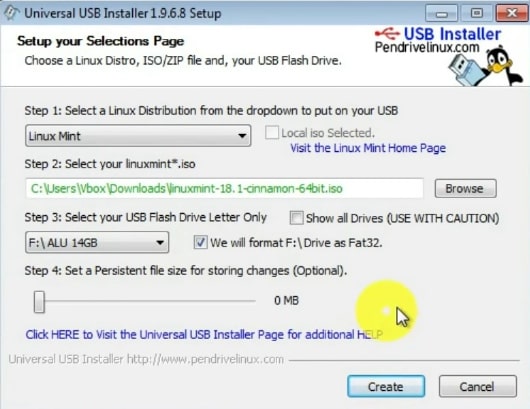
NOTE: Never select the option “show all drives”. If you select this option, all your hard drives become available for writing. You can accidentally write the Linux Mint image to your main hard drive and destroy your windows system and all your data.
Then, select Format the drive. Be aware that this step will remove all the data from your Flash drive. So, backup your files if necessary.
If you are sure that you have selected all the right options and copied the important data from the USB drive, you can click “Create”. This will write the Linux Mint image to the USB drive.
During this time I recommend you to go back to the Linux Mint download page and check the Release Notes. You can find some useful information to complement this Linux Mint installation guide.
In case, you do not use Windows, for example, you already use Linux or you have only Mac. You can create a bootable USB drive from within these two systems too.
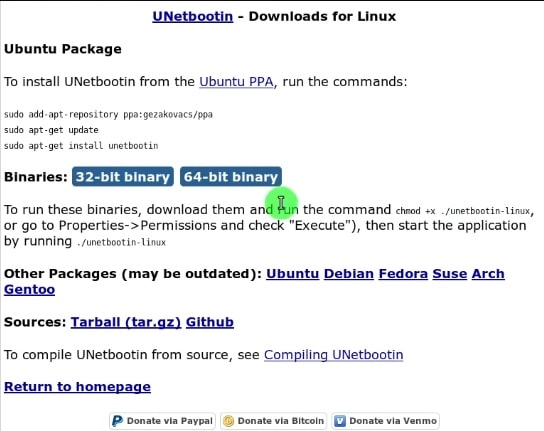
Using UNetbootin on Linux
For this Linux Mint installation guide, I recommend using Unetbootin. It is available in most Linux distributions. You can also download it from the website. Now, you have to go to the Linux section and install it as described in the page. You can add PPA for Ubuntu and Ubuntu-based systems. Alternatively, you can download the binary file.
For Mac OS you can download the dmg file and run it as many other Mac programs.
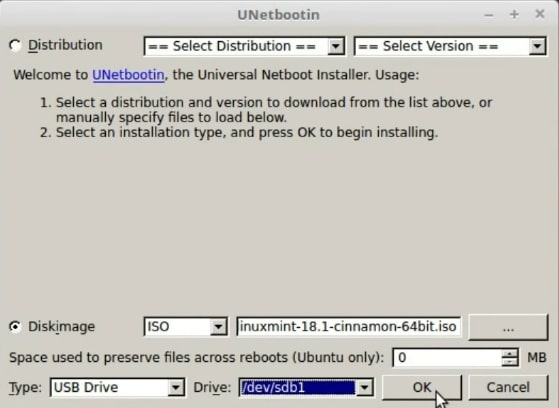
The interface of this program is the same for all platforms. The process here is similar to Universal USB installer that I show before. You select the option “Disk Image”, search for the downloaded Linux Mint image. In the Type, select USB. The same precautions apply here. Be careful that you do not select any Hard Disk. Be sure you selected the UBS flash drive in the Drive option. And click OK. .
Now, you have to wait until the process is finished and make sure there were no errors.
Testing the bootable USB flash drive
So, when a bootable USB is created, we need to test it. Keep your USB flash drive in the USB port and reboot the computer.
During the fist second of the boot process, you should see some message which tells you to press a certain key to launch the boot menu. You can see it is F11 on my system.

For you, it can be any other key. Usually, Esc, Del, F2 or F12. Press that key and when you see a boot menu like this.
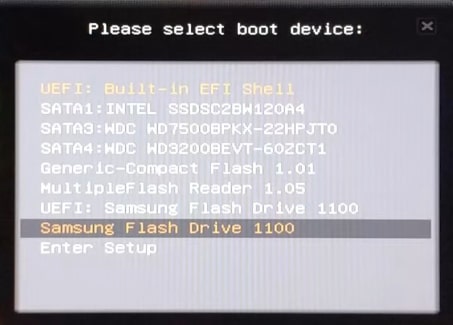
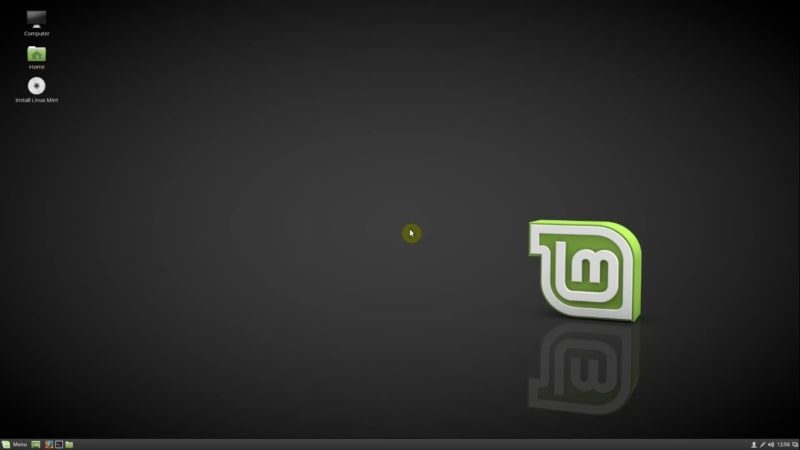
Now, select your flash drive. I select Samsung flash drive in my case. If everything is fine, you should boot into Linux Mint. This is how the Linux Mint live session looks.
In case, it doesn’t work, there are two possible reasons.
First, you created a bootable UBS drive incorrectly. Go back and make sure you download a full Linux Mint ISO file and that you write the ISO to the UBS drive without errors.
Second, you may have some restriction settings in your BIOS. You need to look at the BIOS settings.
4. BIOS settings
There are two things that you may cause problems for your Linux installation. The first one is the Secure Boot. The second one is the UEFI mode. I recommend disabling both.
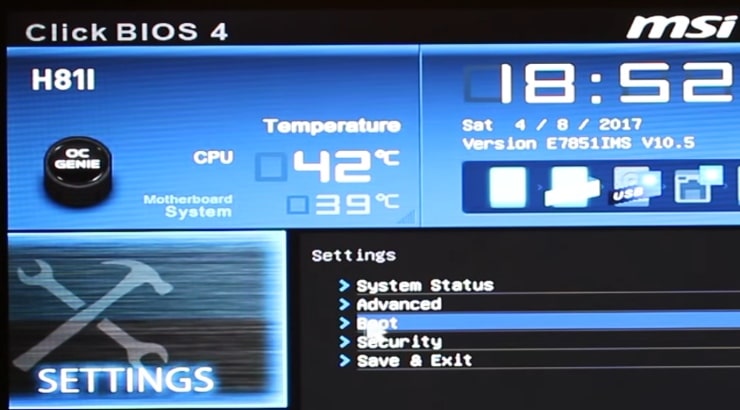
To do that, you need to go to your BIOS settings. Reboot your machine and during the first second of the booting you should see a screen like this.

And it should say which key to press in order to enter the BIOS settings. Often it os F2, but in my case it is the DEL key.
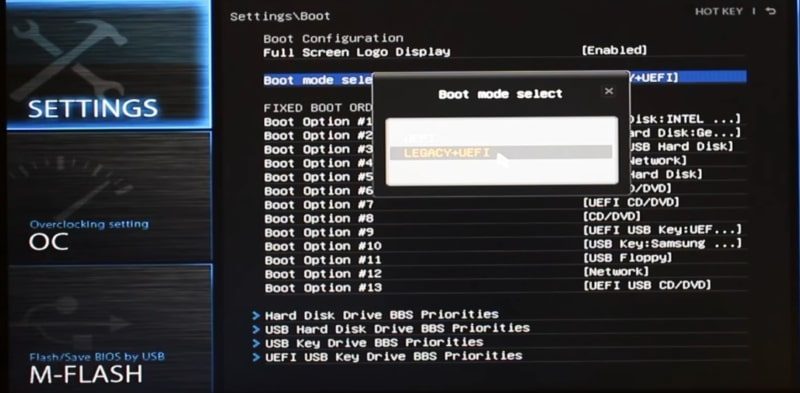
In the settings, you need to find the Boot options and there find Secure Boot and UEFI.
I do not have the Secure Boot option on my computer. But I have UEFI, and I can choose between UEFI and UEFI+Legacy. I enabled the option UEFI+Legacy.
If you cannot disable the UEFI mode, do not worry. Linux can be installed with the UEFI mode. If you have Secure Boot, you need to disable it. The menu will look similar to this:
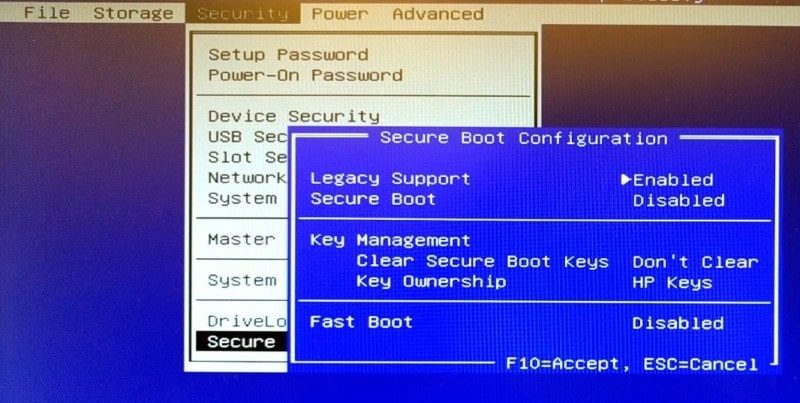
So, after these actions, you should have no problems booting to the Linux Mint Live session and continue with the Linux Mint installation guide.
5. Back up your data
The next step is back up your data. I would say it is the most important step of this Linux Mint installation guide, because if you do it wrong or you skip it, you will lose all your data.
NOTE: I am not responsible for any of your data loss if my tutorial won’t work for you. I just show you the ways to do it, but it is you who has to do the work and take all responsibility. So, do not blame me if you loss your data.
So, there are various ways to do backups. It is getting more and more popular to use cloud backup. So, if you use any of online backup services, then backup all your data before the installation process. Next check with the provider of your cloud service if it will be possible to download the data to the Linux system.
I usually back up all my data using external USB drives. I think it is the cheapest and quite reliable way to back up the data. For example, you can buy a 4TB drive for less than 100$. So, in this Linux Mint Installation guide, I also will show you only how to back up your data using an external USB drive.
So, I will show how to back up your data using Windows or Linux.
Backup your data in Windows
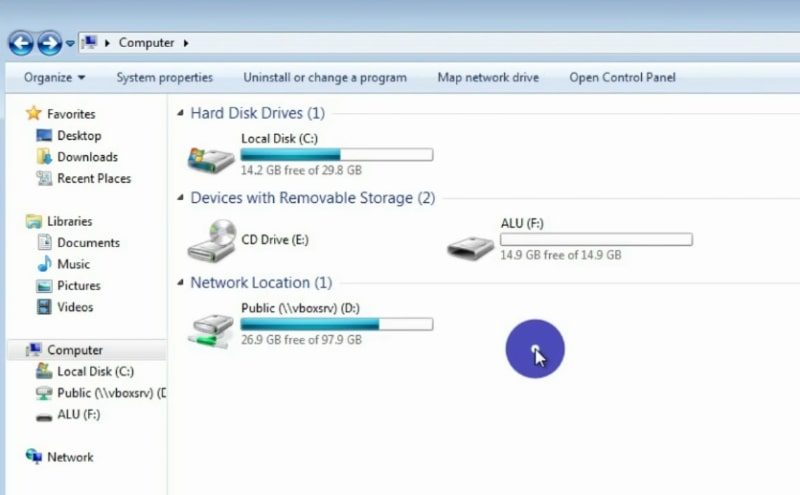
First, you can back up all your data from within Windows. I think the easiest way to back up the data from windows will be by copying all your files to an external USB drive. If you have only one disc on your Windows, it is probably the Disk C.
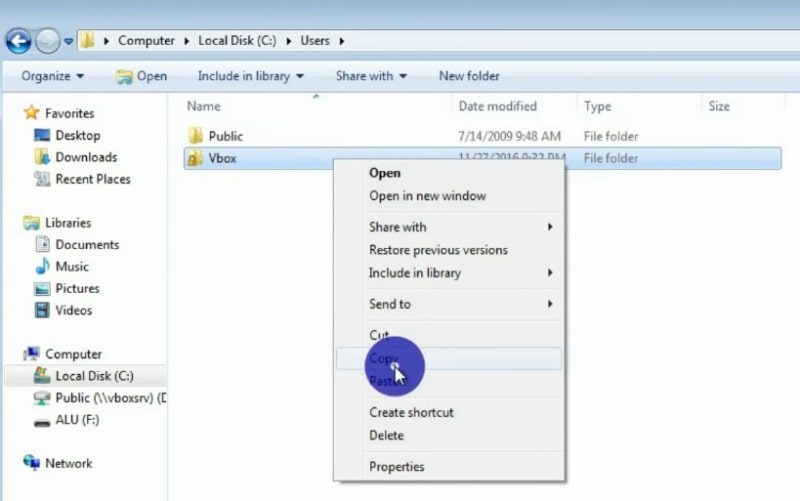
Next, double click on the local disk and go to folder Users and copy the folder with your user name.
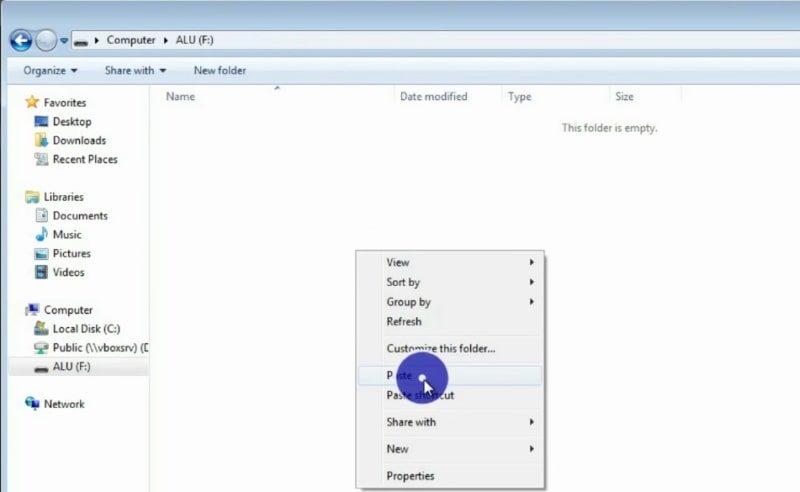
Next, you have to paste it into the USB drive.
It is possible that you created folders outside of this user folder, so make sure you copy those folders too. If you have more than one disk, copy all the data from those disks too. For example, many often people also have disk D.
I know that this is not an ideal way to backup the data, but I think it is the easiest to understand for the majority users. You can also use some specific programs to do the backup.
Backup your data in Linux
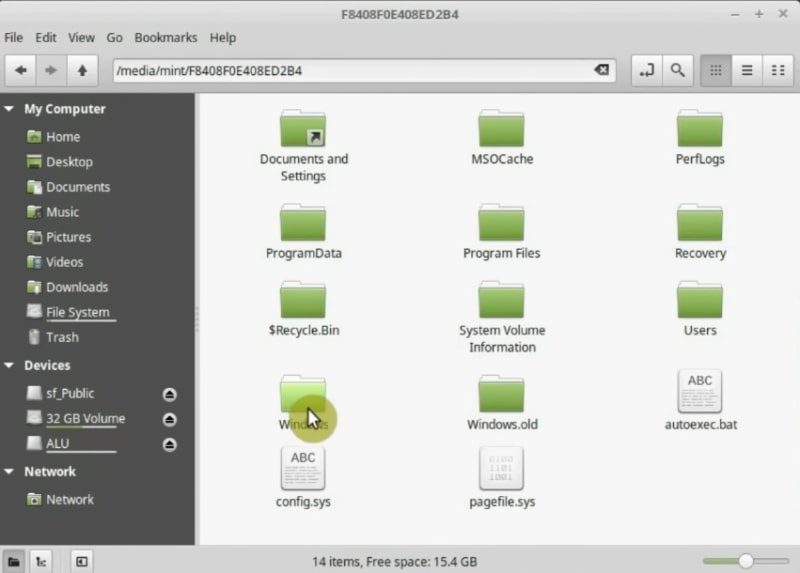
The second option is to back up your data using Linux. When you are in Linux Mint Live session, open the file manager. On the left panel, find your windows hard drive. Click on it, this will mount it to the system.
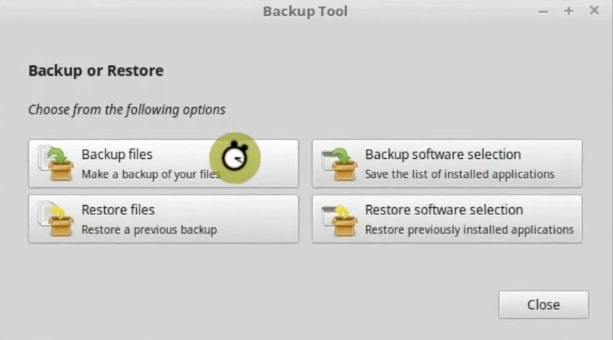
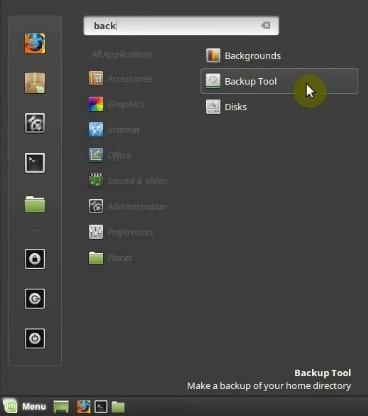
Now, open the backup tool from the main menu. Once the program has been started click on the Backup Files option.
It is now necessary to indicate what will be backed up and where.
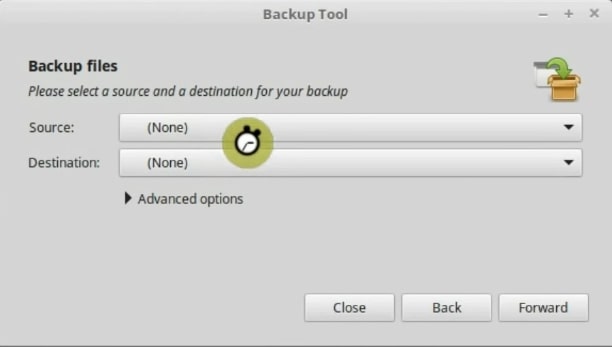
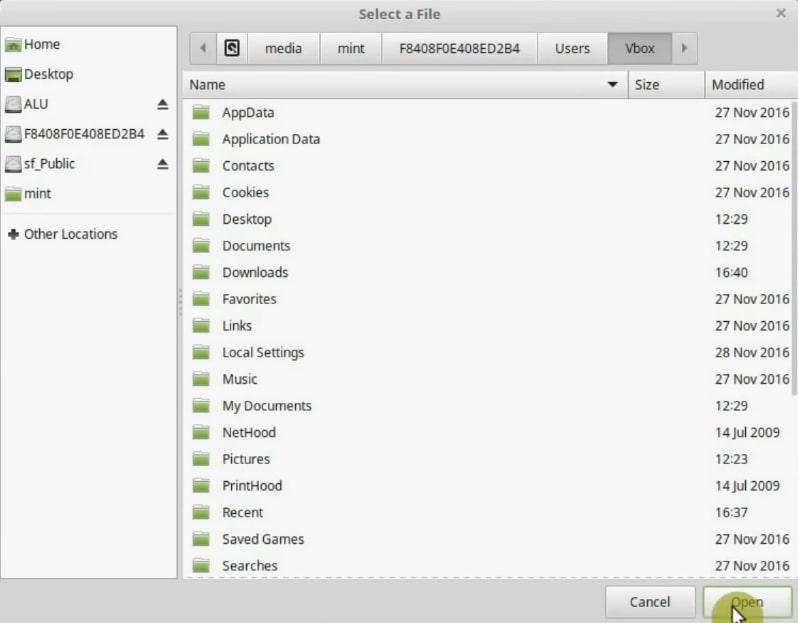
First, in the source option, select the folder you want to back up. In this case, click on Other and go to your Windows Hard Drive, then Users, and select the folder with your username. Vbox in my case.
Again, if you have several users, you can back up the whole users folder.
In the destination select the USB hard drive where you want to back up the data. I select “ALU”, which mimics my external hard drive here. So, be careful and check everything several times.
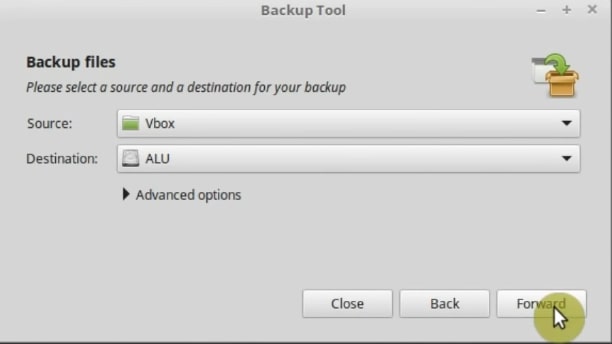
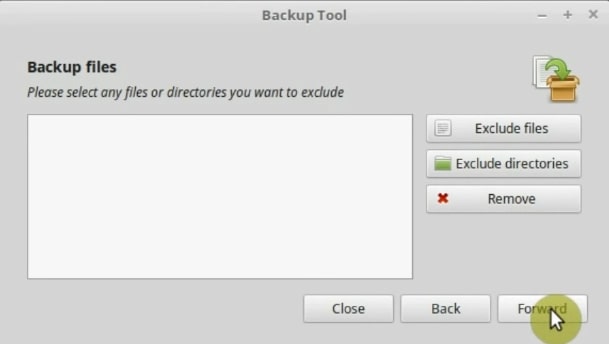
Then click forward. In this screen, you can add files or directories that you want to exclude. Then, click on the Forward button.
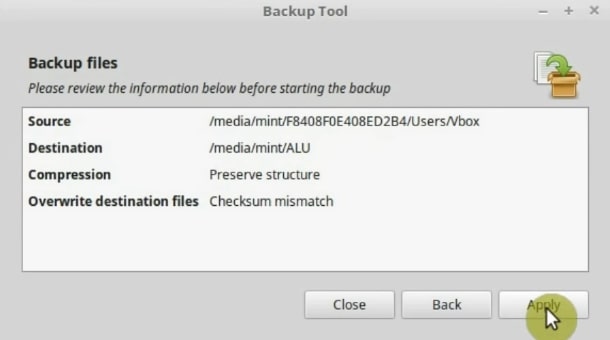
On the next screen, a summary will be displayed. Check again. When you are sure everything is okay, click the Apply button to start to back up.
In the end, if everything went ok, you should get a message like this.
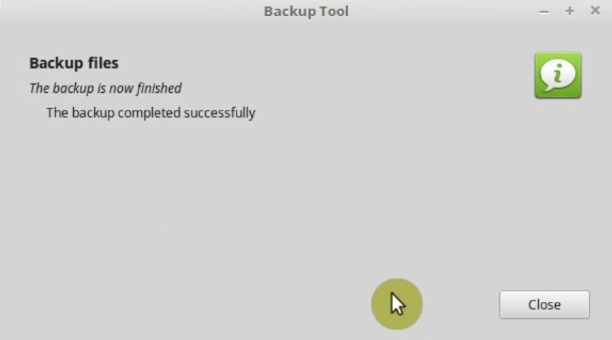
So, the backup is successful. Now, you can install Linux Mint. As I said at the beginning of this step, it is very important to do so to make sure you do not lose any of your data.
So, you can continue with the Linux Mint installation guide.
6. Installation
Now the central moment of this Linux Mint installation guide has arrived. It is time to install Linux Mint.
Boot from the USB drive.
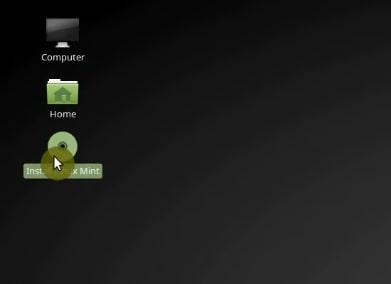
Once you have entered the live session. Double click on the Install Linux Mint icon on the desktop.
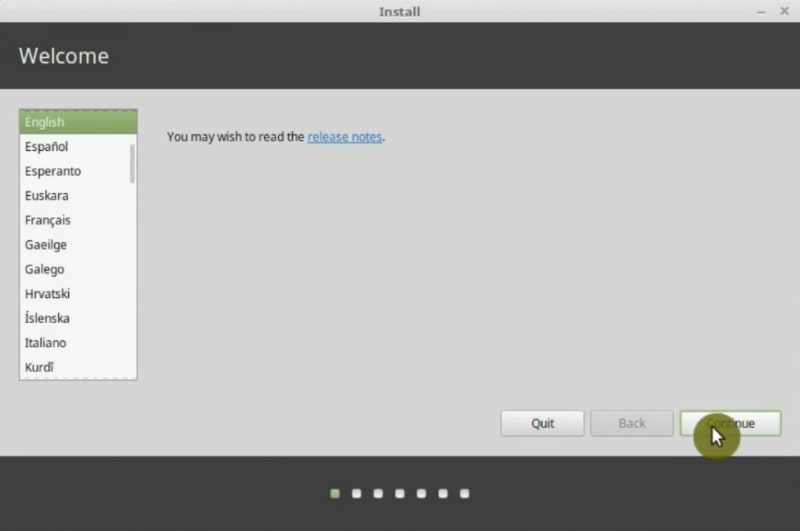
Choose the language
In the first screen is to select the language of the installation. In this section, you are free to choose the language you feel comfortable with. So, I will choose English. Click on the Continue button.
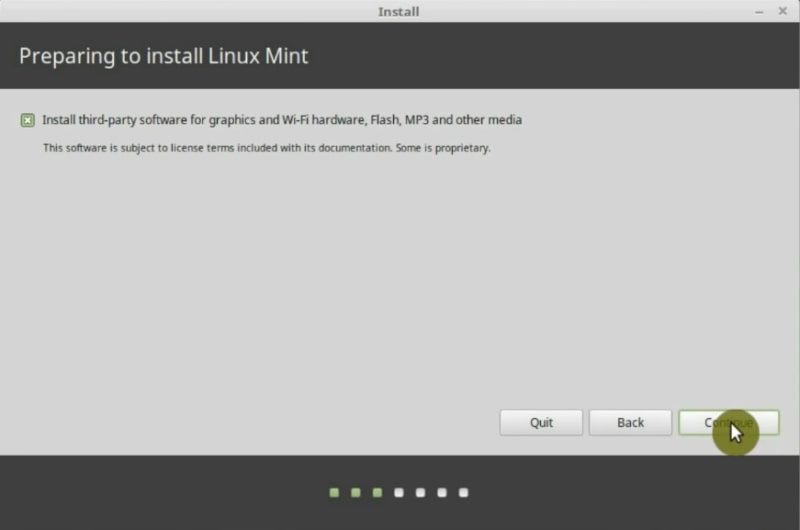
On the next screen, you will be prompted to install some third-party applications. Select to install because you will need these applications. For example, those packages include MP3 codecs needed to listen to music. Please note that for licensing reasons, they cannot be included by default in the installation. Click on Continue.
Three ways to install Linux Mint on your Hard Drive
Next, comes the most important part of this Linux Mint installation guide because it is necessary to decide where to install Linux Mint. Therefore, you will have to define how to partition your hard drive.
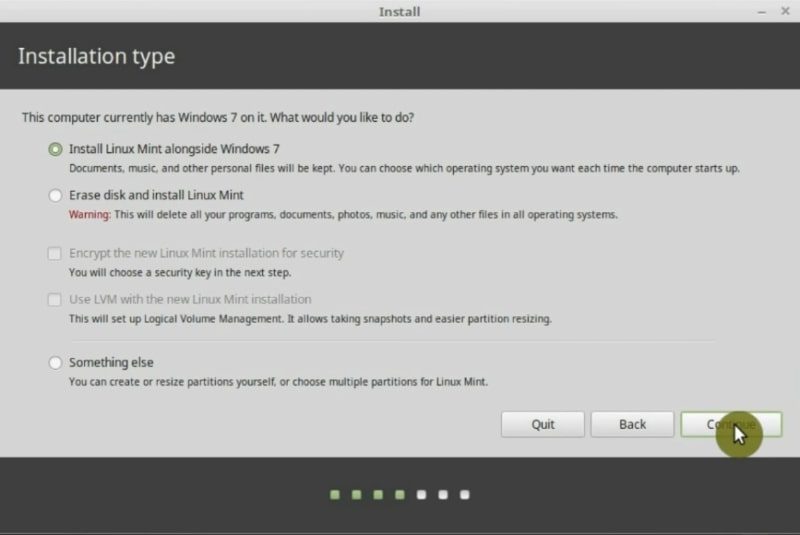
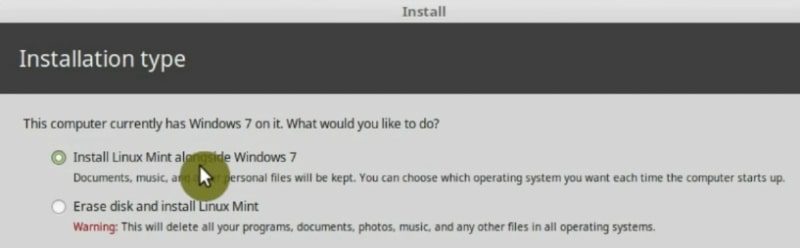
The first option is to install Linux Mint alongside your Windows. You can choose this option if you really need to dual boot Linux and Windows. So, this means that you will have both systems installed. For many people, it is okay to do it, but keep in mind that it is not the best in terms of performance and reliability.
The second option is to Erase the disk and install Linux Mint. This is what I recommend for the new users. The installer will do everything for you.

If you select this option, the installer will do the following: It will create one large partition with your system and a swap partition. The swap partition is required for the case when your system exceeds the amount of available RAM memory. If you install Linux Mint in the UEFI mode, the installer will recognize it and it will create the EFI partition too.
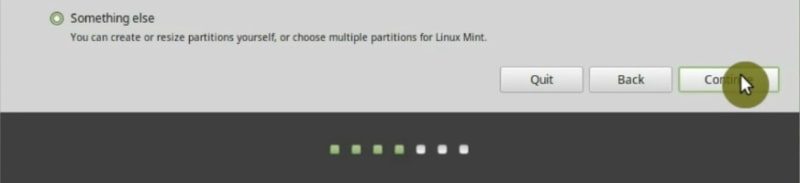
The last option is Something Else. It is also for advanced users, but I still would like to show it in this Linux Mint installation guide. I recommend that you learn to define partitions manually. It will help you to understand a little more about Linux and you will have more control over your hard drive. So, select Something else and click Continue.
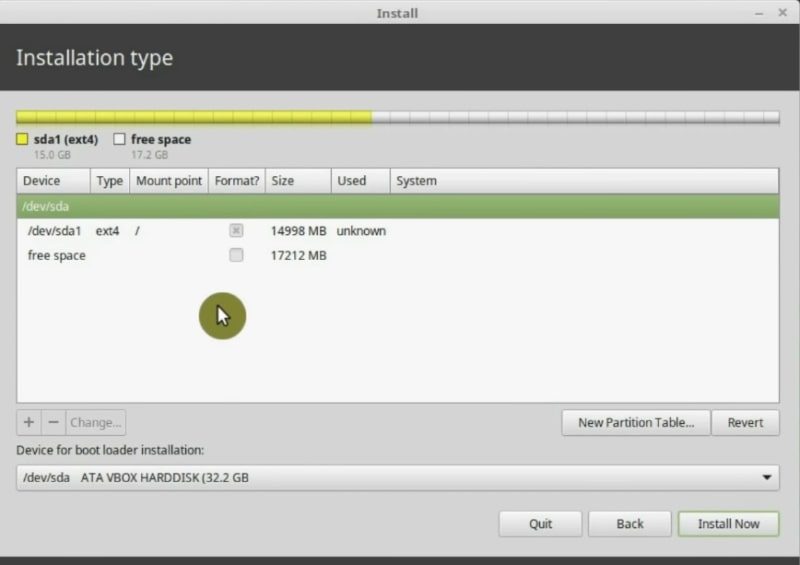
Configure the partitions manually
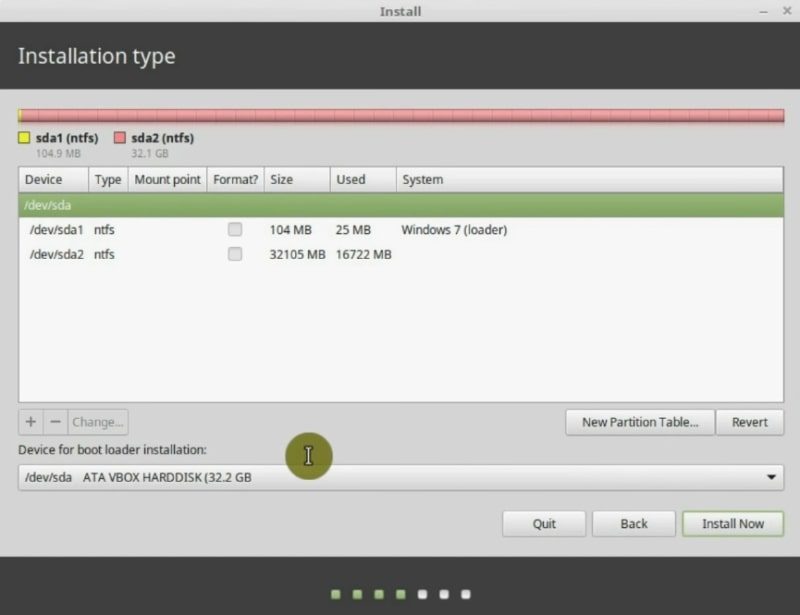
In this screen, you will be able to see my two Windows partitions. As I have backed up all my data, it is safe to be able to remove both partitions. Click on the New Partition Table button.
You will be shown a warning that all your data will be deleted. If you have already backed up your data, then click on Continue.

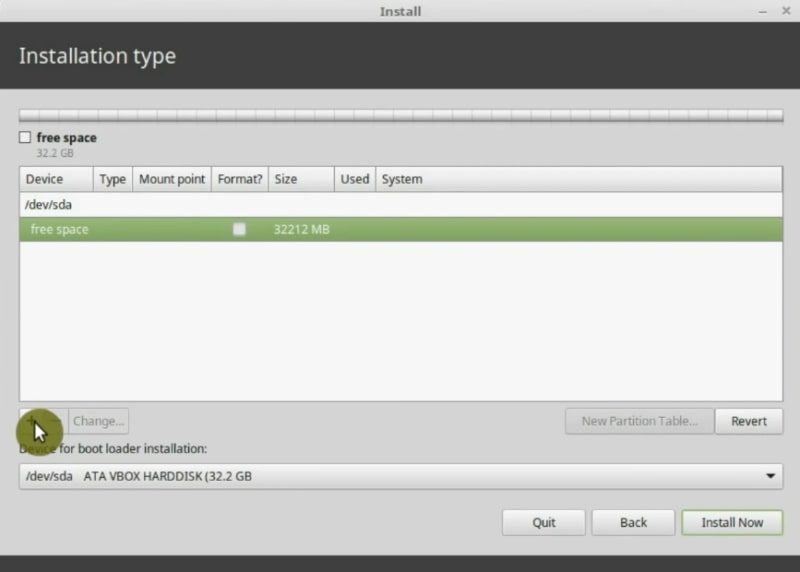
After finishing the process, you will only have free space. It is time to partition. Click on the plus icon.
The system partition
So, the first partition will be for our system. The size depends on what you are going to install. If you use a few programs 15GB should be enough. However, if you install heavy programs such as games, multimedia editing applications, then the more space the better. In this case, I will assign to it 15GB, which is 15000MB.
In the options shown, keep it as primary partition and beginning of the space options. For the file system, there are several options, but the best one is EXT4. It is a reliable file system.
And for the mounting point, select root, which is marked with a slash (/) sign. Basically, it means to install the system in this partition.
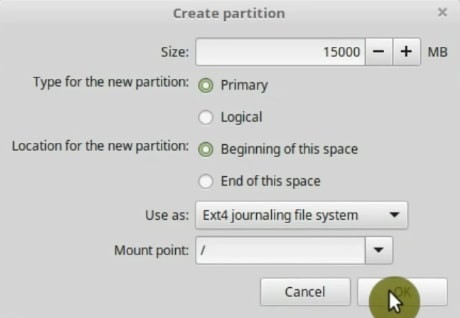
So, click the OK button. It will look like this.
The home partition
Now select the rest of the free space and create another partition. This will be our home partition, where all the user data will be stored. It should be the largest possible partition. Leave the size of your RAM memory reserved as free space. You will use it later in this Linux Mint installation guide.
If you do not know how much RAM you have, go to the menu and search for System Monitor. Next, go to the Resources tab and you will see the size of your RAM memory.
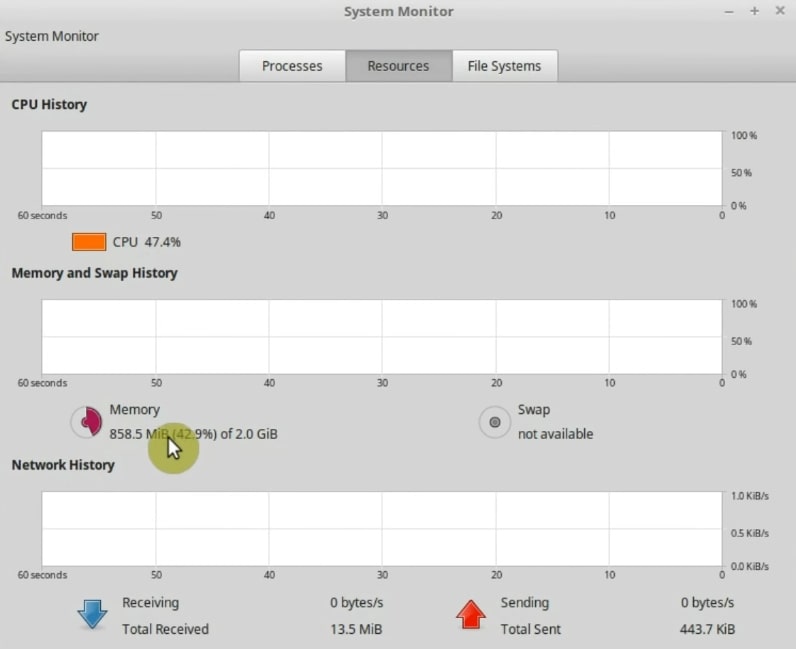
So, it is 2Gb for me.
17Gb of free space minus 2 Gb of RAM gives 15 Gb. So, I allocate 15 Gb for my home. It will be much larger for you because as I have already mentioned, it is my test installation. So, again, make it Primary and Beginning of the space. And for the File System select EXT4. Finally, /home as the mount point.
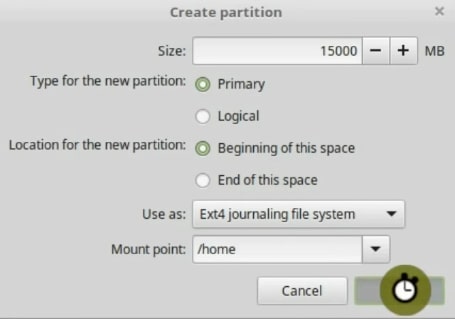
So, click on the OK button. The hard drive will look like this now.

The swap partition
The rest of the space we will assign to swap. I have already mentioned that Swap is used by the system when there is not enough RAM memory.
So, select the free space and create a new partition. Make it primary, and in the file system, select swap area.
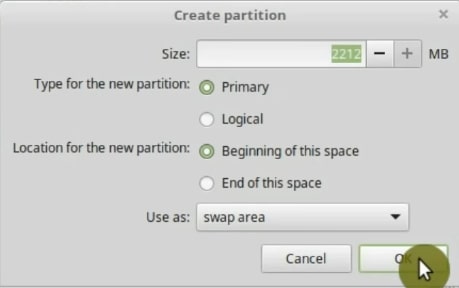
The three partitions root home and swap are now created. Your hard drive will look like this.
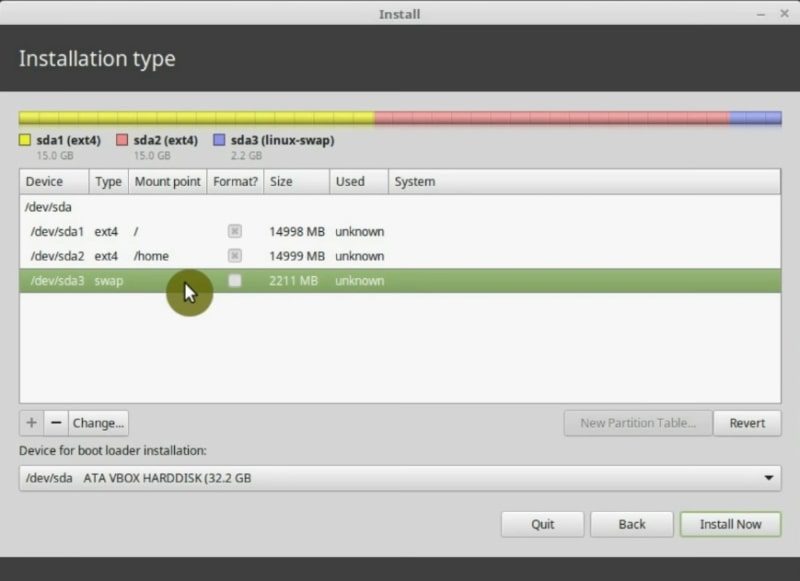
If you were not able to disable UEFI in your BIOS, you better do not do manual partition and chose the option to partition and install Linux Mint automatically. This Linux Mint Installation Guide is aimed for beginners, and I recommend beginners to install Linux in UEFI mode only automatically.
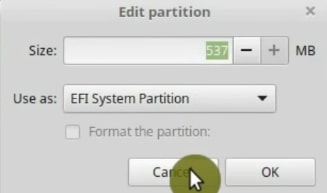
However, if you still want to do it manually, this is how it should look. You simply need to create an additional partition and mark it with the type EFI.
Finally, check that your boot loader will be installed on the same disk as your system. We have sda partition table and the boot loader should be installed on sda too.
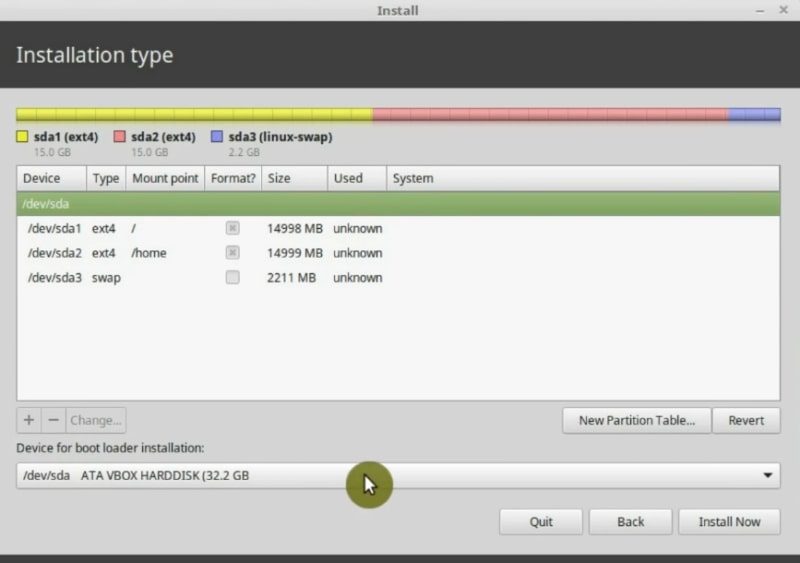
Start the installation
Once you have finished defining the partitions, it is time to start the installation. Click on Install Now button.
On this screen, the installer will show you a summary of the changes it will make to the hard drive. It is the last chance to check if everything is as you want.
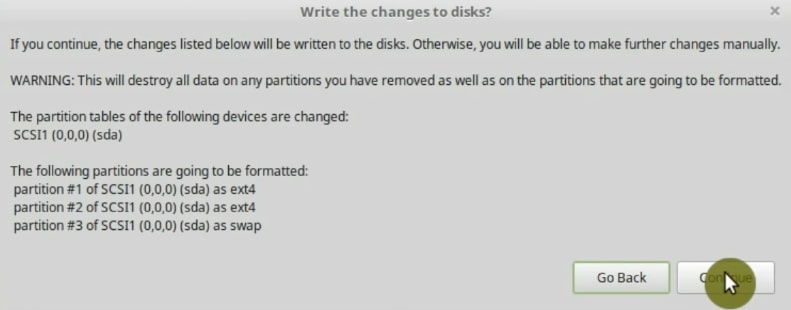
Click on Continue. Now, the installation process has started. While the system is installing, you can do a few more settings.
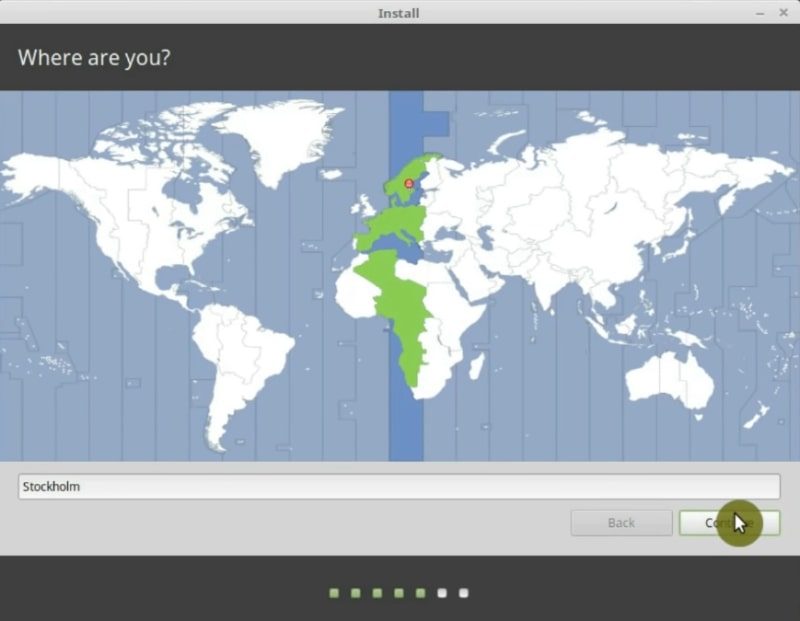
First, select the timezone. So, you have to choose the area where you live.
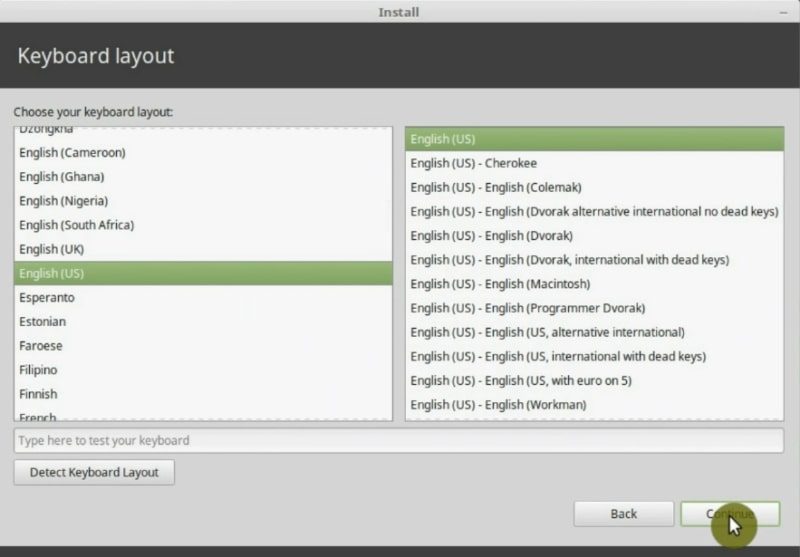
Second, you can change your keyboard layout if it is not a standard keyboard. I keep it English US.
Configure your user
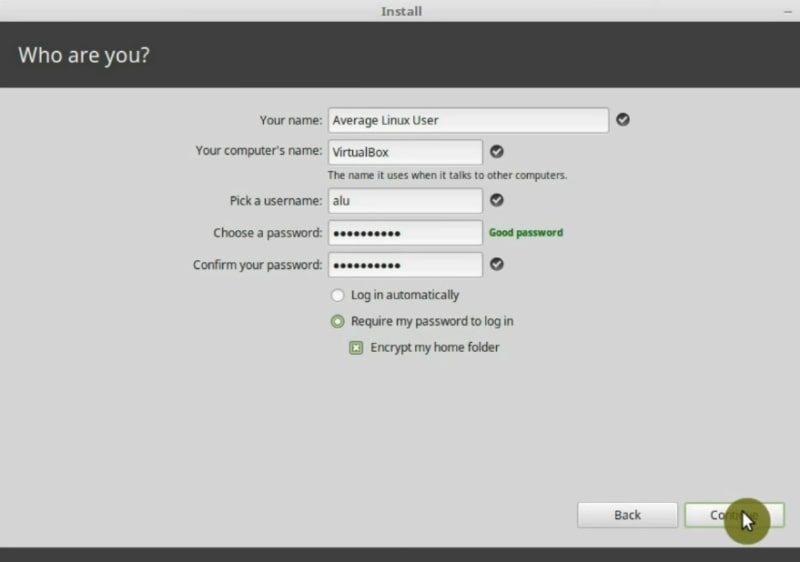
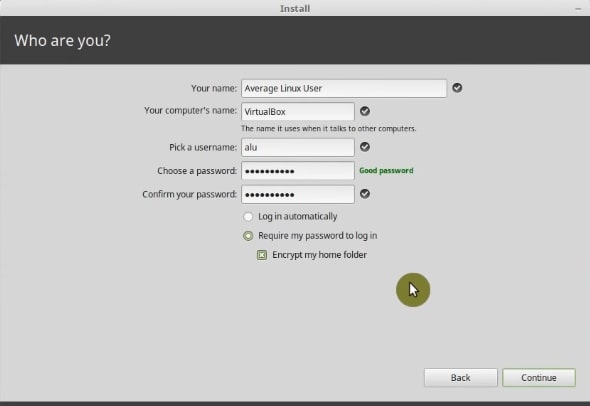
The final step is to create a new user for Linux Mint. First, type your name. Next, the computer name, for example, Virtualbox. Then, pick a username. It is better if it is short. Next, choose a password. The installer will show a message if the password it is good. You can also select automatic login which is a good idea for the home computer.
Finally, you can enable the Encrypt my home folder option. I recommend this option if you install Linux Mint on a Laptop or if you will have sensitive data on your computer. For this Linux Mint installation guide, I will select to encrypt my home.
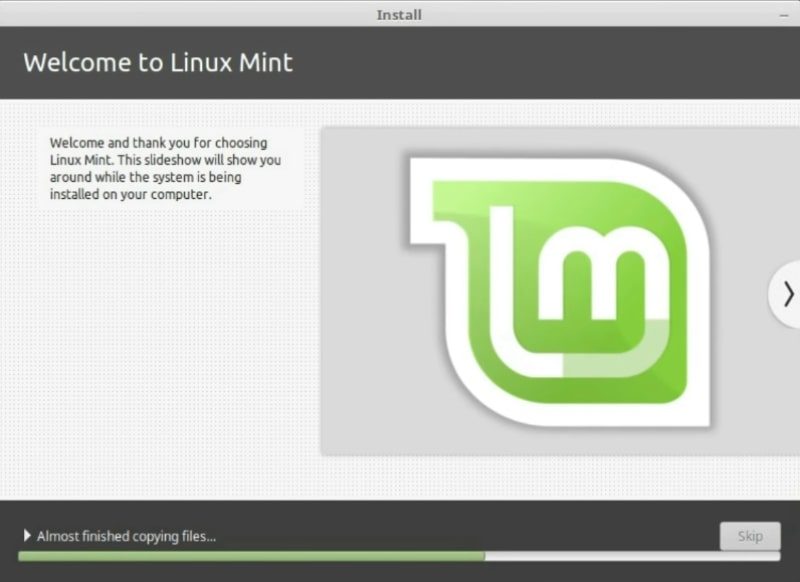
Click Continue. Now, you need to wait sometime and the system will be installed.
If errors occur
Of course, not everything is perfect, it is possible that during the installation process some kind of error can occur. For example, If you do the installation in the UEFI, this error may occur during the installation process:
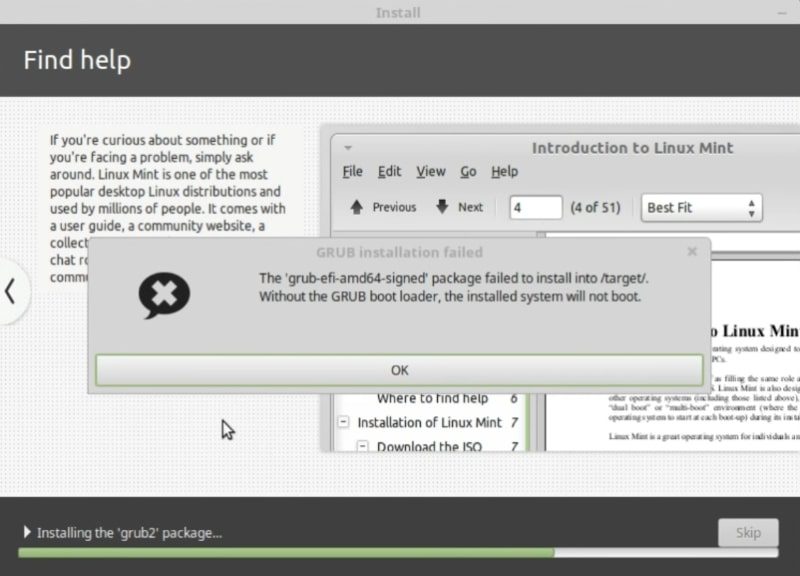
It says that GRUB boot loader installation failed. Do not worry. This problem was mentioned in the release notes. That is why I recommend to always check the release notes.
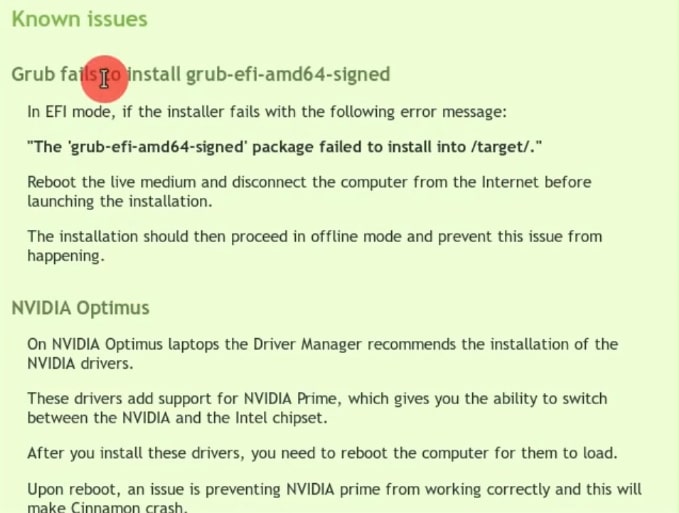
To fix it, disconnect the internet. Next, reboot and start the installation from the beginning but this time without the internet connection.
If the whole process is completed without errors, you will see a message like this.

Restart and remove your bootable USB
So, restart your system. You should get a message like this.
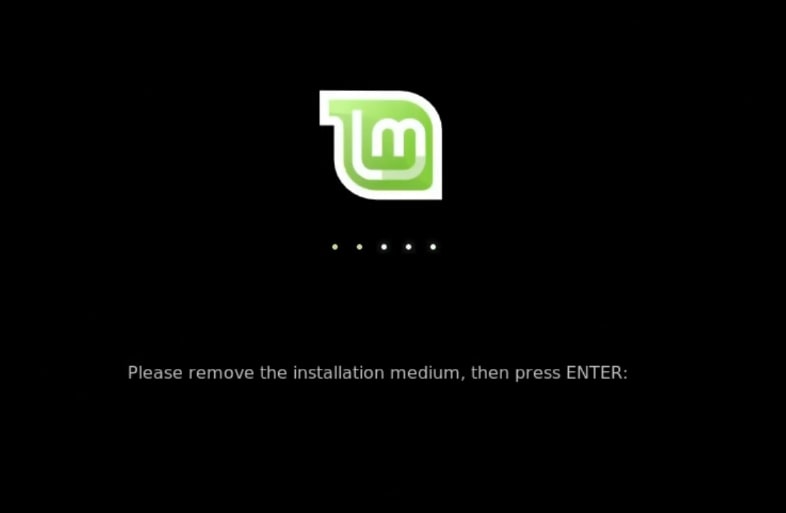
So, remove your USB drive and press enter. And your computer will start to boot.
NOTE: In a very unlikely event, your system may get stuck during the shutdown, and you will not get the message to remove your installation media. Do not worry, just remove the USB drive and shutdown your system by pressing the button on your computer. Then start the system again.
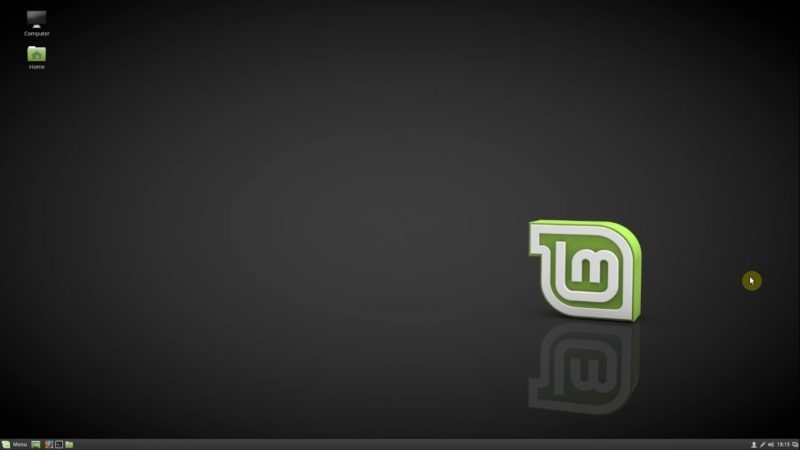
I hope you will boot into your newly installed Linux Mint system after the steps of this Linux Mint installation guide. Now, the system is ready for use.
But to make this Linux Mint installation guide an ultimate guide, I would like to show you a few more things to improve the performance and the user experience.
7. After installations settings
Linux Mint is a Linux distribution that is characterized by being very focused for the novice. In addition, it comes so that once installed, it will be used. However, there are a few things you can do to improve the user experience.
So, in this section of the Linux Mint installation guide, I am going to show you some tricks and settings.
How to set up the update manager?
Linux Mint has an update manager that is perhaps the best of all Linux. So, you can open the Update Manager by clicking on the icon next to the time.

The first time you open it, it gives you a suggestion about the update policy. I think Linux Mint team is too cautious, and they little exaggerate the danger of the updates.
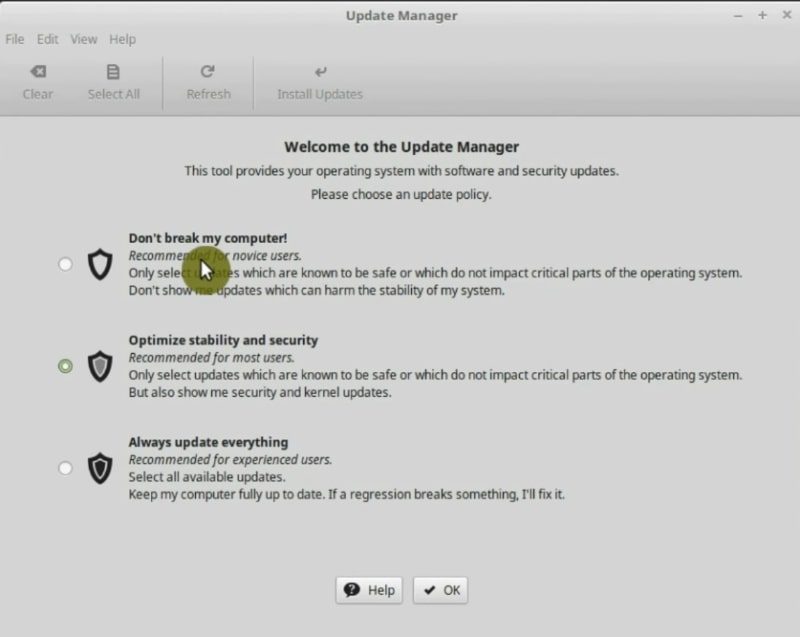
You can choose any of the three options. However, I recommend you to use Always Update everything option. This will keep all the packages on your system updated and thus secure. Of course, you can select Do not break my computer option, but it is too cautious.
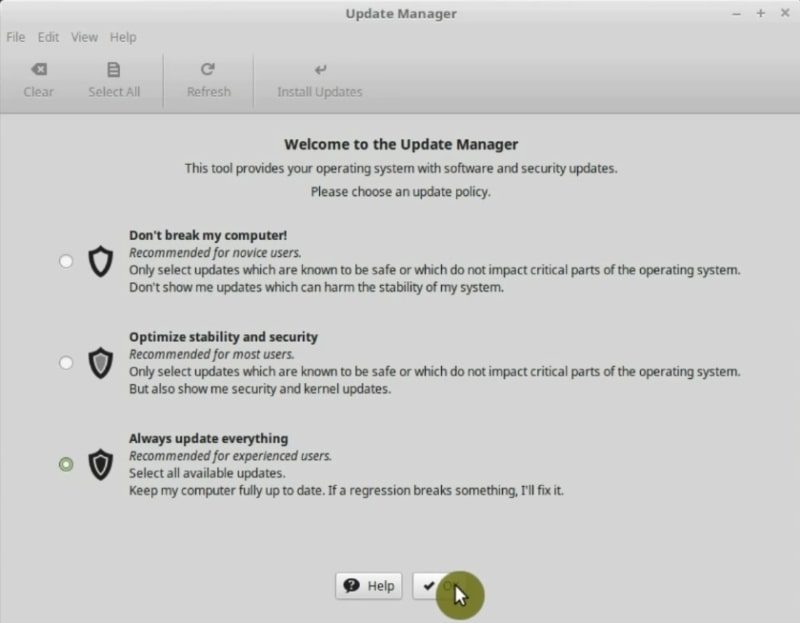
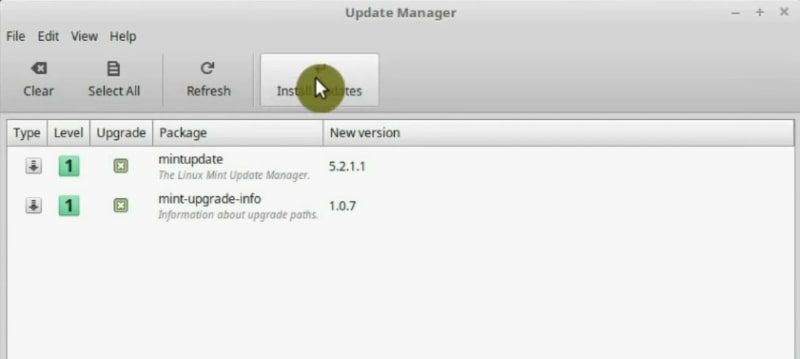
After you clicked OK, the Update Manager will show some updates.
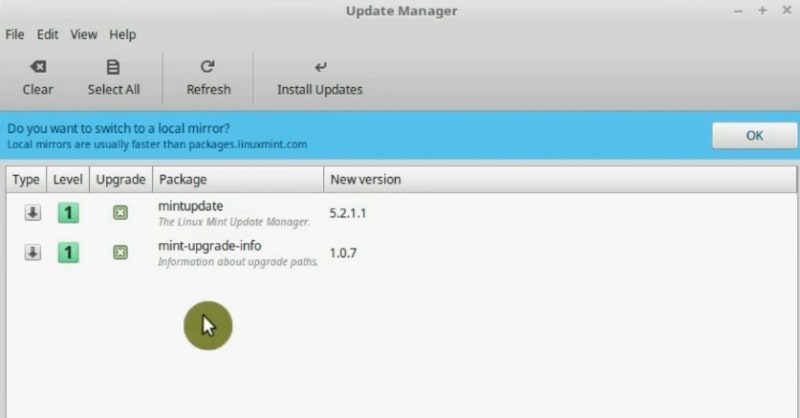
You can start to download them, but we are suggested to switch local mirrors. Let us do it. It will make the download speed faster. Click on the Ok button. After you entered your password, you have to select the Main Mirror.
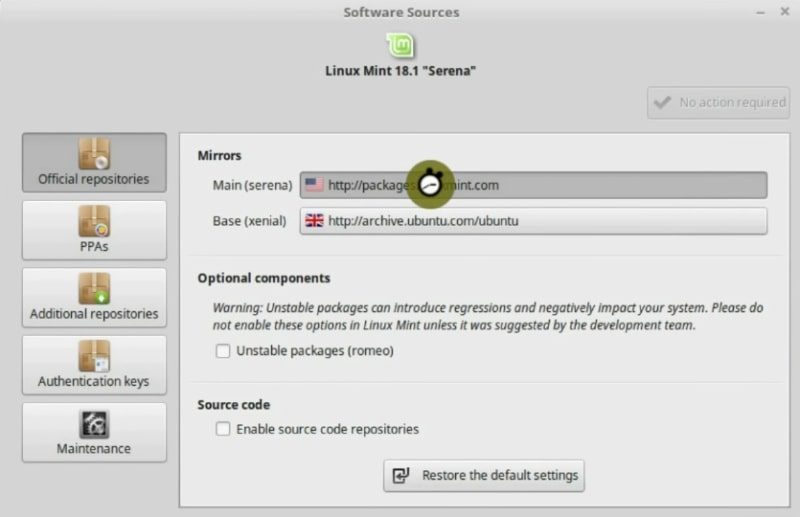
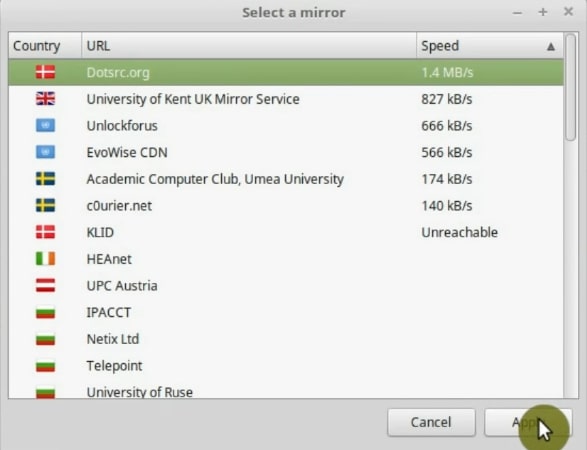
Just wait for a few seconds until the servers are ranked. Then select the fastest mirror which is on the top. Click on Apply.
You should do the same for the base packages.
By performing these steps, you have changed the mirrors and you will be asked to update the APT cache. Do that!
After you updated the cache, you can start to download all the packages available for update.
When the update is finished, many other updates appear. Cataloged with a range of numbers from 1 to 5 that mean how risky the update is.
On the other hand, if you scroll down you will see some updates with the rank 5. These are the key part of the system. It is the kernel and related packages. You would not see kernel updates if you selected “Do not break my computer” and they would not be selected if you chose Optimal stability and security in the settings.
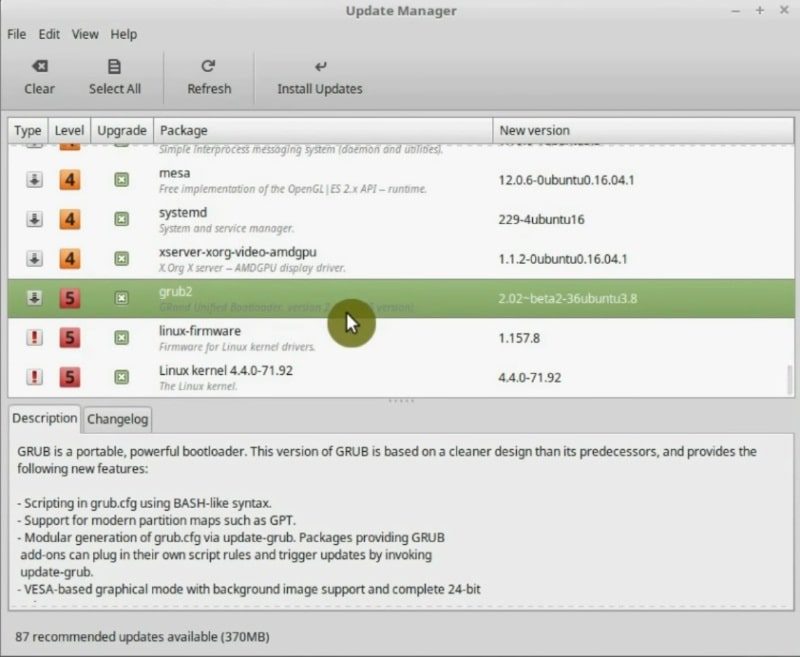
So, let us install these updates. Select all the packages and click on Install Updates.
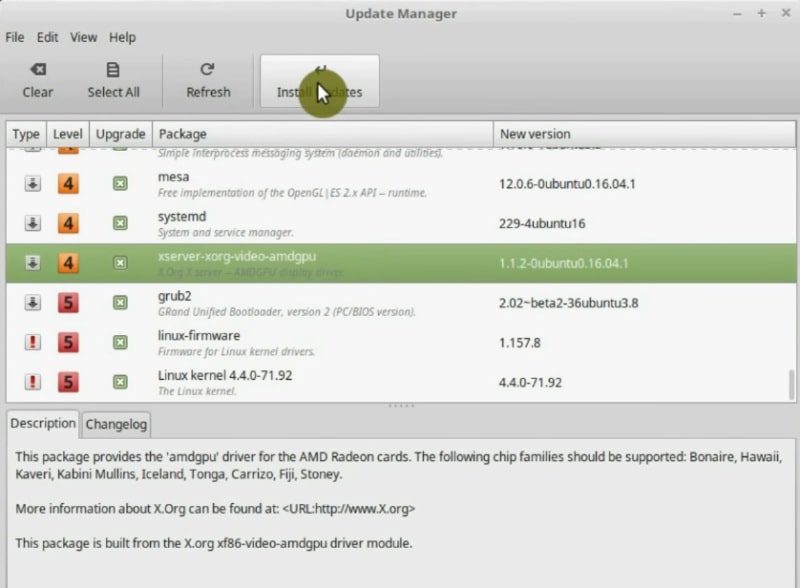
If during the update process you get a message like this, which asks you if you want to keep old configuration file or replace it with a new one. Always select replace, unless you really know what you are doing.
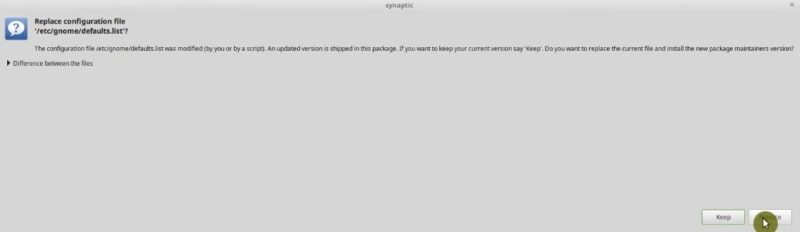
Once all the packages are installed, you will have an updated and secure system. Perform this process periodically to make sure of it.
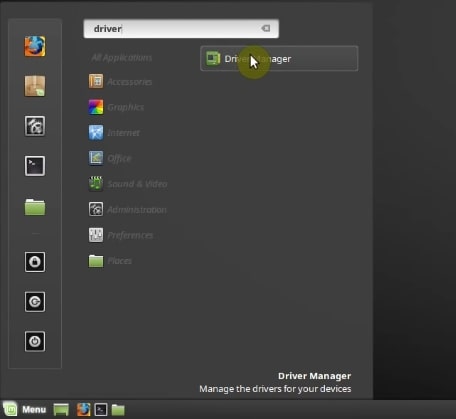
How to install drivers?
In order for your computer to work properly, it is necessary to install all the drivers. To do this, in the main menu search for Driver Manager and open it.
It takes some time to update the cache for the first time. Then it should present you any available drivers.
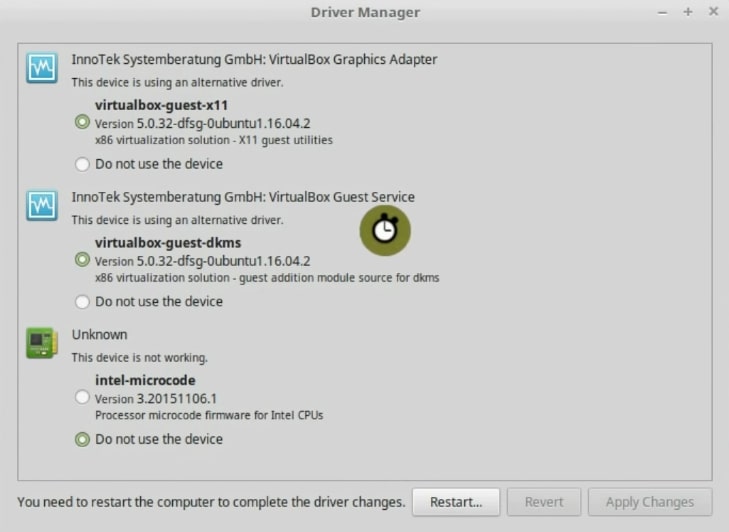
This Linux Mint installation guide has been running on Virtualbox, so, I have some virtualbox drivers installed already. But I still have one driver available. It is a firmware for the Intel process. This firmware allows your Linux Mint system to update the firmware of the processor. It should improve the performance of the processor. I will install it.
As I said, all available drivers will be displayed in that window. For example, if you have a graphics card, you will be shown all available options. I always recommend you to use the proprietary drivers because they generally work better.
After you install all the drivers you need, you have to restart the system and the drivers should work.
How to enable the Firewall
The next step is to configure the Firewall. A Firewall is a program that controls computer access to the network. In other words, it controls the connections in and out of your computer. Linux Mint system is secure enough, but you can harden it even further if you enable the firewall.
Go to the main menu and search for Firewall, then, open it.
It is a very simple program. So, you just need to enable it. As you can see, It is very user-friendly.
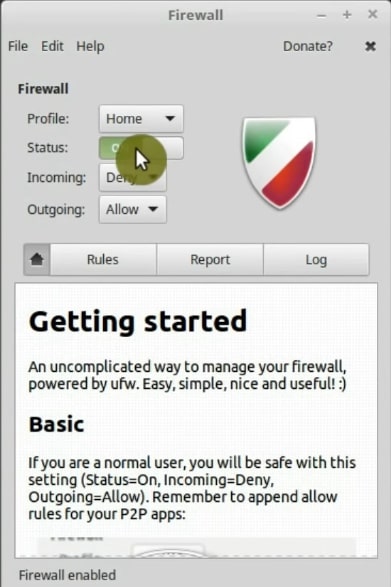
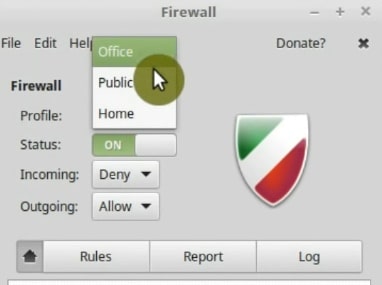
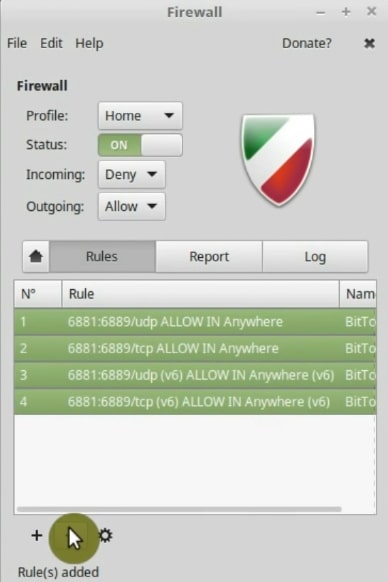
The firewall application has three profiles: Public, Home and Office. They have little different layers of protection. I usually use the Home profile.
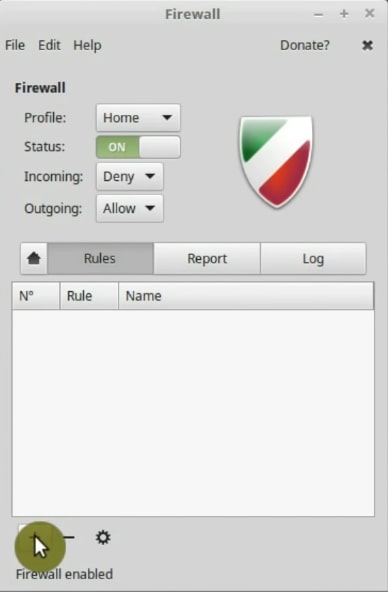
You may want to limit or allow access to certain applications. To do this, go to the Rules tab and click the + button to set a new rule.
If you are not an advanced user, you can use some preconfigured options for various applications. This avoids having to do it manually. For example, set a rule for BitTorrent. Just search for it on the Application list. Next, click on the Add button.
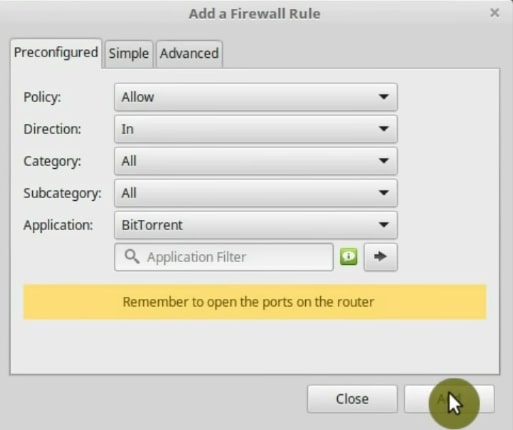
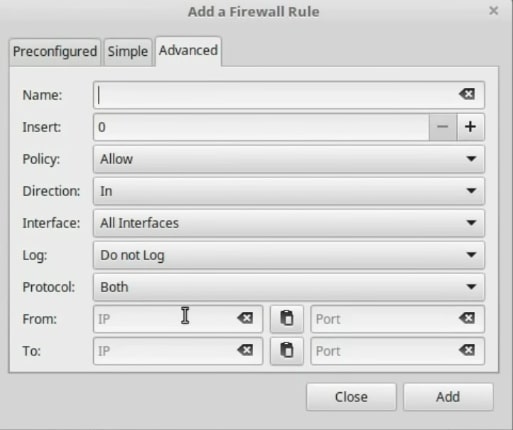
If you are a little more advanced, you can enable specific ports in the Simple tab. Even if you are a really advanced user and have solid knowledge in the management of the firewall, there is a tab called Advanced where you will have access to more complex configurations.
Finally, you can remove some rules that you no longer want. Select the ones you want to delete and click on the - icon.
It is a good idea to be cautious and enable the firewall to further increase the security of your computer.
How to retrieve the encryption passphrase
This step is only necessary if during the installation you chose the encrypt the home directory option.
In this Linux Mint installation guide I chose it. So, it is wise to retrieve the encryption passphrase. If your system breaks, you will need to use the passphrase to decrypt the data. So, you need to do it.
Now, the decryption happens when you log in and enter your user password. But your user password and the encryption passphrase are not the same.
So, to get the passphrase, open the terminal and type:
ecryptfs-unwrap-passphrase
After you entered your password, you will get the sequence of characters and number like this.
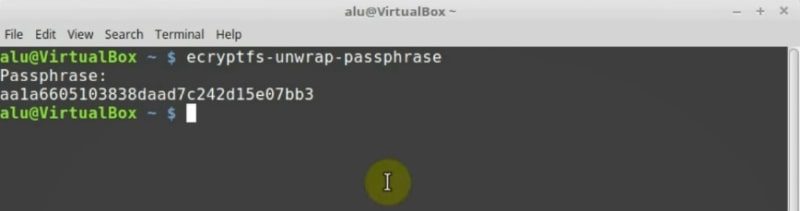
NOTE: Copy or write it down, and keep in a safe place where only you can access it. Obviously, do not store in on the same computer.
If something happens to your system and you cannot log in, you still will be able to access your data with this passphrase.
How to adjust the use of swap
This option is not mandatory to do, but it makes the performance of your system better so I recommend you to do it.
First, let us look at the swappiness configuration. So, open the terminal and type:
cat /proc/syst/vm/swappiness
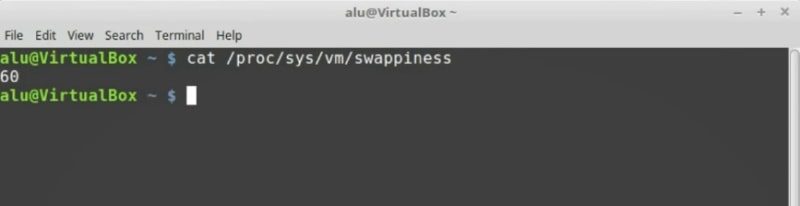
You will see the value of 60. This means that when the system uses more than 60% of your RAM memory, it will start writing the files to the swap partition of your hard drive.
The problem here is that RAM is always faster than a Hard Drive. So, when a system starts writing to a hard drive, it becomes slower. Fortunately, we can force the system to use more RAM and write to the disk only when the RAM gest almost full.
To do this, you need to edit a configuration file. Type on the terminal:
sudo nano /etc/sysctl.conf
Scroll down the file, and in the end add:
vm.swappiness = 10
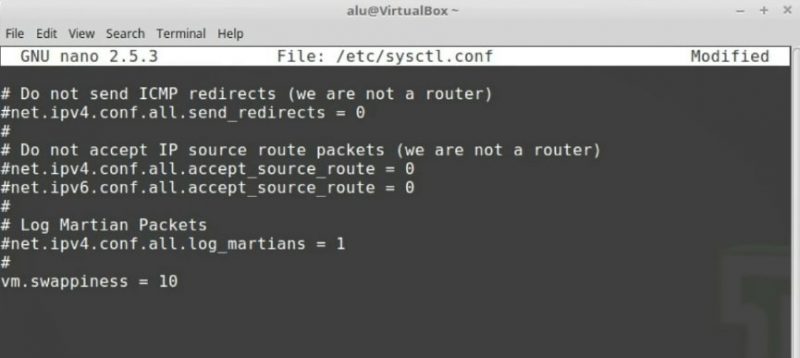
Now, press CTRL + O to save the file and CTRL + X to exit.
Then, reboot your system. When the system has started, it opens the terminal again and checks the value change.
cat /proc/syst/vm/swappiness
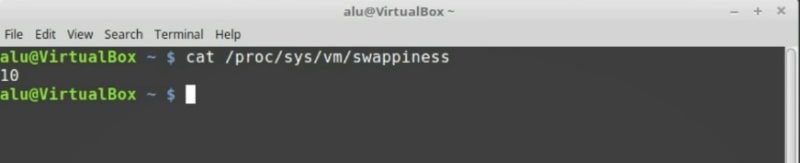
It should show 10 instead of 60. Now your system will be faster than before. Especially when you are using a lot of applications
There are even more things you can do after installing Linux Mint. Check them out HERE!
Now, you can do the last step of the Linux Mint installation guide.
8. Restore the backup data
The last step of this Linux Mint Installation guide is restore the backup data. One way to do that is, copy all files from the external hard drive to your home directory.
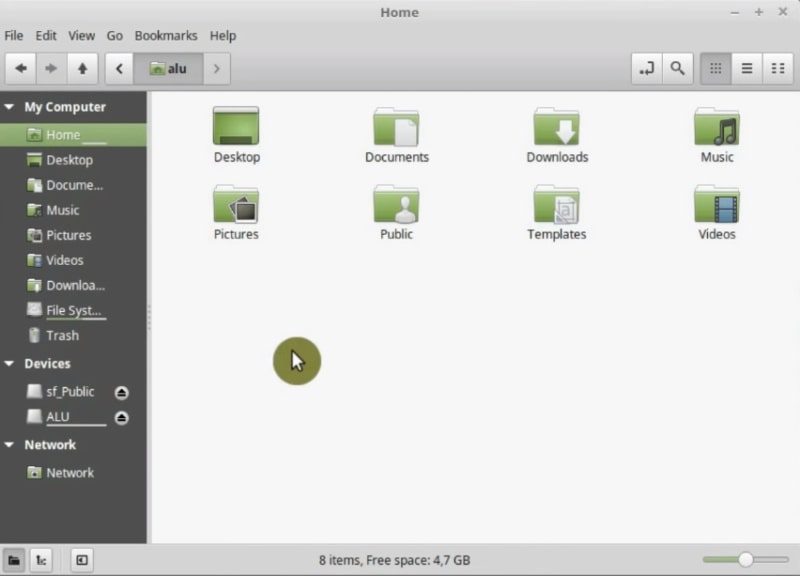
As you can see, there are several folders to classify your files, for example, Documents, Music, Pictures and Downloads. You can use the occasion to sort your files. Obviously, you can create as many folders as you need and restore your data there.
If you do not like this way of restoring your data, you can also do it from the Backup tool. First, open it from the main menu.
The tool is quite simple to use. It is aimed at newbies. To restore the backup, click on the Restore Files option.
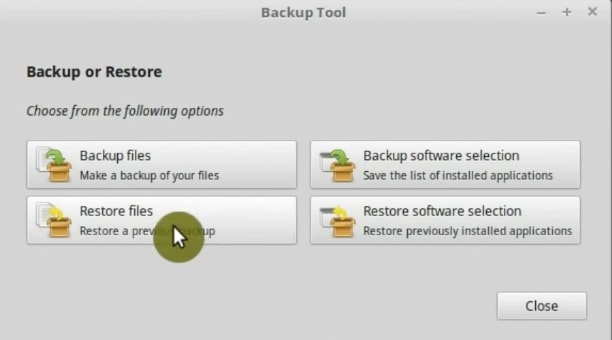
On the next screen, the options for starting the restoration will be available.
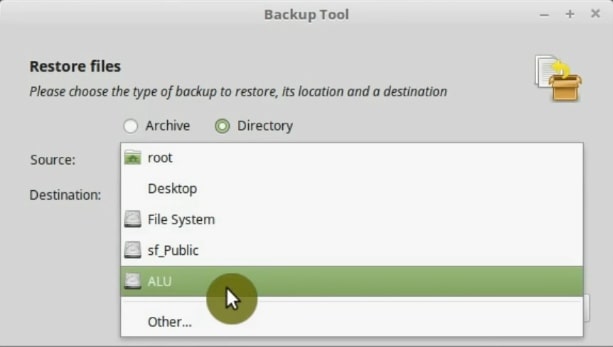
First, chose the Directory option, because we made backup without compression. Then, in the Source option, you select your external Hard drive with the backup data.
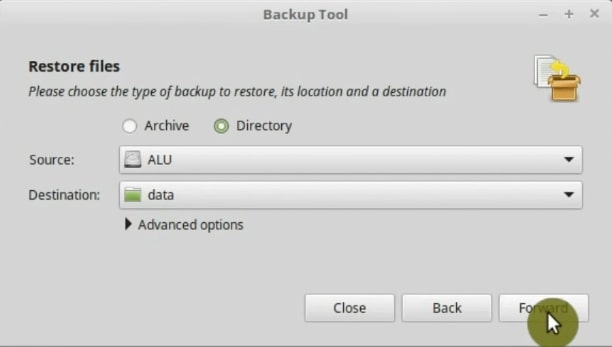
In the Destination folder, you have to select the folder where the data will be restored. You can select the home folder, but I suggest creating a new folder and restore everything there. However, you are free to choose the location you want. At the end, when everything is defined, you can click the forward button.
The following screen will show you the summary of what is to be done. Verify that everything is OK and click Apply.

In the end, your data should be in the data folder on your newly installed Linux Mint system
Conclusion
So, this is the end of this Linux Mint Installation guide. It I hope it has helped you and you enjoy Linux Mint. You should have a functional and reliable Linux Mint system by now. And many users do not need more. However, it is Linux, and there are many things you can improve and customize. For example, you can change the Linux Mint theme. If you want the full power from your Linux Mint, you also check these 15 things to do after installing Linux Mint.
If there is anything you would add to this Linux Mint installation guide, please, comments below.
Comments
Hary
Very good tutorial, thanks.
John Locker
Might this guide be available in printed form? Or can a print button be inserted? Thx.
Average Linux User
Go to the menu of your internet browser (e.g. Firefox, Chrome) and there is a print menu. Use it to print this page.
Pedro
beautiful, thank you so much
Ray
THANK YOU, THANK YOU!!!
I THINK THAT….I OWE YOU MONEY. ;-)
A Newbie
Thanks for your excellent information. I have one question- I have a UEFI only machine and just after your instructions for setting up the swap partition, you say that these manual partitioning instructions are not for this kind of system, but if I still want to install then I can edit the partition and change it to an EFI partition system (as per the image). Which partition do I edit this way? the swap partition or the boot? Thank you.
ReneD
Thumbs up for this great tutorial. You have made me a happy linux-Mint user ;-)
Average Linux User
My pleasure. Thank you for reading and leaving a comment.
Ernie Hender
Generally I do not read post on blogs, but I would like to say that this write-up very pressured me to try and do it! Your writing taste has been amazed me. Thank you, very nice article.
Average Linux User
Wow, thank you for your nice words.