How to shrink a Linux partition without losing data?
Do you need to shrink a partition with your Linux without reinstalling the system? You can resize your partition without losing your data with GParted and this post will show you how to do that.
I used this method when I decided that I needed to re-partition my hard drive and create several new partitions to test different Linux distributions. However, I did not want to reinstall my current Arch Linux system. Instead, I shrank my Arch Linux partition and added new partitions using the free space I created. Below I share how I did that.
You can watch the video tutorial or continue reading below.
Make a GParted Live USB
The first step to shrink a partition in Linux is going to Gparted.org and download the GParted Live ISO.
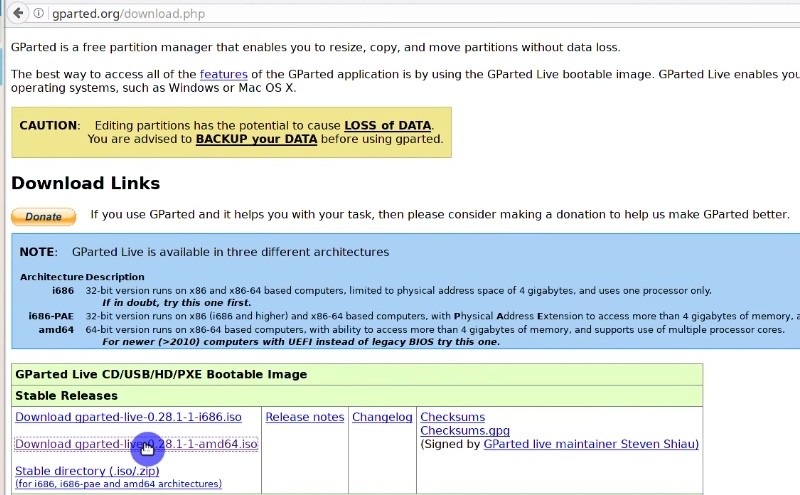
Next, create a bootable USB using this ISO. You can do it from the terminal using the dd command:
sudo dd bs=4M if=gparted-live.iso of=/dev/sdX status=progress && sync

The if option is the path to GParted ISO, and the option of is the USB device where you will record the ISO. You can find out the name of your USB devise with sudo fdisk -l and the size of your USB.
Boot from GParted Live
Then, boot from this live USB drive. You can keep everything default.

Just press enter for every question.
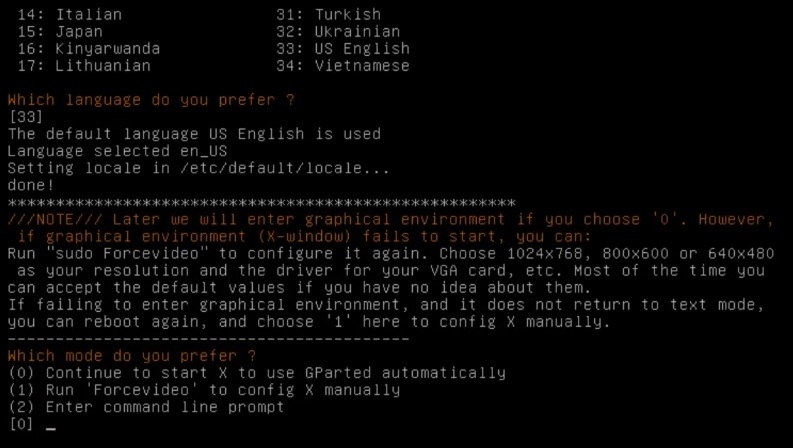
In the end, you should get to the Live session of Gparted. This is the same Gparted program you may have on your system.
Shrink an existing partition
One advantage of Live USB Gparted is that your main system is not working and you can manipulate its partitions, while Gparted in a working system cannot resize a partition.
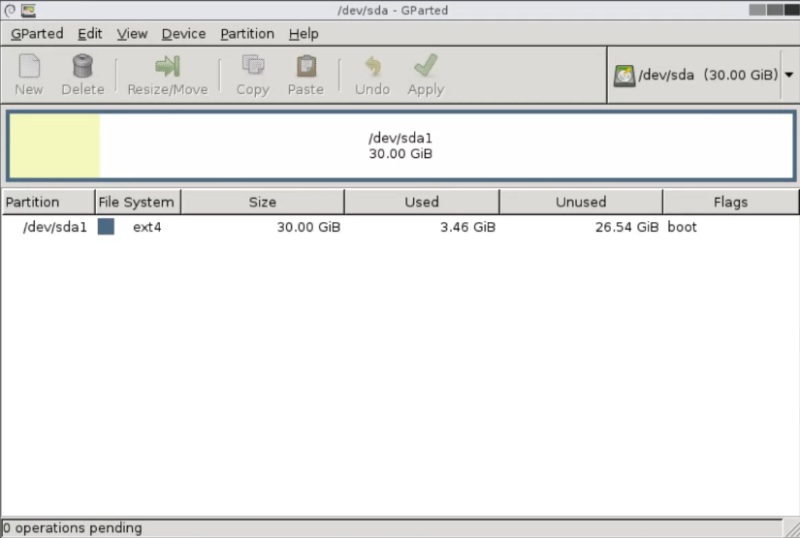
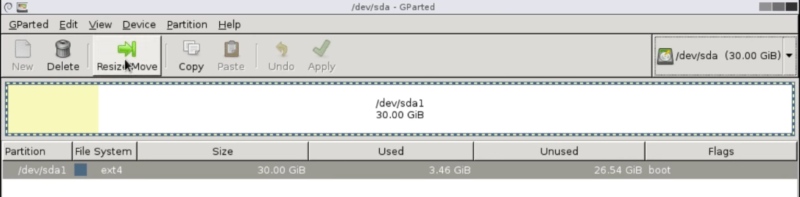
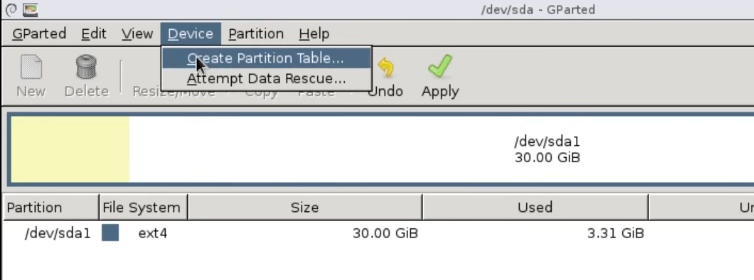
If you have several hard drives, make sure you selected the hard drive with the partition you want to resize in the top right part of the program window. In my case, I have one hard drive and one partition.
Below, you can see the yellow area is the part with the data. It is around 3 Gb in my case. The rest is free space. Let’s use this space to create another partition.

Select this partition and click on Resize option.
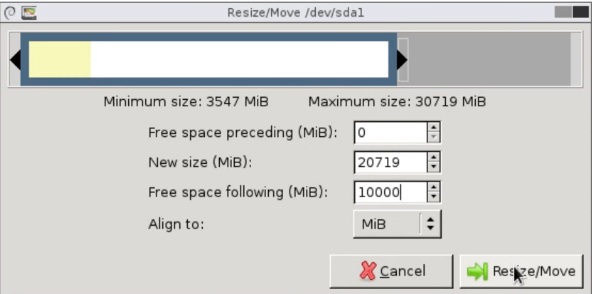
You can resize it using the numbers or by mowing the arrows. I will free up 10 Gb. Enter the number, press enter, and click on Resize.
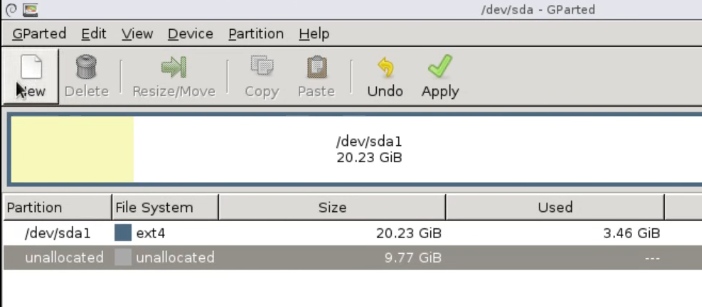
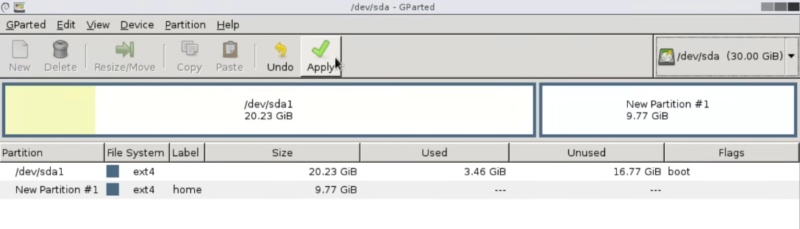
After this, the main partition is shrunk.
Create an additional partition
Now, you can create another partition. Click on the unallocated space, then click New to create a new partition.
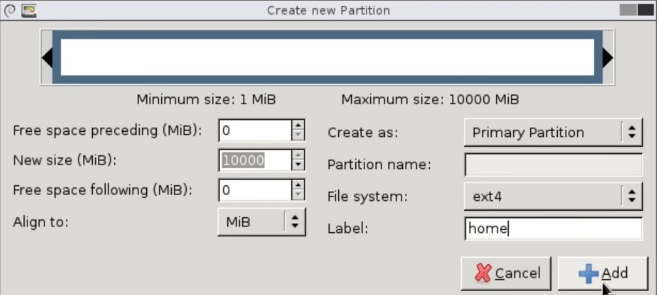
You can select its size, whether you want it to be primary or extended. An extended partition allows you to create more than 4 partitions. You can choose the file system you need. And you can also give a name to this partition. So, when you have set everything as you want, click Add.
In the below image, you can see the two partitions I have created.

Apply the GParted changes
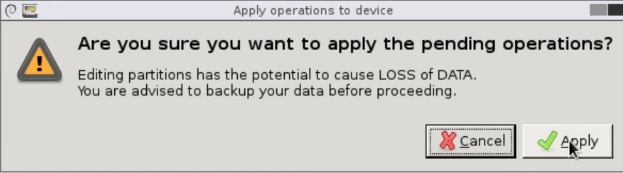
Everything above created only the plan of the changes to do. You can find the detail of the changes you are about to apply at the bottom of Gparted.

So, if you notice that something is wrong, it is safe to cancel at this stage.
Also, let me warn you. Although Gparted is a reliable program, there is no guaranty that your data won’t be corrupted. So, before you resize your partition, back up all the important files.
If you have backed up all important data and you are sure about these settings, press apply.
Confirm and wait a few minutes until everything is complete.
Check that there were no errors.
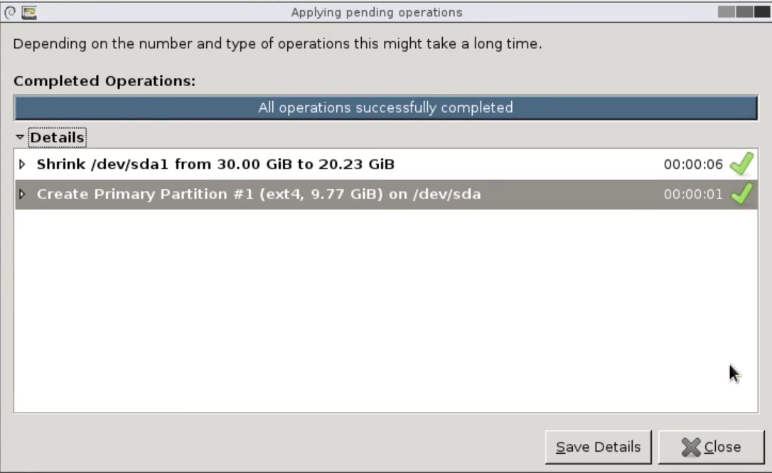
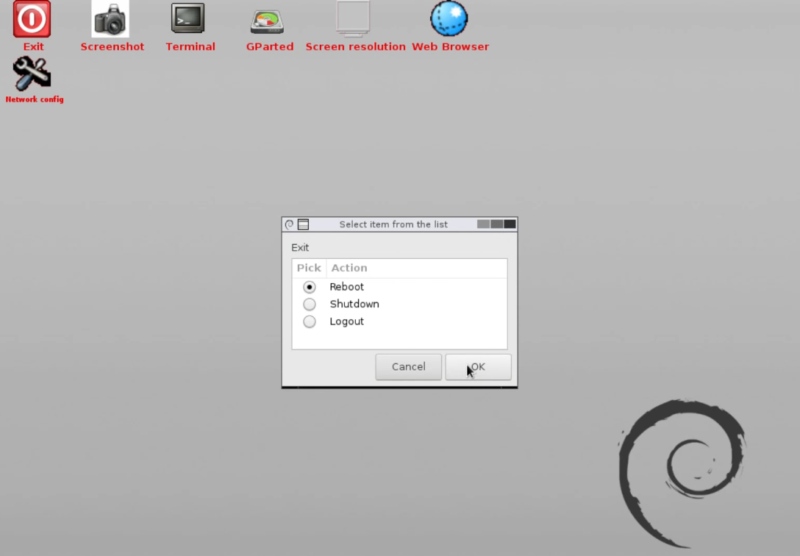
Now, there are two partitions on this hard drive and your system files should be intact. Close the program, double-click on exit and reboot into your main system. It should work as before.
So, the process is complete.
Other options in GParted
As you can see, shrinking a partition in Linux is simple and reliable.
Moreover, you can use this Live GParted ISO not only to shrink a partition in Linux, but to do any other manipulations including deleting partitions, increasing partition’s size, and create a brand new partition table.
Have you used Gparted? Have you ever tried this method to create new partitions? Let me know in the comments.
Comments
Ramon Hoyo
Thanks for share it!
Wahyudin
Can i use Gparted on live os like Ubuntu Linux Mint? Is any different?
Average Linux User
Yes, you can. No difference.