10 Essential Things to do After Installing Garuda Linux
Although Garuda Linux is highly configured by default, there are still 10 essential things to do after installing Garuda Linux.
Content
1. Configure Timeshift
Security first! Before we apply any customizations it’s important to have a system snapshot in place in case something goes wrong. Garuda Linux comes with Timeshift and we just need to configure it.
Timeshift → Wizard → Select BTRFS as a filesystem → Next → Select hard drive where the system resides → Next → Configure backup snapshot frequency to your liking → Next → Enable BTRFS groups → Next → Finish
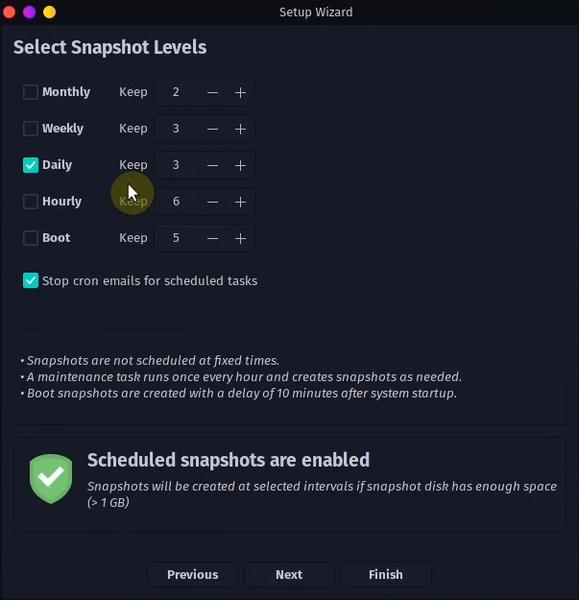
Also, we can create a system snapshot manually at any given point by clicking Create button.
2. Install Drivers
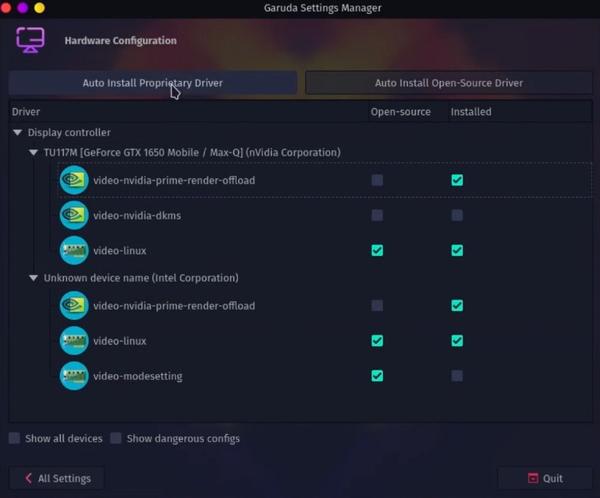
Drivers are necessary to every system since they allow the system to take full advantage of the hardware. We can easily install them with Garuda Settings Manager.
Garuda Settings Manager → Hardware Configuration → Click Auto Install Proprietary Drivers → Yes
3. Improve AUR Download Speed
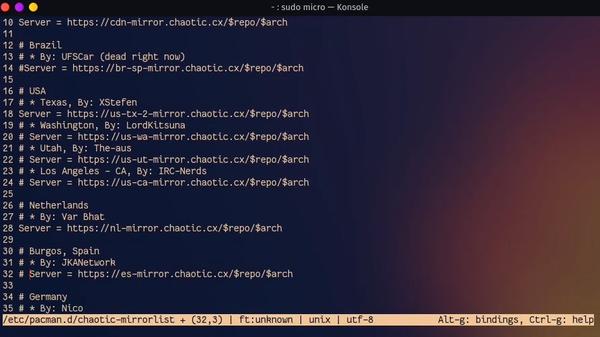
We have configured the mirror list for the official Garuda Linux repositories when we did the initial system setup. However, that mirror list does not affect the AUR repositories. The steps below show how to configure AUR for the fastest speed possible.
Open the mirror list file by executing the following command:
sudo micro /etc/pacman.d/chaotic-mirrorlist
Then comment out all mirrors in front of the one you want to use - which should be the one closest to your location. Note, don’t comment out the CDN mirrors.
Press CTRL + S to save, CTRL + Q to exit the editor.
Refresh the database using the new mirror:
sudo pacman -Sy
4. Enable Firewall
While Linux is very secure by default it’s advisable to enable a firewall that protects against network intrusions. On Garuda Linux the UFW firewall is installed by default and it just needs to be enabled.
Enable firewall it with the following command:
sudo ufw enable
Check the status of the firewall:
sudo ufw status verbose
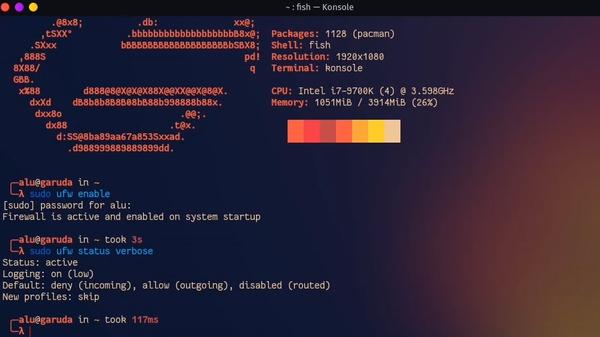
It should be active. The default configuration denies incoming connections and allows outgoing connections which should be fine for the vast majority. However, if you use some apps that require open ports in order to receive a connection (i.e. KDE Connect), then you would need to open that port in firewall.
Some flavours of Garuda Linux come with firewalld pre-installed instead of ufw, you can enable it with this command:
sudo systemctl enable --now firewalld
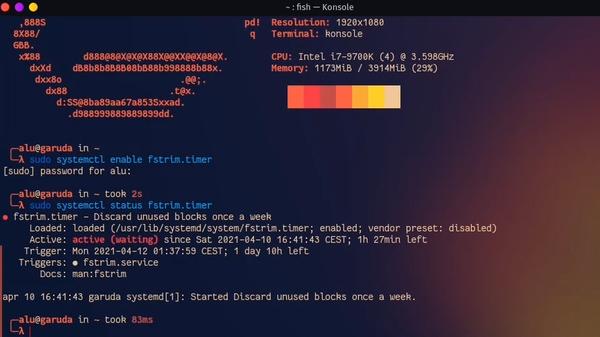
5. Enable TRIM for SSD
TRIM optimizes the performance and ensures the longevity of your SSD by minimizing write amplification. It isn’t enabled by default. so enable it with the following command:
sudo systemctl enable fstrim.timer
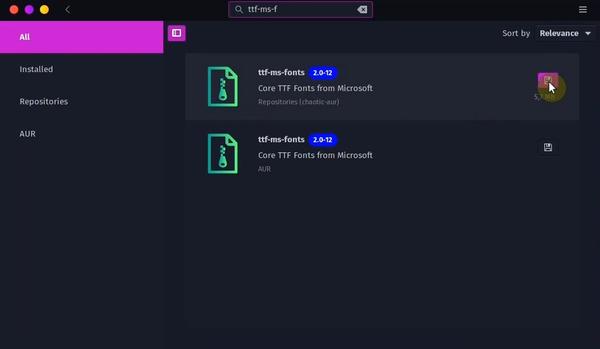
6. Install Microsoft Fonts
Even if you are not a fan of Microsoft, you’ll likely deal with Word documents at one point or another. In that case, you’ll need to have Microsoft’s fonts installed.
Software Manager → Search for ttf-ms-fonts → Install
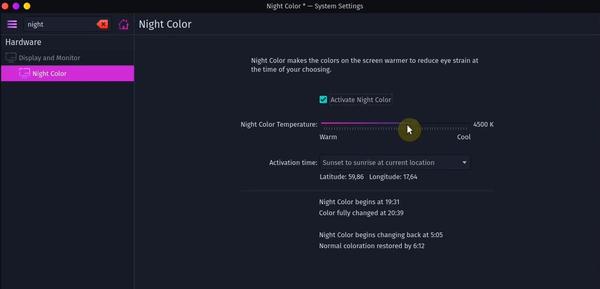
7. Enable Night Color
Night color is a Linux application that protects your eyes by reducing the amount of blue light at night. It’s better for the eyes and sleep. A very crucial app for all of you working at night.
Settings → Display & Monitor → Night Color → Activate Night Color → Apply
8. Disable GRUB Delay
If you have only Garuda Linux on your machine, then the GRUB menu asking you to select the system to boot is redundant. It also makes the boot process slower. We can easily disable it right from the Garuda Boot Options.
Garuda Welcome → Garuda Boot Options → Set menu timeout to 1s
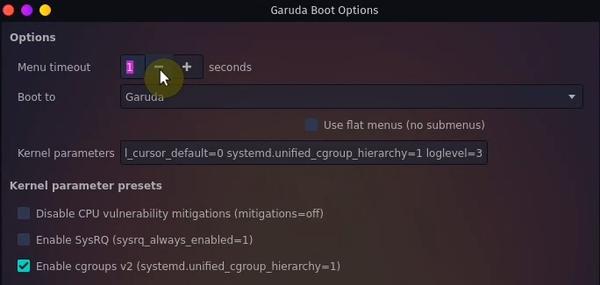
You will still see the GRUB menu for 1s just in case of emergency, for example, if you need to select another Linux kernel to boot from.
9. Clean Your System
Garuda Linux offers a few places where we can tidy up our system and free more space.
The first thing we can do is to remove orphans. Orphans are unused dependency packages. I recommend doing this from time to time.
Garuda Welcome → Garuda Assistant → Remove orphans
We can also clean the package cache to free up some space.
Garuda Welcome → Garuda Assistant → Clean package cache
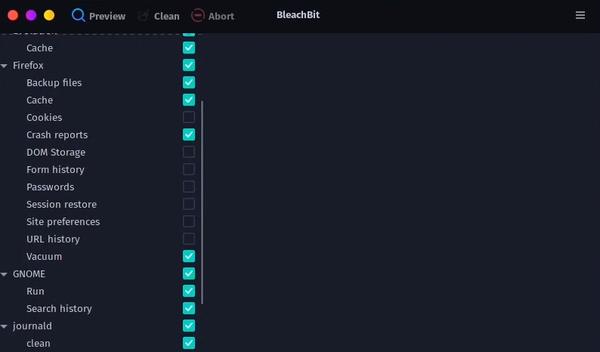
Lastly, we have BleachBit. It’s a more advanced app so I would advise you to be careful when cleaning stuff with it.
10. Check for Errors
This is a more advanced tip that I believe will come you in handy. Garuda Linux is crippled with problems so I recommend not skipping this one.
Check for failed systemd services:
sudo systemctl --failed
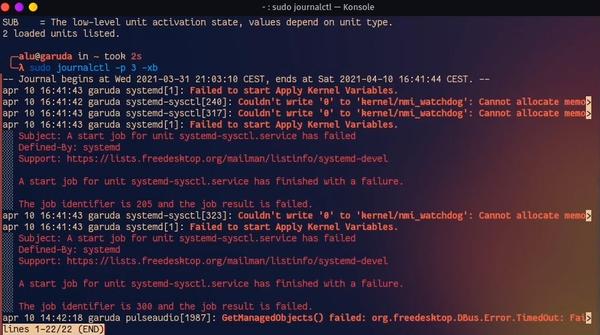
Check for errors in logfiles:
sudo journalctl -p 3 -xb
Logfiles will often show some errors, but it doesn’t necessarily mean that something is broken. If you do see something there, that you expect to work, then it’s time to research more about the issue and try to fix it.
Conclusion
These were essential things that I believe everyone should do after installing Garuda Linux. However, we can always use a few more extras. Let me know your tips in the comments below!s
Also, if you wonder about my opinion on Garuda Linux, check out my Review of Garuda Linux
Comments
Garuda Noob
Since Garuda installs on BTRFS, I think the trim command timer used by Garuda is actually: btrfs-trim.timer This is already enabled. $ sudo systemctl status btrfs-trim.timer
btrfs-trim.timer - Discard unused blocks on a mounted filesystem Loaded: loaded (/usr/lib/systemd/system/btrfs-trim.timer; enabled; vendor preset: disabled) Active: active (waiting) since Thu 2022-04-28 14:02:35 EDT; 12min ago Until: Thu 2022-04-28 14:02:35 EDT; 12min ago Trigger: Sun 2022-05-01 00:00:00 EDT; 2 days left Triggers: ● btrfs-trim.service Docs: man:fstrim
Average Linux User
Stacer is an option. I wrote about it too.
I would say one should be careful with BleachBit and it is a great program if you know what you do.
DrBoneSaw
BleachBit should never be used on a Linux systen. Use Stacer instead.
Ninjkryptik
why do you say this? whats wrong with bleachbit on Linux?