25 Things to Do After Installing Linux Mint 20 'Ulyana'
Linux Mint - one of the most beloved Linux distros continues to amaze us with each new release. In this post, we will take a look at fundamental 25 things to do after installing the most recent Linux Mint 20 “Ulyana”.
Content
- Create Backup
- Configure Update Manager
- Install Drivers
- Configure Hi-DPI display
- Install Codecs
- Install Microsoft fonts
- Decrease Swap usage
- Enable Drive Cache (HDD)
- Optimization for SSD
- Enable Redshift
- Configure Firefox
- Install Google Chrome
- Install Audacious
- Install popular apps
- Install Clipboard Manager
- Configure LibreOffice
- Add keyboard layouts
- Customize Themes
- Xkill shortcut
- Configure sound
- Activate Firewall
- Add/Remove Startup Apps
- Remove some apps
- Extend battery time
- Clean system
1. Create Backup
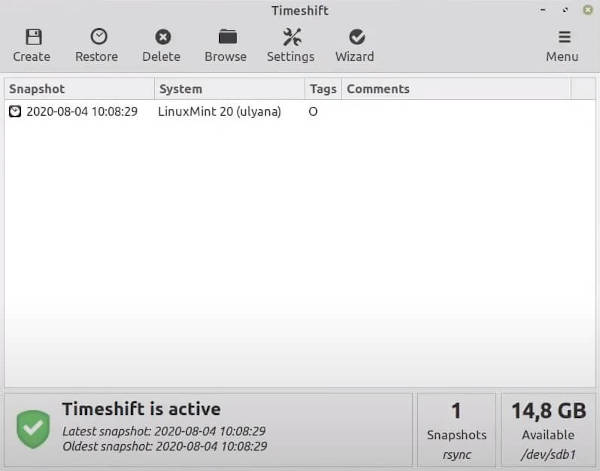
Backup is always on the top of things to do after installing any Linux distro. The reason for this shouldn’t come as a surprise. Many things can go wrong and make you lose your work. Linux Mint 20 comes with the system snapshot app - Timeshift.
Open Timeshift and click on Wizard in the top right corner.
Wizard has the following four steps:
- Snapshot Type
- select RSYNC
- Snapshot Location
- Select the disk where you would like your snapshots to be stored or click Next for the current disk
- Snapshot Levels
- You can choose how many snapshots Timeshift will perform/store on a monthly, weekly, daily, hourly and boot basis
- User home directories
- allows you to decide which folders Timeshift will back up.
- You should prioritize your home directory, but depending on your space, it won’t hurt to include
/directory as well.
In case you accidentally lost your data, open Timeshift, click Restore and select a snapshot which contains the files that you would like to recover.
2. Configure Update Manager
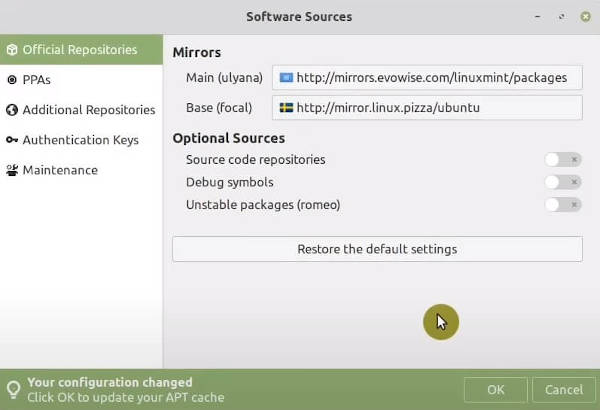
For faster updates, I recommend switching to a local mirror. Open Update Manager → Edit → Software Sources → Mirrors → Select the closest mirror to your location (for both, main & base) → OK.
To configure the system update frequency, go to Edit → Preferences → Options tab → Adjust the frequency to your liking.
3. Install Drivers
Drivers allow your Linux Mint 20 to communicate correctly with your hardware. Linux Mint 20 comes with a Driver Manager to make installing them a breeze.
Open Driver Manager → Select the recommended driver for your system → Apply Changes.
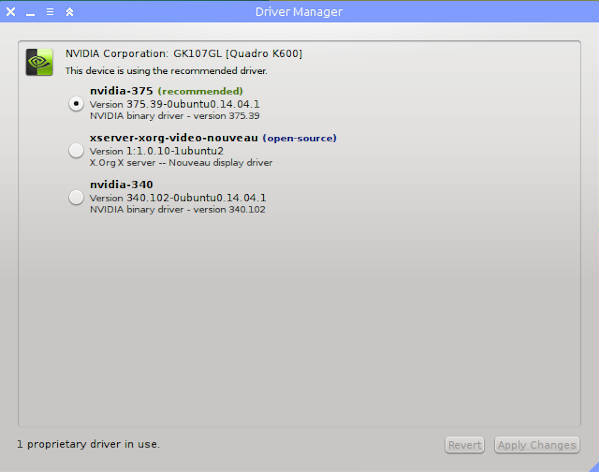
If you don’t find any drivers, most likely it is because your hardware doesn’t require any proprietary drivers. Your Linux Mint will use open-source drivers that are already included in Linux Mint 20 “Ulyana”.
4. Configure Hi-DPI display
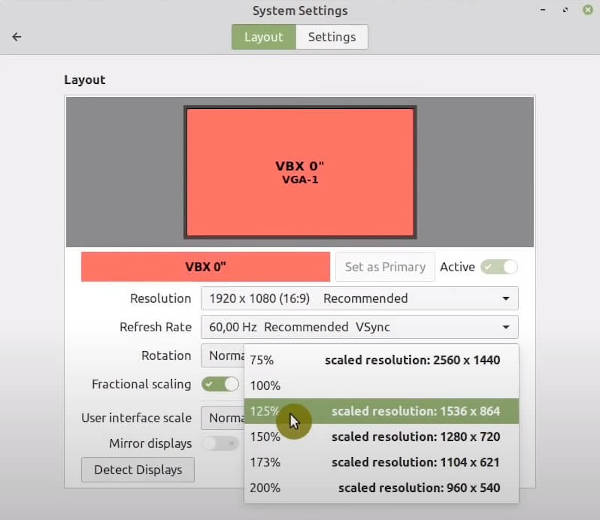
Nowadays, Hi-DPI screens are usual. Linux Mint 20 has a fraction scaling feature to ensure that your desktop displays correctly on those screens.
Open System Settings → Display → User interface scale → enable Fractional Scaling and select the best resolution for your screen.
5. Install Codecs
Codec is a piece of software responsible for encoding-decoding multimedia files. They allow you to play various media formats on your Linux machine.
Open Menu → Sound & Video → Install Multimedia Codecs._
6. Install Microsoft fonts
If you use your Linux Mint 20 for work, you’ll likely deal with documents. Those documents are usually created in Microsoft Word, and you guessed it - they use Microsoft’s fonts! To install Microsoft’s fonts in Linux Mint:
Open Synaptic Package Manager → Search for mscorefont → Select the package → Right-click → Mark for installation → Apply.
s
7. Decrease Swap usage
One of the ways to boost your system performance is decreasing swappiness value. This feature forces your Linux system to use your RAM, instead of your hard drive. If you are not familiar with Linux swap, check out our post.
Check the current swappiness value by executing:
cat /proc/sys/vm/swappiness # 60 (default)
Open /etc/sysctl.conf file as an administrator:
sudo xed /etc/sysctl.conf
Add vm.swappiness=10 at the end and save the file:

Now reboot your system and check the swappiness value:
cat /proc/sys/vm/swappiness
It should be 10.
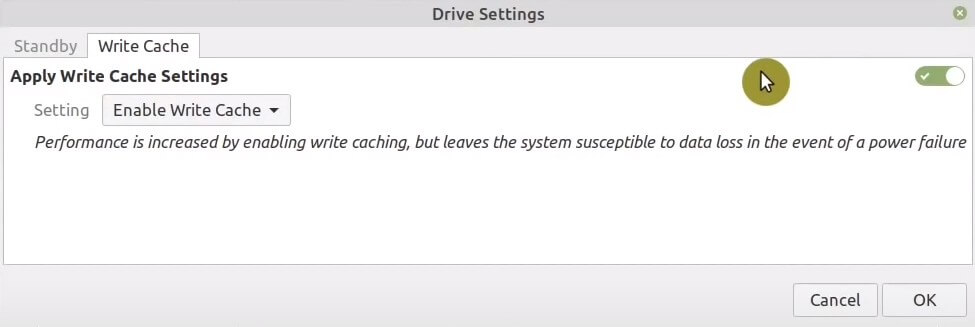
8. Enable Drive Cache (HDD)
This setting will decrease the delay between writes and improve your system responsiveness. Be aware that there is a potential data loss in the event of power failure. I’ve been using this feature for years, and I have never experienced any issues, but again, use at your own risk.
Open Disks → Select your current HDD → ⋮ (three dots menu) → Drive Settings → Write Cache tab → Enable Write Cache.
9. Optimization for SSD
Many of you are probably familiar with the fact that SSDs wear off over time. The best optimization is decreasing the number of writes to increase its lifespan. We have already done the first step - reduced swap usage.
Optionally, the next step is to disable the writing of file timestamps.
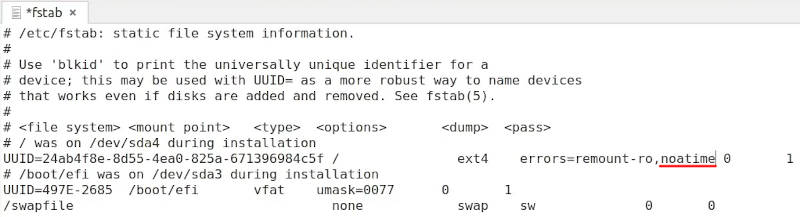
Open Terminal → sudo xed /etc/fstab → Identify your root partition →
Next to the errors=remount-ro add noatime.
If you have more partitions like /home, then you’ll need to add this rule to
them as well. The only exception is the boot partition!
Last, but not least important is TRIM. TRIM optimizes the performance and ensures the longevity of your SSD by minimizing write amplification.
Luckily, Linux Mint 20 enables TRIM by default. You can verify it by executing:
sudo systemctl status fstrim.timer
You should see that it is active and enabled.
With these improvements, your SSD will serve you a long time!
10. Enable Redshift
Redshift is a crucial Linux application for all of you using your system at night. Redshift protects your eyes by reducing the amount of blue light on your screen.
Open Redshift from the start menu, and you’ll notice the 💡 icon in the system tray. That’s Redshift running in the background.
Right-click on it and make sure you have enabled Autostart to make Redshift run as soon as your system boots up.
11. Configure Firefox
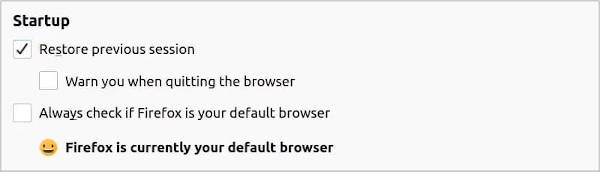
How many times have you accidentally closed your browser and lost all your tabs? If you are like me, it happens so often. To make sure that Firefox restores your last browser session every time you launch a browser:
Open Firefox → Options (hamburger menu) → Preferences → Enable Restore previous session.
Another useful feature is to enable DRM content. You may find yourself unable to play some videos (e.g. Netflix) or audio because of DRM restriction. To enable DRM content:
Open Firefox → Options (hamburger menu) → Preferences → Enable Play DRM-controlled content

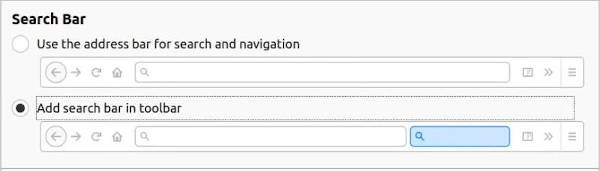
The next improvement is related to Firefox’s search bar behavior. Let’s say you search for a particular email address. Firefox will open your default email client, instead of performing a web search. This functionality can certainly be annoying. To change the search bar:
Open Firefox → Options (hamburger menu) → Preferences → Search tab → Select Add search bar in toolbar
You can also customize the toolbar with Right-click on toolbar → Customize.
Lastly, I’ll change the search engine. By default, Firefox on Linux Mint uses Yahoo, but I prefer Google as my search engine.
Open Firefox → Options (hamburger menu) → Preferences → Search tab → Scroll to the bottom → Find more search engines → Scroll to the bottom of the page → Click Google.
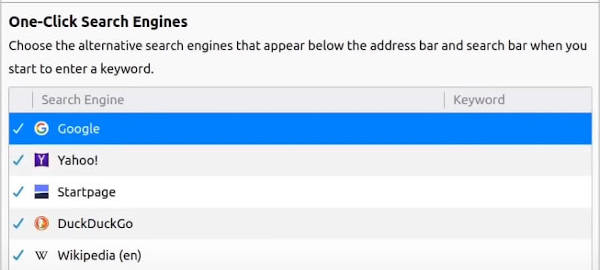
Now, go back to the search tab and choose Google as your default search engine.
These were small tips that should make your browsing experience a little bit better.
12. Install Google Chrome
Although I prefer and recommend using Firefox, being the most popular browser nowadays, Google Chrome is a go-to browser for many users. To install Google Chrom in Linux Mint:
Go to Chrome’s official website → Click Download → Select .deb package → Accept and Install.
After you have downloaded Google Chrome, open your file manager in the Downloads directory and double-click on Chrome’s .deb file to install it.
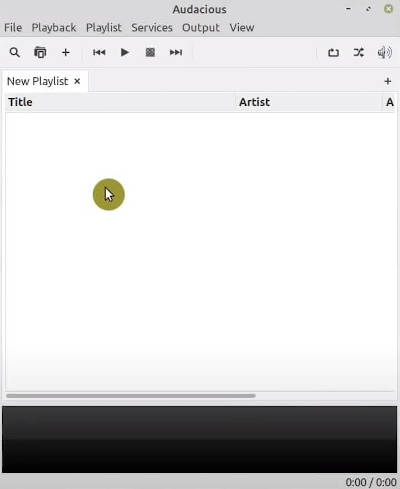
13. Install Audacious
Linux Mint 20 has chosen Rhythmbox as its default music player. However, I am fond of a simple music player - Audacious. To install Audacious:
Open Software Center → Search for audacious → Select the first entry → Install.
14. Install popular apps
Linux Mint’s target userbase has always been users coming from Windows. It’s no wonder that it comes with a slew of apps to comfort a new user. As we have seen from above, we can use the Software Center to install additional apps.
Try to search and install some of the popular apps:
- Dropbox
- Zoom
- Spotify
- Steam
- Skype
- Slack
They all are available in the Linux Mint Software Center.
15. Install Clipboard Manager
Linux Mint 20 doesn’t come with a clipboard manager, but nothing stops us from installing it ourselves. I like Clipit the most.
Open Software Center → Search for clipit → Install
After you have installed Clipit, launch it, and you’ll notice its icon in the system tray. By clicking on it, you can see your clipboard history.
To customize how many entries show in history:
Right-click on Clipit’s icon → Preferences → History tab → Adjust the number of Items in history.
16. Configure LibreOffice
LibreOffice is a well-known office suite alternative for Linux. It comes with balanced default settings, but I’ll show you some tips to make it even better. For example, you can make your LibreOffice look similar to Microsoft’s office:
Open LibreOffice Writer → View → User Interface → Enable Single Toolbar & Tabbed interface.

Open LibreOffice Writer → Tools → Options → Icon style → Select Colibre.
![]()
Optionally you could experiment with more styles. You can install them by opening Synaptic and searching for libreoffice-style.
17. Add keyboard layouts
If you are multi-lingual person, several keyboard layouts is a must-have.
Open System Settings → Keyboard → Layout → + button → Choose a keyboard layout → Add.
Customize the shortcut for switching between layouts:
Go to Options → Switching to another layout → Select your preferred shortcut (ALT + Shift).
Keyboard layout icon in the system tray displays the active keyboard layout and allows you to switch between your keyboard layouts.

18. Customize Themes
Similarly to other distros, Linux Mint 20 is highly customizable.
Open System Settings → Themes → Select your preferred Icons and Desktop theme.
On Add/Remove tab, as the name implies, you can install/uninstall themes.
Add/Remove tab contains only a limited set of themes. To take advantage of all available themes, learn how to install additional Cinnamon themes.
19. Xkill shortcut
xkill is a Linux command primarily used to force-quit unresponsive apps. Some
distros do have a pre-set shortcut for xkill, but Linux Mint 20 does not.
Open System Settings → Keyboard → Shortcuts → Add custom shortcut → Set name
to Xkill and command to xkill → Add → Click on Keyboard bindings entry →
Type your shortcut (CTRL + Esc).
Next time you press CTRL + Esc, your mouse pointer will turn into a cross, and if you click with this cross on any frozen app, it will force-quit.
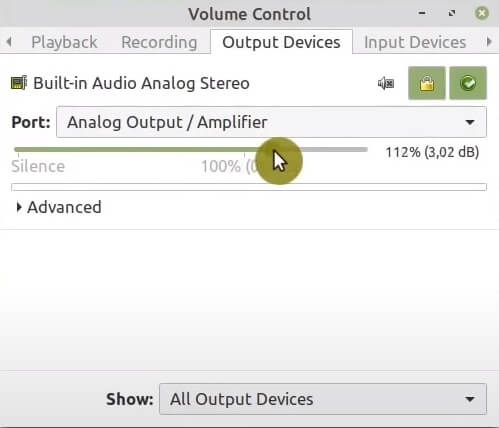
20. Configure sound
Linux Mint 20 sound configurations are placed in the Settings App Sound section. Pulse Audio Volume Control (PAVC) is the standard app for configuring audio on Linux.
For example, if your laptop has quiet speakers, PAVC allows you to amplify them. To install PAVC:
Open Software Center → Search for pavucontrol → Install.
Then adjust the volume to a desired level:
Open PAVC → Output Devices → Drag slider to the right-hand side to amplify your speakers.
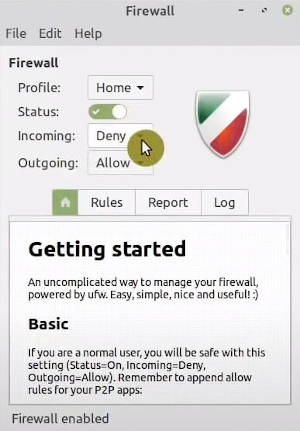
21. Activate Firewall
While Linux does not need anti-virus, it can surely benefit from a network firewall. Linux Mint 20 bundles Firewall as a network firewall app.
Open Firewall Configuration → Enable Firewall.
The default settings work fine, but if you wish to learn more about network firewall in Linux, check out this post on why you need a Linux Firewall.
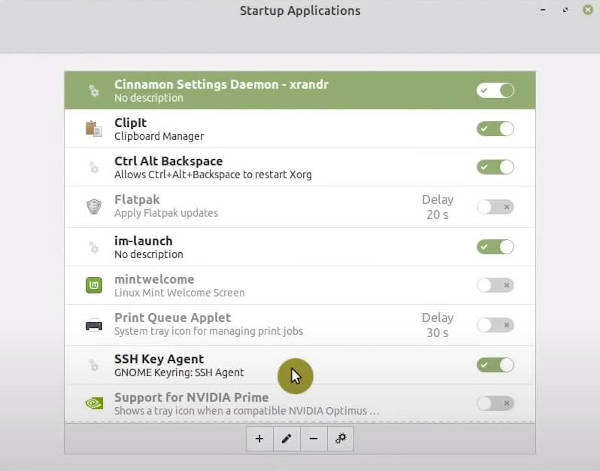
22. Add/Remove Startup Apps
Linux Mint 20 has quite a few services running at system startup. You likely don’t need all of them. To boost your system startup time, I would recommend you to disable the services you don’t need:
Open Startup Applications → Disable services you don’t use.
If you have an app that you would like to start at system startup:
Click on the + button → Choose Application → Select an application → Add Application.
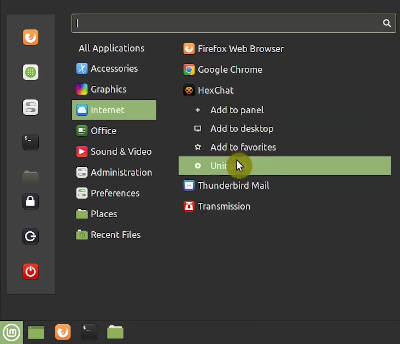
23. Remove some apps
As a beginner-friendly distro, Linux Mint 20 bundles all sorts of apps. For some users, this may be too much. To keep your system clean, you might want to remove the apps you don’t use:
Open Menu → Right-click on an app that you would like to remove → Uninstall.
24. Extend battery time
To improve the battery life of your laptop, you don’t need to do more than just install the tlp package. It is a background software responsible for managing a laptop’s battery. You only need to install it and no other post-install configuration is required.
Open Synaptic → Search for tlp → Mark for installation → Apply.
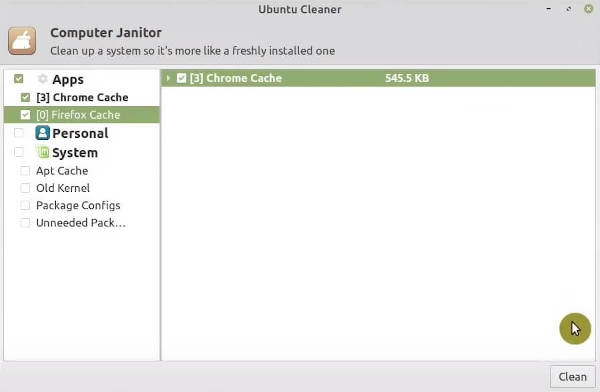
25. Clean system
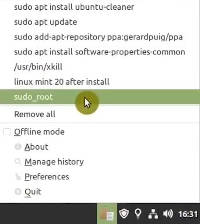
Linux Mint 20 packages Bleachbit as a system cleaner app. Bleachbit is a good app, but I’ve recently tried Ubuntu Cleaner and I liked it more.
Install Ubuntu Cleaner by running the commands below:
sudo apt install software-properties-common
sudo add-apt-repository ppa:gerardpuig/ppa
sudo apt update
sudo apt install ubuntu-cleaner
After you’ve installed Ubuntu Cleaner, open it & clean redundant files.
If you wish to remove old kernels, I would recommend you to use Linux Mint’s Update Manager.
Open Update Manager → View → Linux Kernels → Remove old kernels (make sure to keep at least two kernels).
Conclusion
Linux Mint 20 is a stable, familiar-looking and featureful distro. I believe with these 25 things to do after installing Linux Mint, you would like it even more.
Let me know if you would add or remove somethings form this list. 👇
Comments
Cyr4x
There is a special place in hell for people recommending to install Google Chrome on Linux.
belgarath
Microsoft Edge? ;)
belgarath
Microsoft Edge? ;)
Linda
Can’t find drivers for old hp pavillion laptop
Scott
As to section ‘‘8. Enable Drive Cache (HDD)’’ If dual booting with other Linux, is it only for Mint partition or for the entire HDD?
Average Linux User
The setting is for entire HDD.
Daniel Pharand
As to section ‘‘25. Clean system’’ the article on https://easylinuxtipsproject.blogspot.com/p/clean-mint.html suggest otherwise.
Average Linux User
The article you refer to is more detailed. It is focused on system cleaning. However, I do not see where it contradicts with this post.
JohnIL
I have to say after trying the fractional scaling in Mint that it does not look a whole lot sharper then if I just dropped down the resolution a bit? I have a 1920 x 1080 14 inch screen and tried both 125% and 150% scaling and they both look pretty fuzzy. It also adds some tearing when scrolling as well. I guess better than nothing considering the only option previous was 100% or 200%. But I also use Mac’s and Windows 10 PC’s and sadly they have definitely got a better handle on the display scaling.
Charlie Brown
Just a comment about the section “7. Decrease Swap usage”: when I entered… sudo echo “vm.swappiness=10” » /etc/sysctl.conf …I got an error, “permission denied” (despite entering my password correctly).
What worked for me was to enter: sudo -s and then re-enter the command as: echo “vm.swappiness=10” » /etc/sysctl.conf
This resolved the issue about access being denied.
However, I still have a question as to why the access would have been denied when using sudo. If anyone can answer this, I would appreciate it. I am an experienced amateur Linux user, but not an expert.
Average Linux User
Here is an explanation why
>>doesn’t work: https://serverfault.com/questions/540492/sudo-echo-bla-etc-sysctl-conf-permission-deniedI corrected the post. Thanks for pointing this out.
The other way to do it is:
You can also open
/etc/sysctl.conffile withsudo:And add
vm.swappiness=10at the end and save the file.Charlie Brown
Thank you. Very clear answer, and the link is helpful as well.
Juan
Hello AVL, thanks for sharing you knowledge; Linux is amazing again… Just one question… between LinuxMint Ubuntu vs Debian edition,… what is your opinion? Thanks!!
Average Linux User
I prefer Linux Mint that is based on Ubuntu. For Debian, I would go with pure Debian.
jijo
For those with AMD 4000 series notebook APU: sudo apt install linux-generic-hwe-20.04-edge this will:
Average Linux User
Thank you for sharing this!
Carlos
Woo exactly what i was looking for, worked 100% on my redmibook. Thank you so much
Jay
Many thanks for this tip ! Helped me improve my laptop setting on a Dell 5415 (Ryzen 5). Now I can manage screen backlight and improve battery life. So I will no stay on Linux Mint (last roadblocker removed!) Thanks again for sharing. Jay
aquasp
Your list is amazing! I didn't know about the ssd optimizations. Thanks! You deserve a lot more.
Average Linux User
Thank you, aquasp!
Dmitriy Buritov
It so amazing and useful site!!! Thanks for your job.
Average Linux User
Thank you, Dmitriy!
Eijie
Clem hates snaps and therefore we as a user are restricted in our freedom to choose how we would like to use our system. Please add an optional entry with the explanation on how to remove the SNAP-BAN and allow the user to install software from SnapCraft servers.
Average Linux User
I agree with Clem to large extent and that's why I did not include it. But Linux is open source and you can enable SNAP