Linux Mint Themes and Icons beyond the default
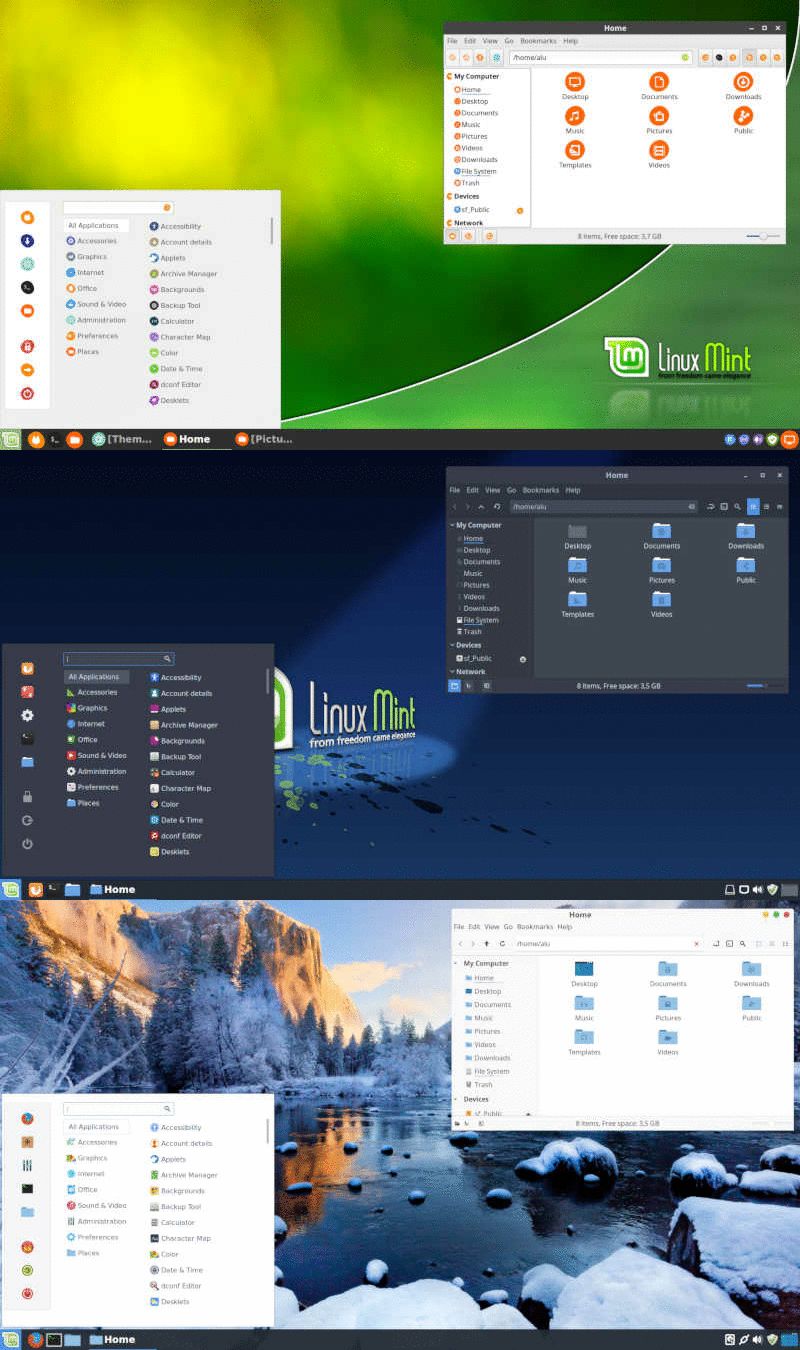
By the end of this post, you will be able to make your Linux Mint Cinnamon desktop look more beautiful or even like Mac OS X. Basically, you will learn how to change the Linux Mint themes beyond the default.
INTRODUCTION
Linux Mint is a great Linux distribution for new users. It is a stable Ubuntu derivative with great community support. And it has a good visual aspect but it can be improved a lot. So, let’s change the Linux Mint themes. You can watchthe video tutorial or continuer reading below.
VIDEO TUTORIAL
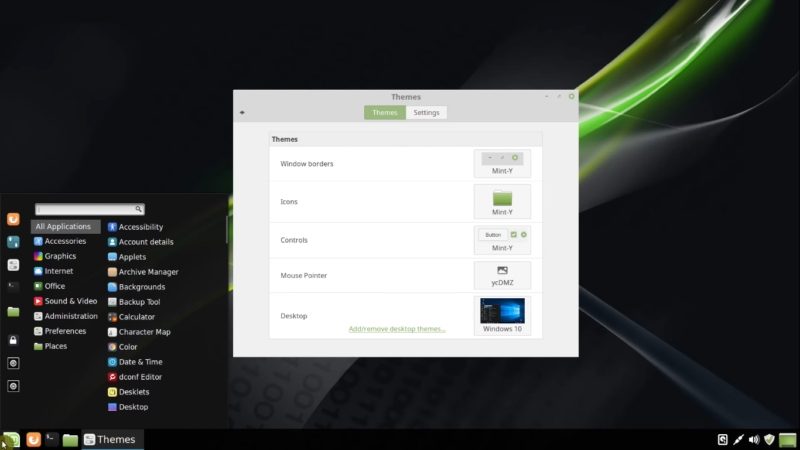
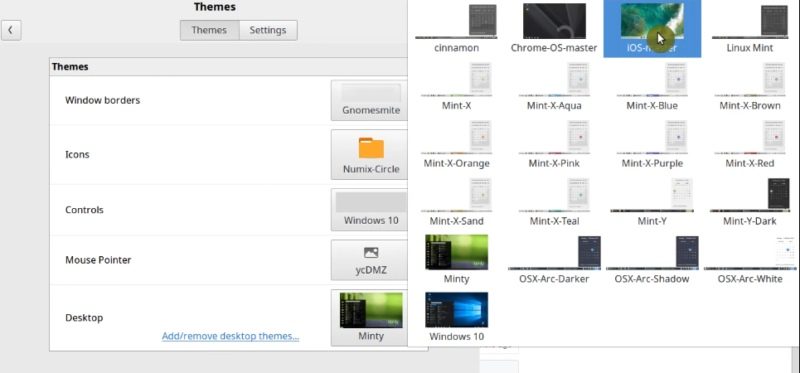
So, if you go to Settings → Themes you will find a set of themes that come with Linux Mint by default.
There are some pretty themes by default. For example, I really like Linux Mint Y theme. Check it out. To apply it, simply change every category in Themes to Mint Y.

However, the default is not enough for us, and I am going to show you how to install more themes.
Changing the Linux Mint Themes from the system settings
The easiest to configure will be the desktop theme. Go to Settings -> Themes. Next, click on Add/remove desktop themes.

Next, go to available themes tab. You will see a theme list, you can mark all you want to install.

Sometimes you want to have a closer look at the theme, thus click on More info and you will be re-directed to the Cinnamon Spices website, where you can see a larger screenshot of the theme.
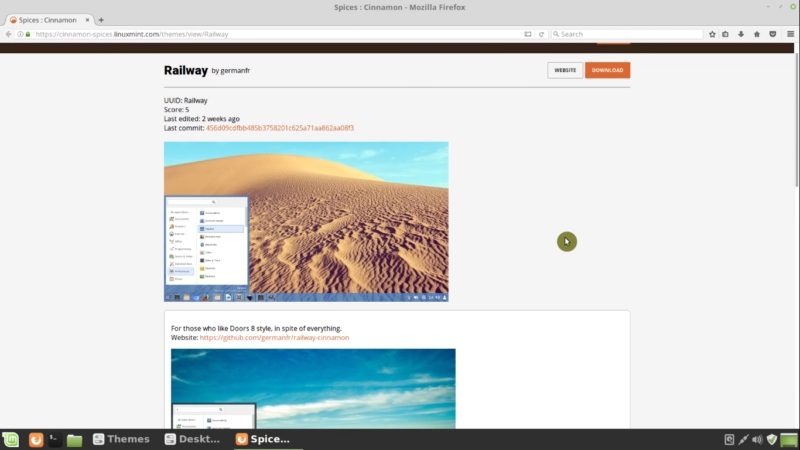
There are many desktop themes, but for this post I will install Minty, Windows 10 and Railway. You can use the search field to fin these theme.
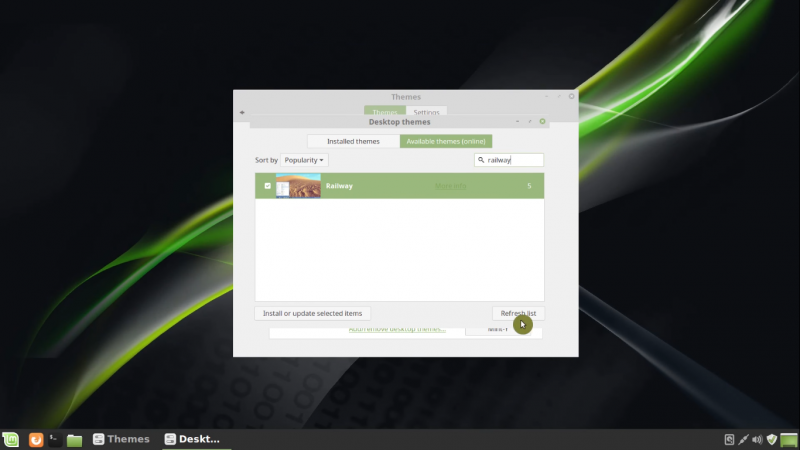
After the selected themes are installed close the window, then, go the Desktop themes and select the one you like the most.
Windows 10 desktop theme
So, this is how Windows 10 theme looks like. Quite nice actually.
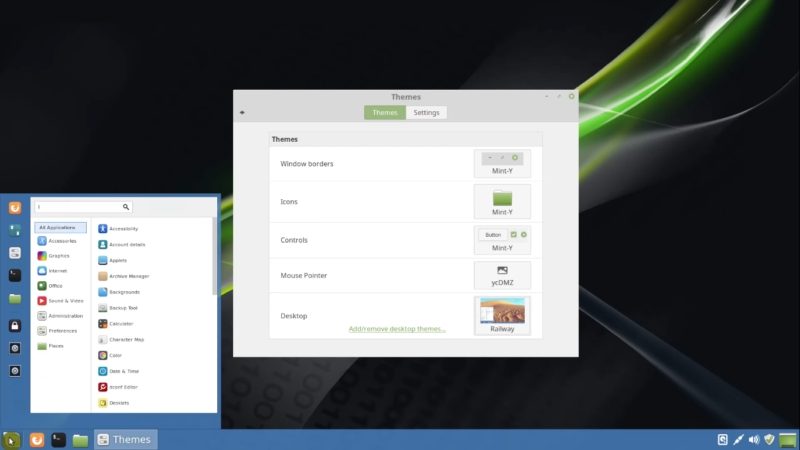
Railway desktop theme
If you like light blueish themes, Railway is very good.
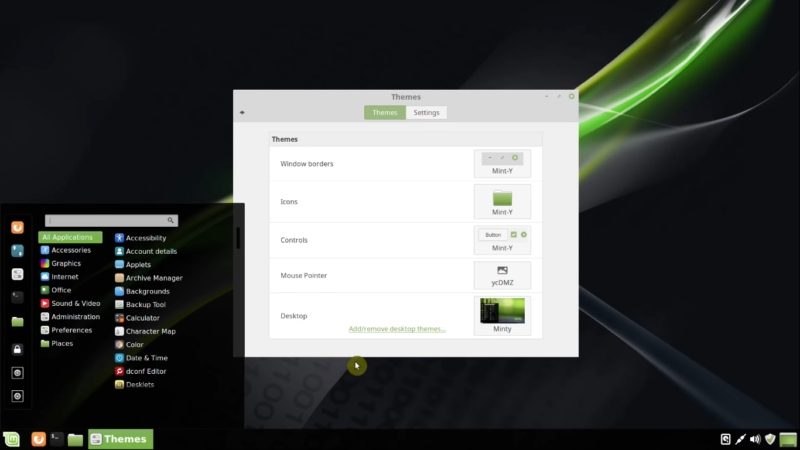
Minty desktop theme
But my favorite is Minty theme. However, all depends of you. So, you can select what you like.
If you do not like some themes, you can go back to Add/remove desktop themes. Right click on the theme, and uninstall it.

It is always advisable not to have too many themes installed so as not to occupy unnecessary space.
Install themes from Gnome-look website
There are more desktop themes which are not available for install from within the Linux Mint settings. You can search for more themes at Gnome-look.org, but keep in mind that many of themes here are not fully compatible with Linux Mint Cinnamon desktop.
Note: Some of the themes that you can find there are obsolete. In other words, you need to spend quite some time to find something decent.
In order to find a desktop theme to change the Linux Mint themes, you need to look at GTK3 themes. For example, I found OSX Arc Collection.
Install themes from a .deb package
To install this theme, you have several options. The debian package and tar.gz archive. If you want the full theme pack, you need to install the deb package.
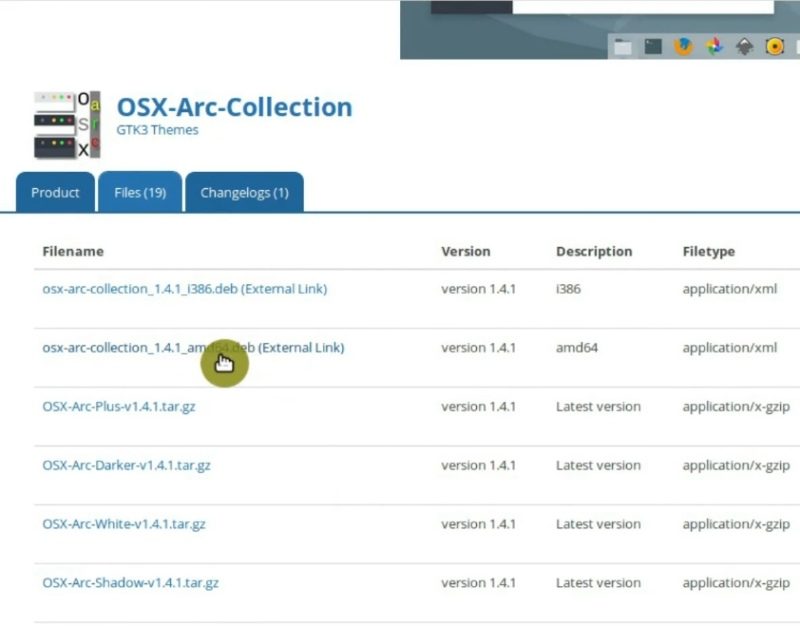
First, download it. Then, open it with Gdebi and install it.
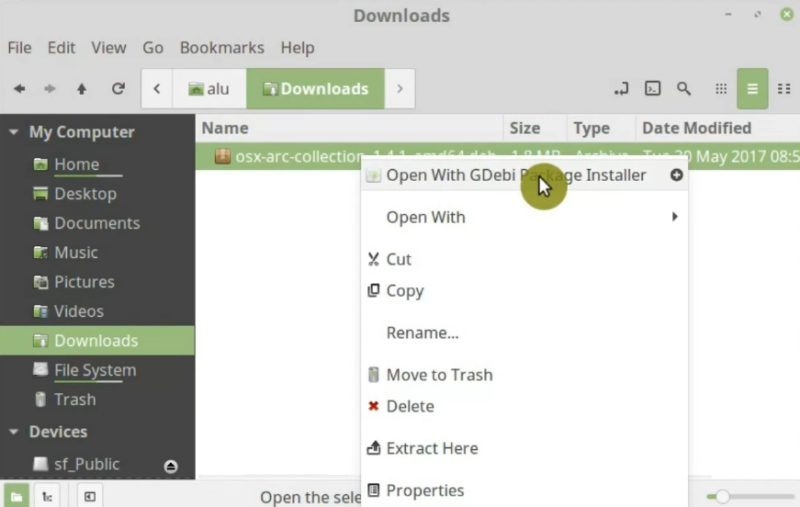
This is a good way to install a theme. In fact, it is the easy way.
Install themes from archives (zip, tar.gz)
However, not all themes have deb package available. For example, some themes are available as archives (zip, tar.gz, etc). Installing such themes requires some more steps.
Install GTK3 theme
Chrome OS theme is available only in a zip archive.

To install it, first, download the archive → go to your Downloads folder → Extract it.
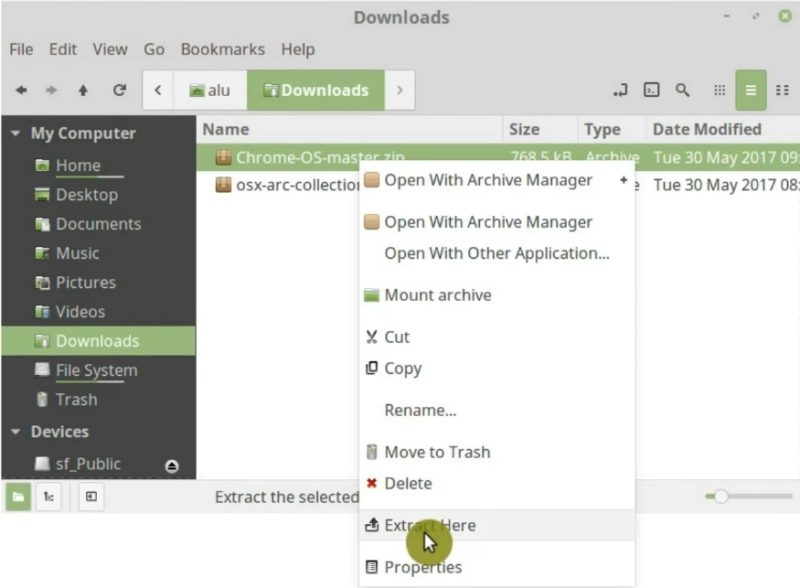
Next, move the extracted theme folder to .themes folder in your home directory.
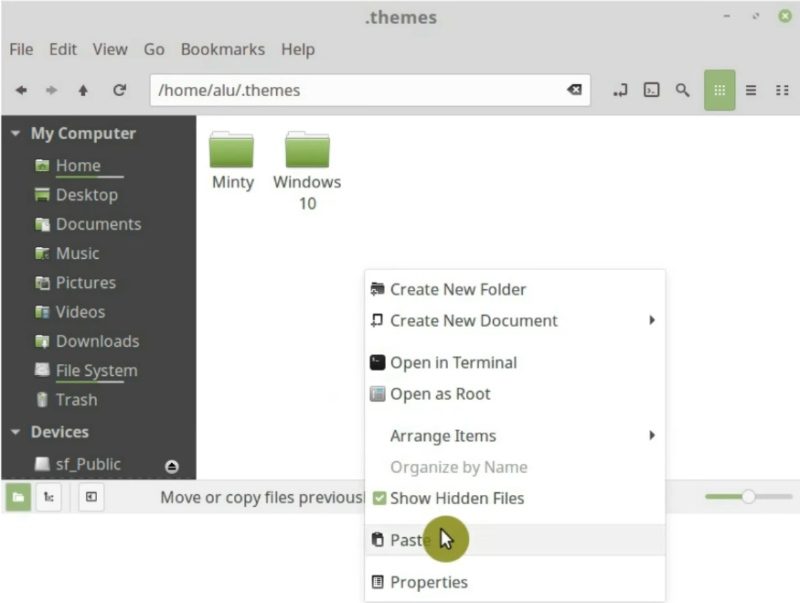
Note: You can go to ~/.themes by typing it in the file manager path bar. Or you can show hidden files and navigate to .themes with your mouse. If you do not have the ~/.themes folder, simply create it in your user home folder.
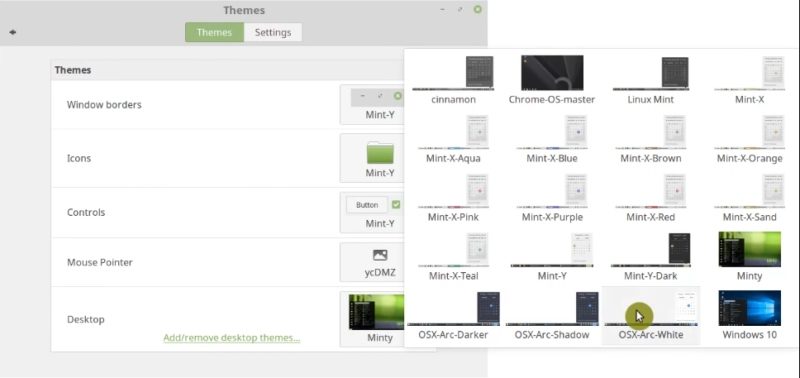
Now, when you go to the theme settings, you will find the two new themes Chrome OS and OSX Arc Collection.
Install Windows borders
Following the same steps, you can install Windows borders. For that, you need to select Metacity Themes on Gnome-look website and select the theme you like.

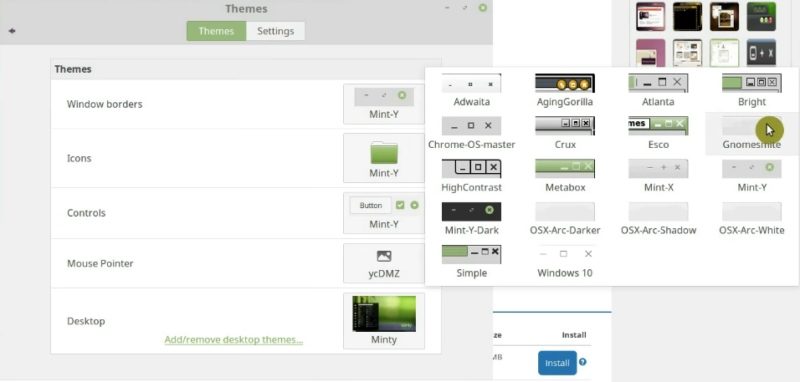
For example, Gnomesmite theme looks quite nice. It resembles OS X. Let’s install it.

Again, Download the themes. Extract the archive. Then, move the extracted theme folder to .themes folder in your home directory. Identically as before.

Now, when you go to the settings, in the windows borders, you can find and activate the theme Gnomesmite.
Install Icons
Similarly, you can search and install Icons themes. Again, go to Icon Theme section on Gnome-look.org and find the theme you like the most.

For example, let’s install Plataro icon theme. It looks nice.

Again download the theme, then, extract the archive and move the icon theme folder to .icons folder.
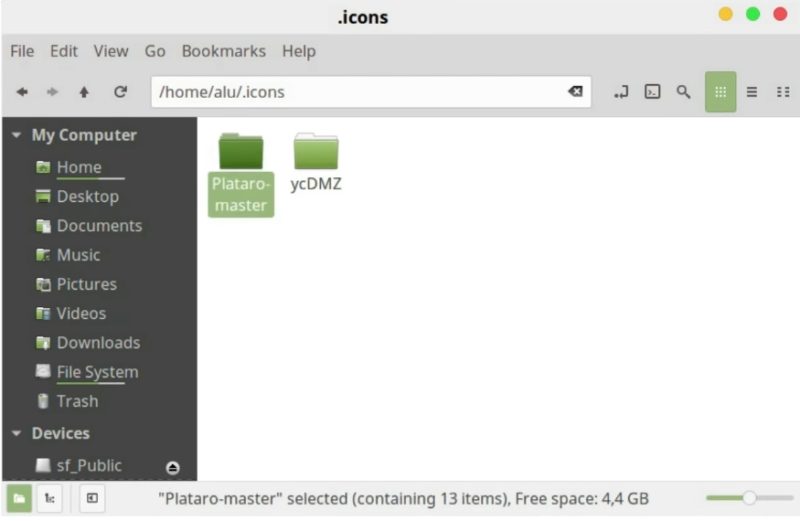
Note: If you don’t have the .icon folder, you can create it.
Now, when you open the icon themes in the settings, you can select Plataro icon theme.
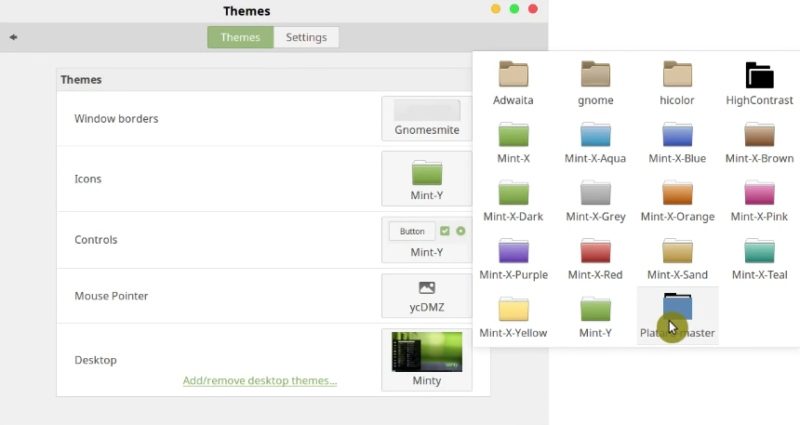
Controls themes
The themes for the controls are the most tricky. If you open it, you will see some themes I have just installed like, OSX Arc Collection.
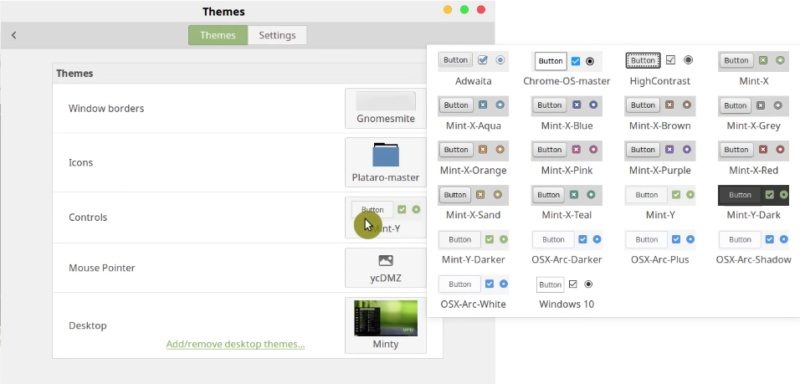
Remember, I mentioned that some of these themes do not work correctly. For example, Windows 10 theme which we installed from within Linux Mint settings looks wrong.

Note: I was able to fix it to some extent by going to the .themes folder and inside the Windows 10 folder remove gtk-3.20 and rename gtk-3.0 to gtk-3.20. Next, log out and log in.
Mouse pointer themes
Changing the mouse pointer is the same. Search for Cursors theme on Gnome-look.

Download the theme you want. Extract the file and place it into .icons folder.
For example, the cursor theme I use in video tutorials is ycDmz.

Now you know how to install themes from Gnome-look.org. There are many themes but some give problems. So, you will have to do some tests.
Install themes from PPA repositories
So far I have taught you to install themes from system settings and from Gnome-look, but there are other places where you can find some themes. For example, from a PPA repository. A PPA is an external repository where developers can distribute their packages for Ubuntu and Linux Mint.
I would like to show you two nice icon sets.
Numix Icons
One is Numix Icons. These are very popular icons in different desktops. I like Numix Circle the most.

To install these icons, you need to open the terminal and run this command to add the repository.
sudo apt-add-repository ppa:numix/ppa
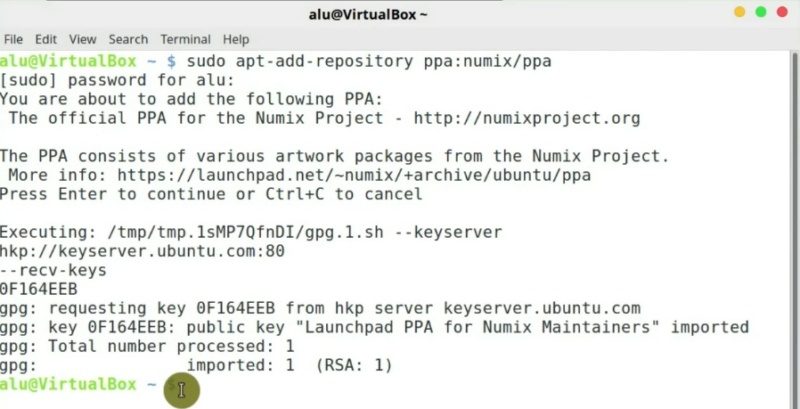
Next, you need to refresh the APT cache.
sudo apt-get update
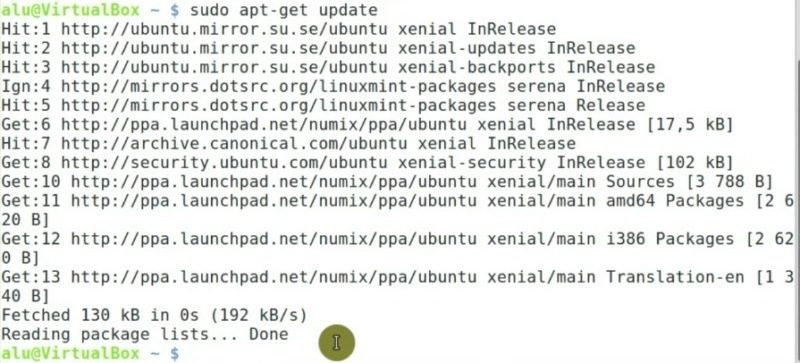
Then install the icon theme from the terminal.
sudo apt-get install numix-icon-theme-circle
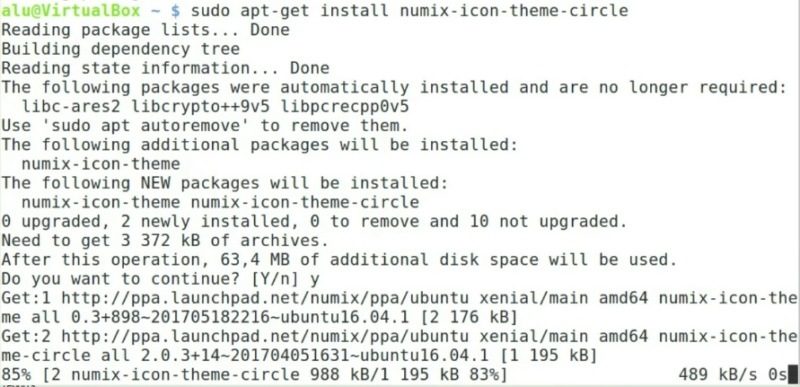
Now, the Numix icons should be available in your settings.
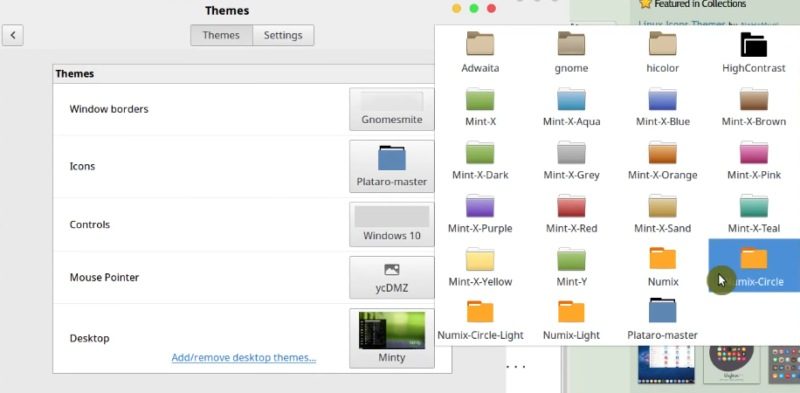
Uniform icons
Another icon set I would like to show you is Uniform icons.

These are very interesting and unusually shaped icons. The installation process is similar as for Numix icons.
Open a terminal and add the Noobslab repository.
sudo add-apt-repository ppa:noobslab/icons2

Refresh the APT cache.
sudo apt-get update

Now you can install the icon theme.
sudo apt-get install uniform-icons

Now, several Uniform icon sets are available in the settings.
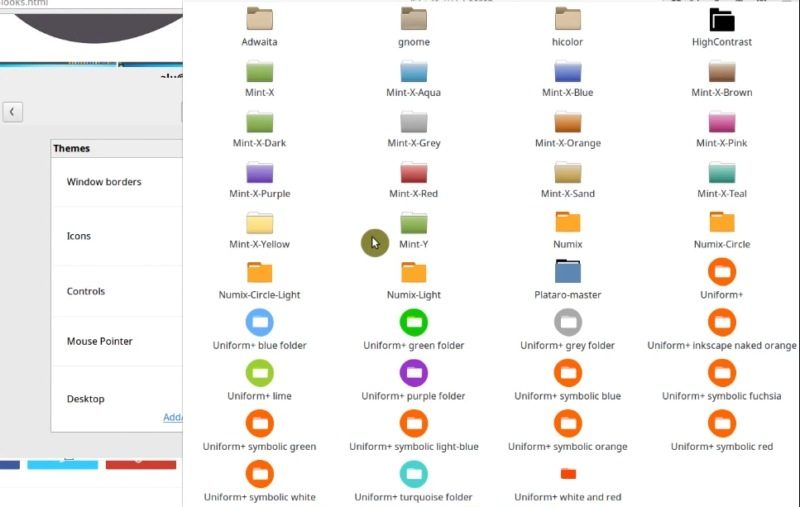
If you find a theme or icon set with PPA, you can install it the same way. Just be careful about the commands you run.
Install themes from Github
Sometimes when you search for a theme, you can end up at Github, which is a hosting for many open source project.
Let me show you how to install a theme from a Github by installing this nice iOS theme.

Usually, all the instructions are provided in every repository. Simply follow them. For example, this theme can be installed extracting the archive to .themes folder.

So, you already know the process, download the file, extract the archive and move it to .themes folder.

It is now available to apply in the settings.
Install themes from the Software Manager
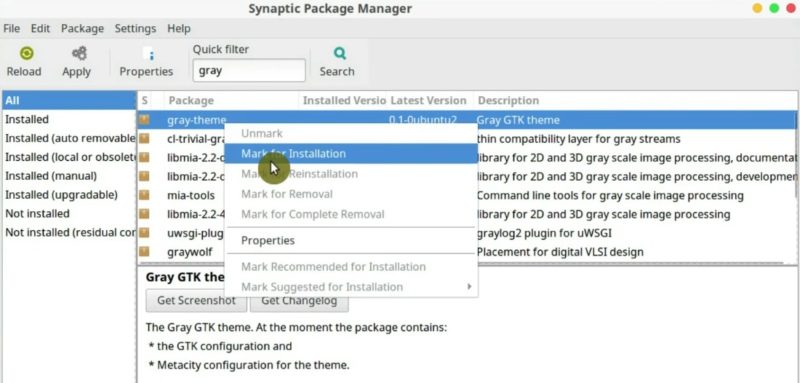
You can also install some themes from your software manager. If you use Linux Mint Software Manager or Synaptic package manager it doesn’t matter. I prefer synaptic because it works little faster than the Mint Software Manager.
In Synaptic search for -themes or -icons.
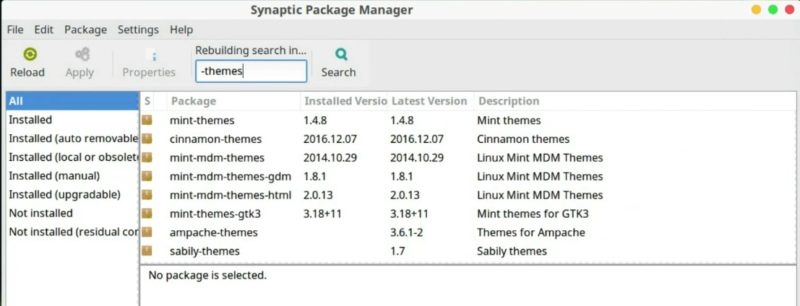
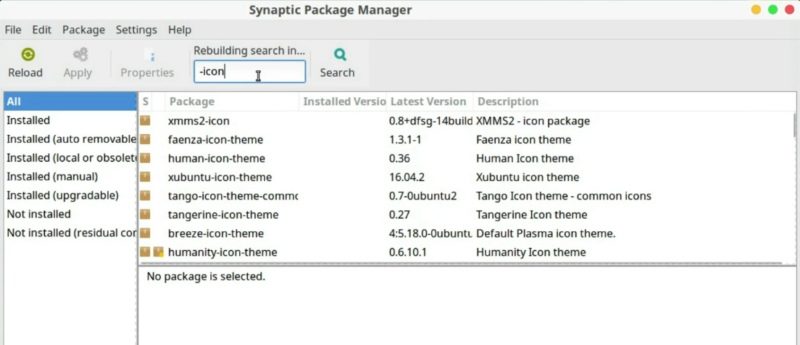
There are no many nice themes, but some of them are very good. I recommend trying: numix-gtk-theme and gray-theme.
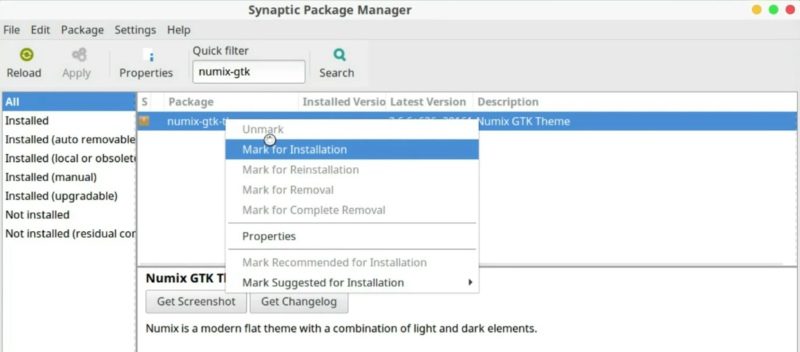
Some more of my favorite icons and themes
Arc icons
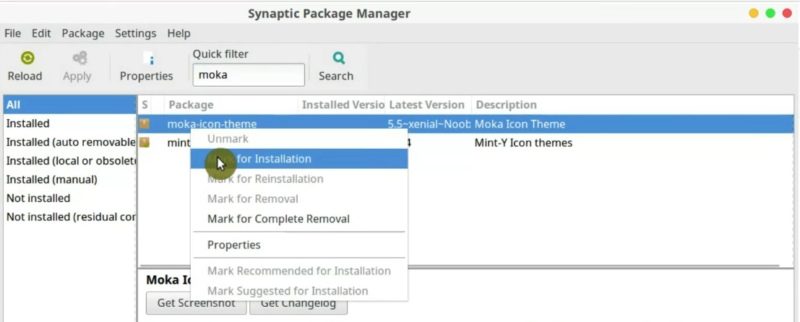
I have also installed arc-icon-theme from Github which is another very nice icon theme. To install it, I followed the process you already know. Download the .zip file, extract it and move it to the .icons folder. However, arc icon theme requires Moka icon theme. To install Moka, I used Synaptic.
Flat icons
Another themes that I installed from Synaptic are ultra-flat-icons and ultra-flat-icons-orange. Install them the same way as Numix icons.
First, add the repository.
sudo add-apt-repository ppa:noobslab/icons

Refresh the APT cache.
sudo apt-get update

Finally, install the themes.
sudo apt-get install ultra-flat-icons ultra-flat-icons-orange

Now, you can select what you like the most from this bunch of themes and icon packs.

My favorite combinations
Finally, I will show you my favorite combinations.
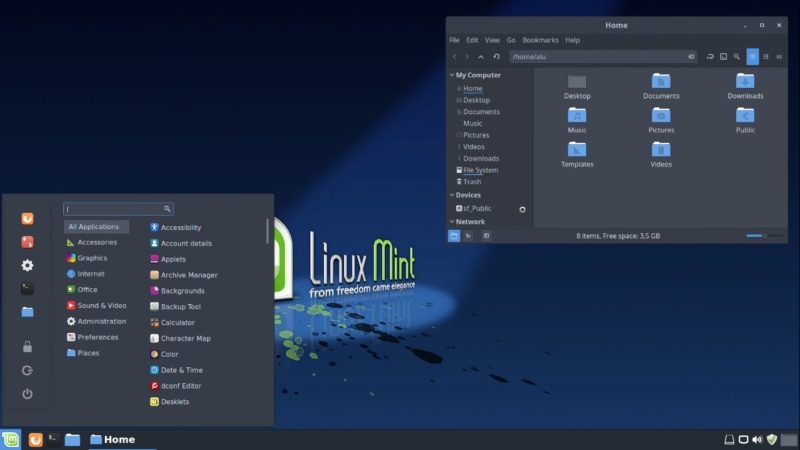
For the dark theme, usually I recommend:
- Adwaite – borders.
- Arc – icons.
- OSX-Arc-Darker – controls.
- OSX-Arc-Darker – desktop theme.
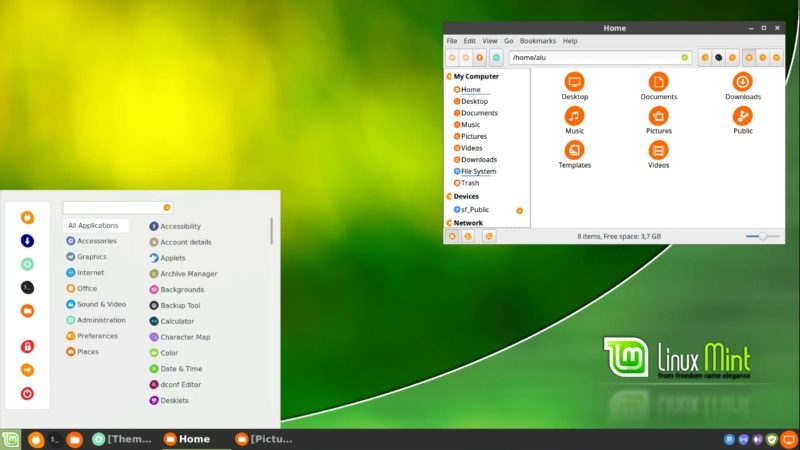
For light theme, I find quite pleasant:
- Numix – borders.
- Uniform + inkscape orange - icons.
- Windows 10 – controls.
- Mint Y– desktop theme
And if you want a theme resembling Mac OS X, ordinarily I recommend using:
- iOS – borders.
- Ultra-Flat - icons.
- iOS – controls.
- OSX-Arc-white– desktop theme
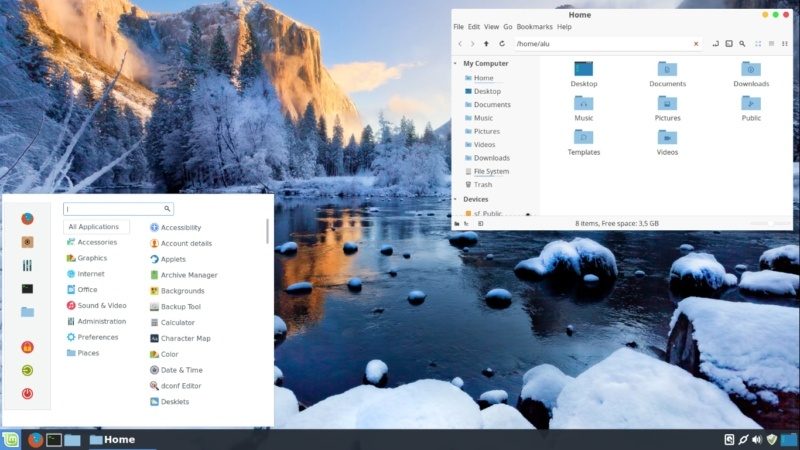
So, I hope you will find your favorite combination. And this is how you change the Linux Mint themes.
Conclusion
Generally speaking the customization is one of the biggest advantages of Linux. You can change the whole look with little effort. In addition, you can even mimic the look and feel of other operating systems. On the other hand, Linux Mint has a nice theme by default but everything can be improved.
You already know how to change the Linux Mint themes. So, let me know about other themes that you are using.
Also, check my other posts on Linux Mint, you will find many useful advice.
 Never miss a post from us, subscribe to our newsletter
Comments
Gispo Gavardo
ThanksThanksThanksThanksThanksThanksThanksThanks a lotlot
Gispo Gavardo
thabk you souch, really appreciated!
jelabarre
The Gnome-Look site seems to no longer have “Metacity” themes. As usual, the Gnome designers are following the extremely fugly amd bad design failurwes of Microsoft and Apple. It seems the so-called “Design” schools have decided that textures are verbotten, and the only thing that is acceptable is black on black on black. Dark text on a dark background, no differentiation between foreground and background windows, and if you can actually SEE what’s on the screen, they’re sure to ban that theme the next time around.
Otto Leipälä
There should be links to all of themes used it in this guide.
Otto Leipälä
I mean these links should be listed somewhere in full list, now this is hard to read as links are middle of screenshots.
Average Linux User
Here you go:
OSX Arc Collection Chrome OS theme Gnomesmite Plataro ycDmz Numix Icons Uniform icons iOS theme Arc icon theme
Isaac
Great Mac Os
Average Linux User
It’s one of my favorites too 👍
Henrique
You helped a lot here! thank you so much! :-D
Average Linux User
Thank you for the comment 😀