Install Debian Testing the right way!
Install Debian Testing to get the latest hardware support, kernel developments, and newer programs. Debian Stable is stable but it also feels pretty outdated. Install Debian Testing Xfce and you will get more up-to-date software without compromising the stability.
Here is the smoothest and probably the very right way to install Debian Testing.
What is the right way to install Debian Testing?
A reliable way to install Debian testing from scratch is to do a minimal installation of Debian Stable with the stable installer image, then upgrade from Debian Stable to Debian Testing, and install desktop environment and other necessary packages.
Alternatively, you can also use Debian Testing Image, but it’s not recommended because Debian Testing image is meant to test the installer not to install Debian Testing.
You need to install Debian Stable first and then upgrade to Debian Testing. This is not a complex process but there are a couple of steps which are very important and will discuss in this post.
Selection of the ISO file
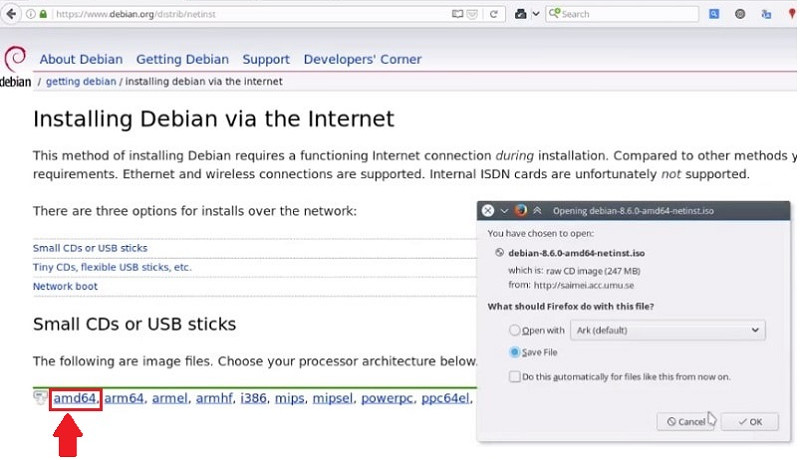
Download the ISO file from www.debian.org
I recommend you to go with the network installer. It contains just the minimal base system packages to load the system and then download the rest of packages over the Internet. We will install only the basic packages from the Stable branch of Debian, so there is no need to download a large ISO.
One more key query, there are many installation ISO files but which one will fit the best for Debian Testing installation? For a normal PC system download the amd64 (64 bit) or i386 (32 bit) ISO files.
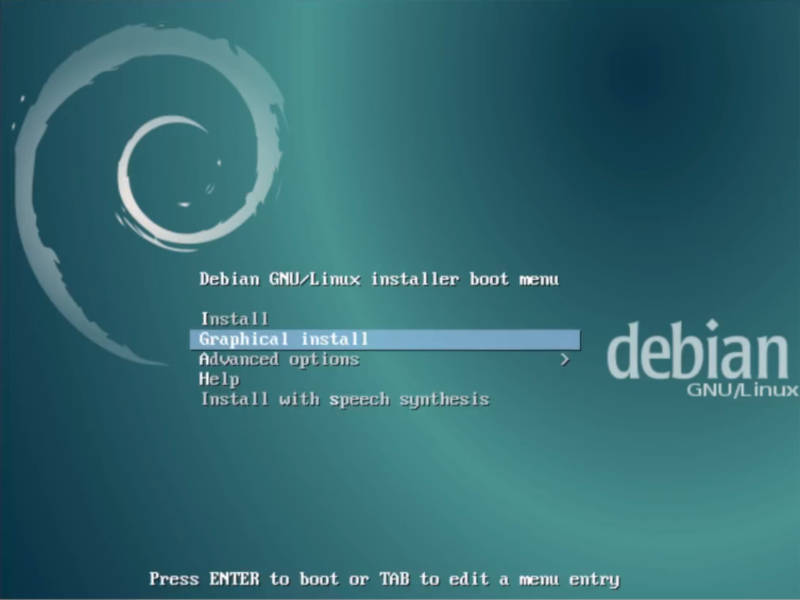
Base System Installation
Choose the Graphical Install, for newbies it is recommended.
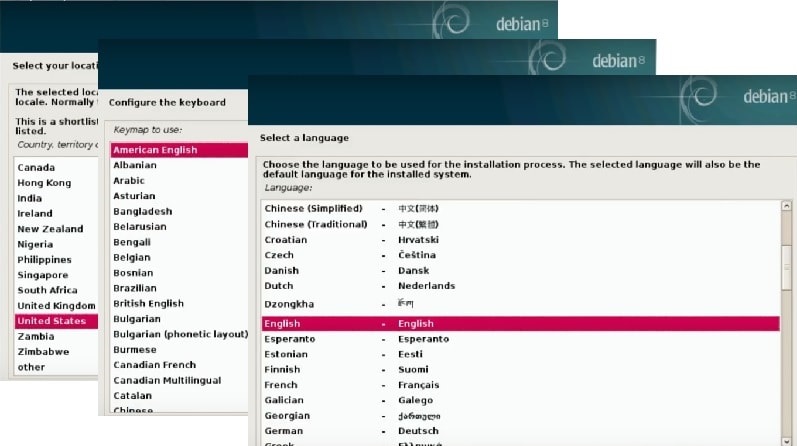
Basic settings
Select the language, location and then select the keymap, i.e. the keyboard layout. The latter step is important, choose the keymap carefully, different keyboard layout will make your typing tough, however, it could be changed later.
The next steps are to some extent intuitive. Set the hostname of your system. This is the name of your personal computer, the default is debian, you could change it. This could be changed later too.
Domain name, leave it blank for a normal desktop system. This domain name plays a significant role if you are using this machine as a server, I usually keep it empty.
Now set the root password, it is always good to set a long difficult password. But you can also leave it empty and later when you set your user password, it will also be used as a password for administrative tasks. However, a root password will add an extra layer of security to your system.
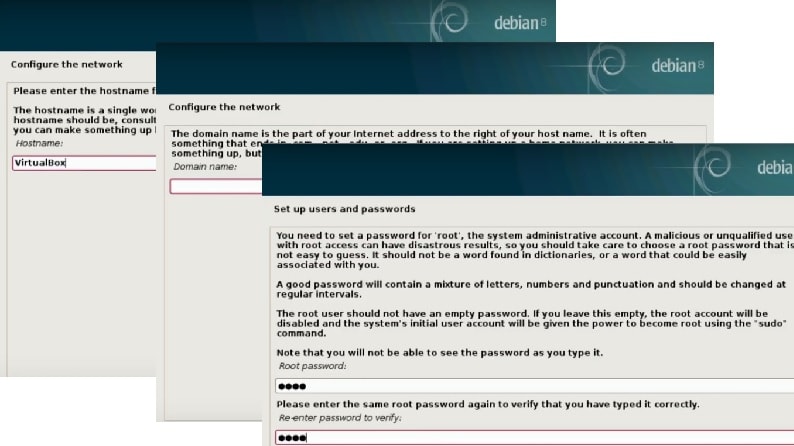
Setup the username and password for the normal user, i.e. may be your name, I’m setting it to Average Linux User (ALU) for example, again choose a good password for the user account.
Partition your Disk
Options to Create Partitions.
You get many options to Create Partitions from the simplest automatic partitioning to manual. I believe there is no need to show automatic options. I usually create partitions manually so that I can have more control. That is what I will show you.
Manual Partitioning
If you are inexperienced with Linux partition tables, select Guided – use entire disk. I select Manual and click on Continue.
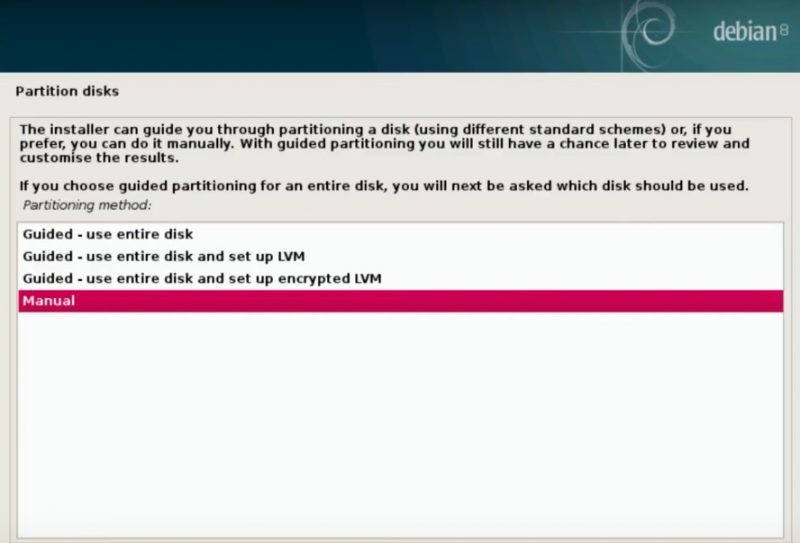
My partition setup is very simple because - it’s only one / partition. Linux is stable enough now, so you can use only the root partition. For swap, you can use a swap file. But of course, you can also use /home and /swap partitions.
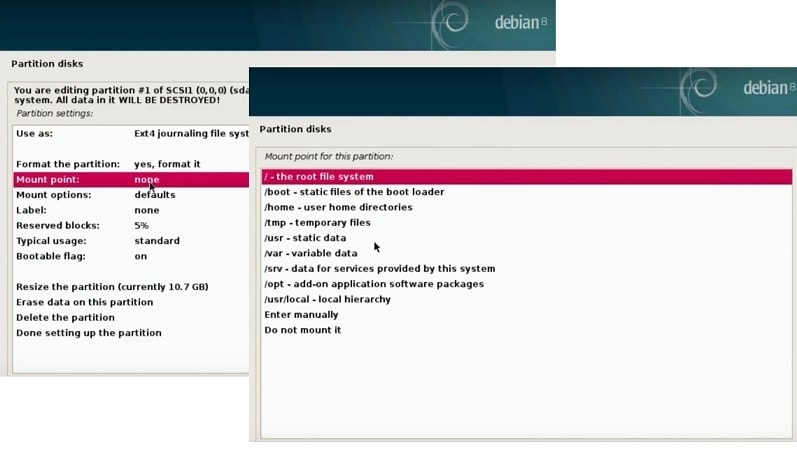
In the Select the Disk menu, you are given a list of available file systems. If you don’t know which file system to choose, go for ext4. Ext4 journaling file system is a reliable file system.

Format the partitions
In the next step, you have to define if you need to format the partition. Format your / root partition. But be careful at this step if it is your /home partition and you have important files on it, DON’T format it.
Assign mounting points
For the mounting point, you select / - the root file system for your system partition. But if it’s your home partition you need to choose /home - user home directories. The mount point specifies at which location in the directory hierarchy a device or disk partition appears.
Label Partitions
You can label the partitions to assign them some explanatory names. You can also skip labels. For example, I usually name my system and home partitions with root and home, respectively. So, it is easier to navigate between partitions.
Finish Partitioning
After required settings select Done Setting up the partition to complete the partition creation for Debian. Then click on Continue.
And then select the Finish partitioning and write changes to disk to finish the partitioning.

The next steps are also intuitive, they will install the basic system utilities.
Configure Package Manager with a Network Mirror
Now choose if you want to use a network mirror or not, I recommend to select YES. Because you are using the Debian Netinstall image and most of the packages will be downloaded over the internet, you will benefit from using a network mirror. Select the country where the network mirror that you want to use is located (usually this is the country where your Debian system is located):
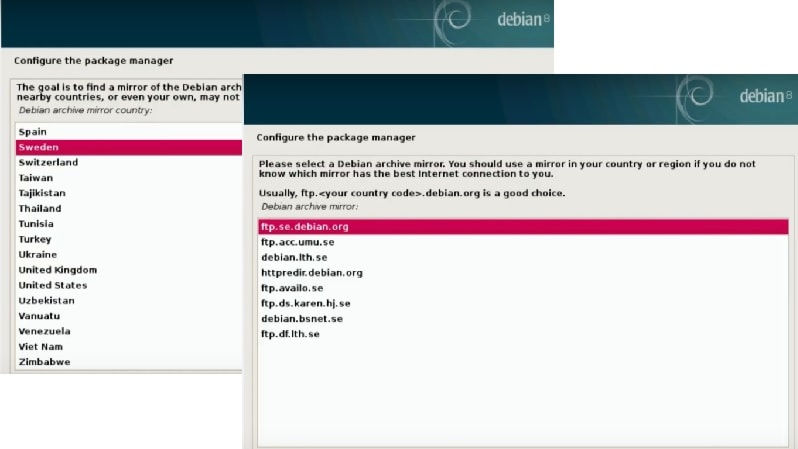
For the mirror name, you can choose any of the listed ones, but usually the top version works fine.
Configure Proxy Setting
As you might have guessed from the name, an internet connection is required during the installation. This might be a problem if you are installing Debian in the network environment where internet access is restricted by a web proxy. So, you can set your proxy here.

Unless you use an HTTP proxy, leave the following field empty and hit Continue.
Enable Popularity Contest
The popularity contest program will anonymously submit statistics about the most used packages on this system to Debian developers from time to time. This information helps the Debian Community in making decisions such as which packages should go on the first CD. It also helps improving future versions of Debian so that the most popular packages are the ones which are installed automatically for new users.
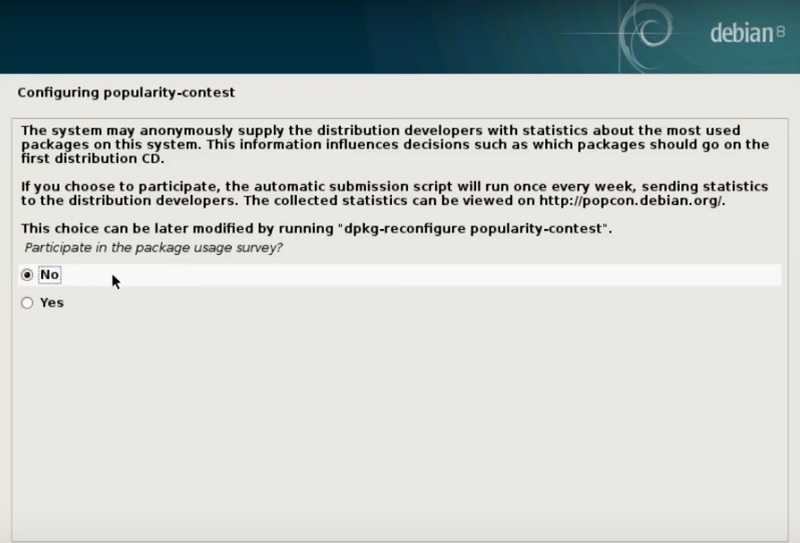
You can skip the package usage survey by selecting No, but I recommend you to put Yes here.
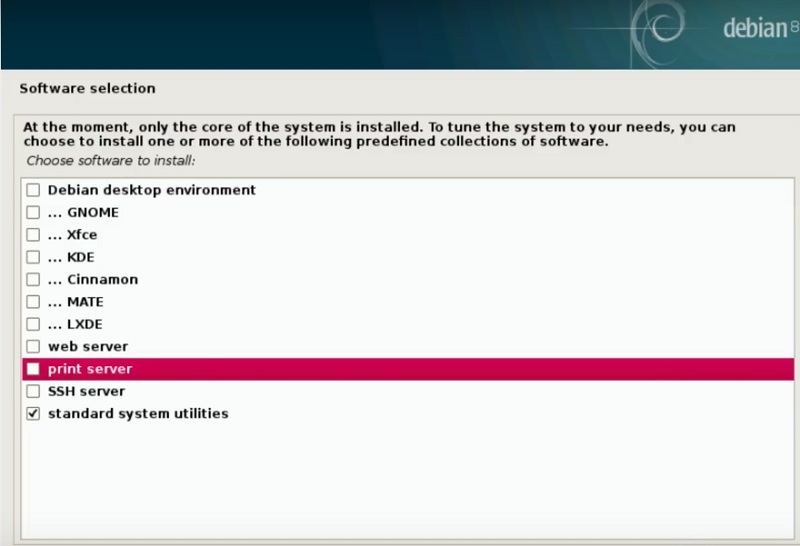
Critical Step for Minimal Installation!
This is the most important step of this guide because we want our installation to be as minimal as possible. Choose only standard system utilities. We will install all the extra packages manually later on.
Install GRUB Bootloader
GRUB is the GRand Unified Bootloader, probably the most popular BootLoader that is used to boot most Linux operating system. When you’re asked Install the GRUB boot loader to the master boot record? select Yes.
And then you need to choose the hard drive where you installed your system.

Finish the Base System Installation
OK, so we are done with a minimal install of Debian Stable.
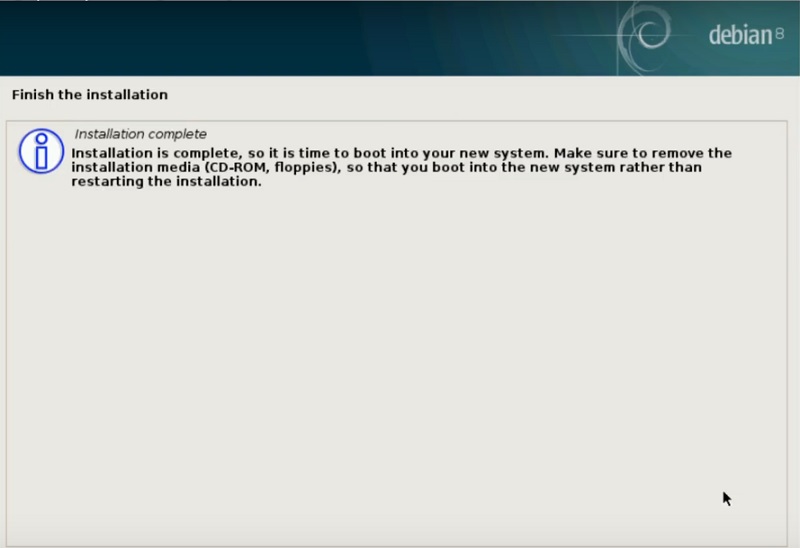
From this step, the base system installation is finished. Remove the Debian CD from the CD drive and hit Continue to reboot the system.
Upgrade Debian Stable to Testing
Log in to the new system at the command line interface with your username and password.
This is a minimal Debian install, so there is no GUI installed. We will install the Xfce graphical interface after the upgrade to Debian Testing.
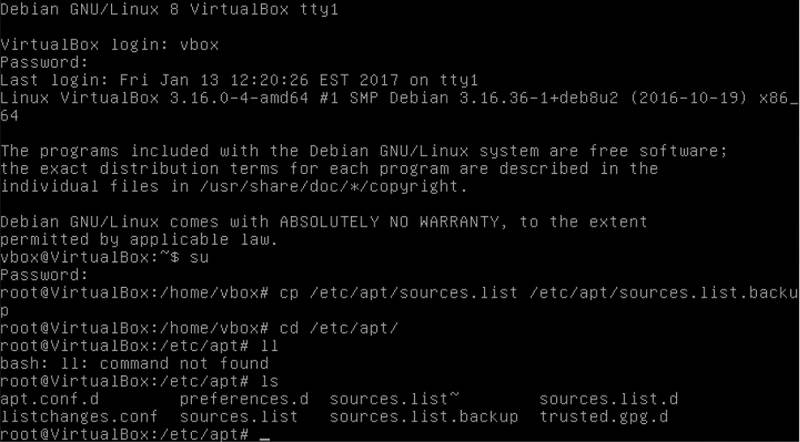
Change to root
Upgrading a system to the Testing branch requires editing some system files, and you would need root privileges for that. So, after the login, you have to switch to root. Use the su (substitute user) command to get a root shell. If you set only the user password, run sudo su -. Note that when you use this command it will ask for the root password.
Edit source.list
Next, backup the original of /etc/apt/source.list:
cp /etc/apt/sources.list /etc/apt/sources.list.backup
You can restore it if needed. It is a good practice to make a copy of every system file you edit.
Now, you can edit the original file with the Nano editor:
nano /etc/apt/sources.list
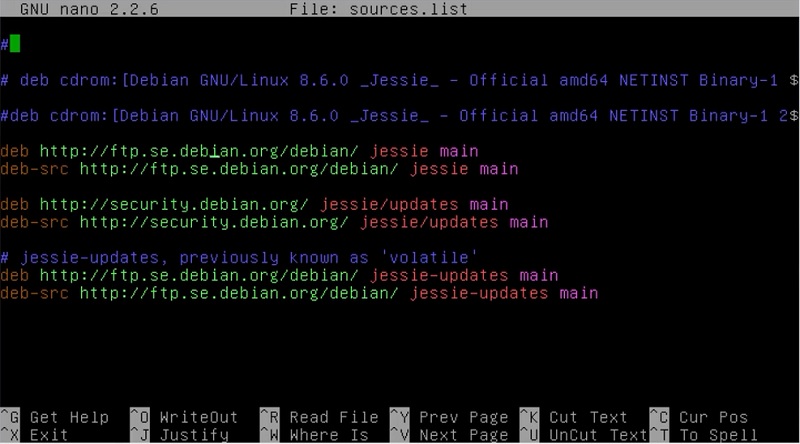
In this file, we have all our sources listed as buster. We need to replace all these buster names with testing.
You can edit it right in nano. But it’s a bit laborious to change every word here. I will demonstrate you an intelligent solution, if you want to change all occurrences of buster to testing, you can make the changes using the sed command in this way:
sed -i 's/buster/testing/g' /etc/apt/sources.list
After that command has executed all buster are replaced with testing. The -i option stands for “in-place” editing. It is used to modify the existing file. You can check if changes took place by opening the file with Nano again.
Upgrade packages to Debian Testing
Next, we need to update the local package index with the latest changes made in the repositories. To that end, run:
apt update
This will display a database of available packages from the repositories defined in the /etc/apt/sources.list file.
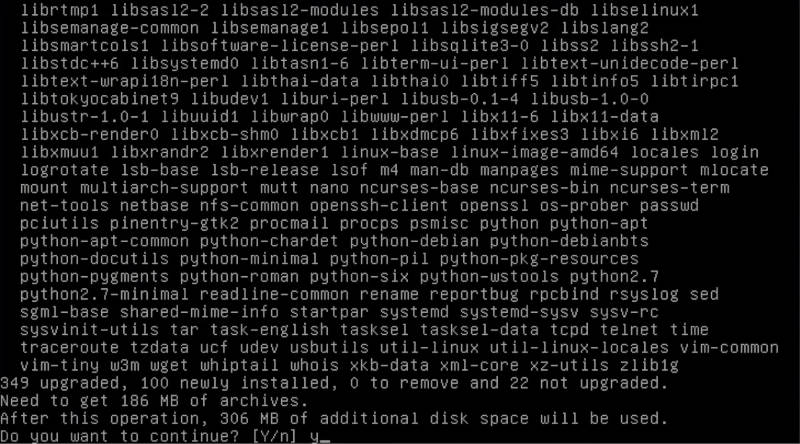
Next, upgrade the packages:
apt upgrade
Choose YES to agree for the installation of all listed packages. When you are presented with the text showing all changes, just scroll with the space key and press the Q key to quit.
upgrade doesn’t upgrade all the packages, upgrade is used to install the newest versions of all packages currently installed on the system from the sources listed in /etc/apt/sources.list.
dist-upgrade, on the other hand, upgrades all the packages similarly to upgrade, but it also capable of handling dependencies related with new versions of packages, so you also need to run dist-upgrade:
apt dist-upgrade
Choose YES to agree to upgrade the distribution.
When all the packages are upgraded, you have successfully upgraded to Debian Testing. Reboot the system by running the reboot command:
reboot
Install the Xfce desktop
After the reboot, we will install the graphical interface. Login to root again (use the su command) and install Xfce as follows:
apt install xfce4
Choose YES to agree to install the necessary packages.
Once apt finishes, reboot and if all went well, the next screen will be the newly loaded Debian Testing Xfce.
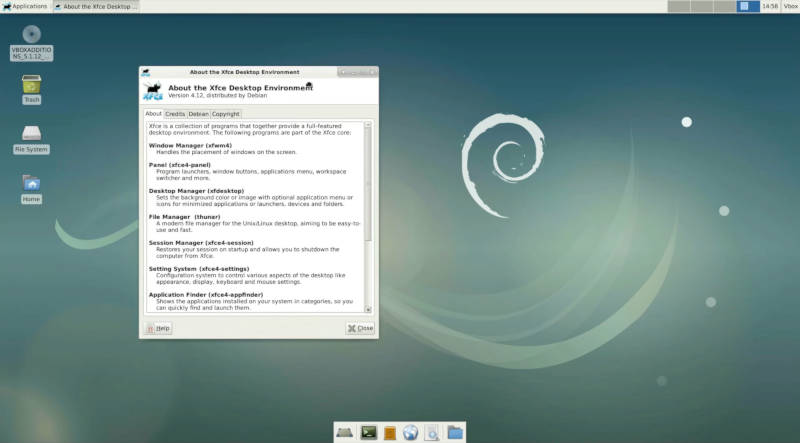
So, that’s all from this article. Debian Testing Xfce has been installed successfully. You can start configuring and customizing it.
I hope this article helped you. I also recommend you to learn how maintain your Debian installation.
If you face any problem, question or suggestion please let me know by leaving a comment below. And hey, please share this article with your friends.
Comments
Chris
Just tried this method and am getting, sed: no input files anybody care to help me out with this
Vinay
I have a Bullseye Xfce system. Can I upgrade to testing by editing the sources.list file?
Will that be safe?
frab
The article is great! Exactly what I was searching for. It enabled me to get Debian up and running on my new hardware with an AMD Ryzen 4700U processor.
Thank you very much!
Chad
Thanks! Great article I used it to upgrade to testing because my computer did not have audio support in the stable kernel. Your article was clear and concise. The upgrade worked well and solved my problem. Thank you.
Average Linux User
Great! Thanks for sharing your experience.
bokstavsordning
I followed this guide just now for debian buster. I got errors when running apt update. Solved by changing testing/updates to testing-security in sources.list
Average Linux User
Thank you for sharing this info.
Joz
Thank you! It worked like a charm.
Average Linux User
Joz, you are welcome!
Spike Py
You write: “I will demonstrate you an intelligent solution, if you want to change all occurrences of jessie to testing, you can make the changes using the sed command in this way: sed -i 's/stretch/testing/g' /etc/apt/sources.list After that command has executed all jessie are replaced with testing”
No … you replace stretch with testing but in the file there is not stretch, there is in your case jessie, now days there is buster so it should say “sed -i 's/buster/testing/g' /etc/apt/sources.list”
Average Linux User
Thanks for the comment. I update the article to use
buster.yeeterdeeter
This is definitely not the right way, at least according to Debian's wiki page on this topic. https://wiki.debian.org/DebianTesting
'The reliable way to install testing from scratch is to do a minimal installation with the stable installer, then upgrade from stable to testing (see below). '
'Alternatively, you could use the testing image of the debian-installer, but note that the testing installer is more for testing the installer than for installing testing. Bugs in the testing installer should be filed against the debian-installer pseudopackage. '
Average Linux User
This is exactly what I describe in this post. Where is it different from Debian Wiki?
dman
Yea, I don't think he read the article at all.
daniel
Nice article! It helped me getting started with debian testing thank you!
Average Linux User
Happy to hear that. Thanks for commenting.