Burn ISO to USB in Linux with GUI app
Nowadays it is very common to use USB drives to install Linux distributions. This enables reuse and better installation time with respect to CDs or DVDs. In this post, I will show you how to burn an ISO to a USB drive in Linux using a graphical program called Etcher.
INTRODUCTION
I recently wrote how to make a bootable USB drive on any Linux distribution using a terminal. However, it is true that there are people who do not like using the terminal. Now, I will do the same but using Etcher.
Etcher is a cross-platform graphical application to burn ISO images to USB drives. It is made with JS, HTML, node.js, and Electron. So, it is cross-platform and you can also use it on Windows and Mac OS.
VIDEO TUTORIAL
Install Etcher
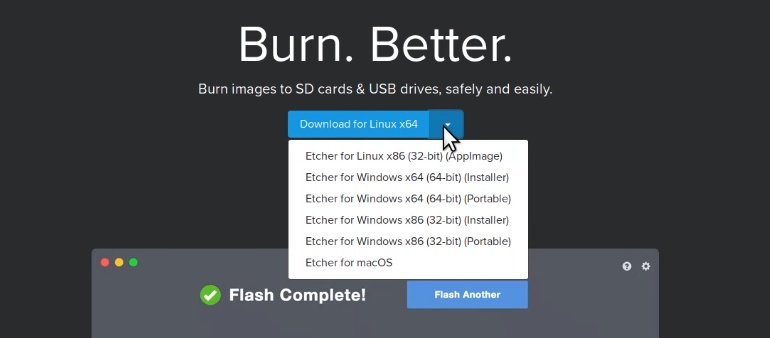
First of all, it is necessary to download Etcher. To do this, go to the Etcher website. Usually, it automatically defines your system and offers you to download the version for your system. However, if it does not detect your system, or detects it wrongly, you can click on the arrow next to the download button and select the image you want to use. In my case, I will download the 64-bit Linux.
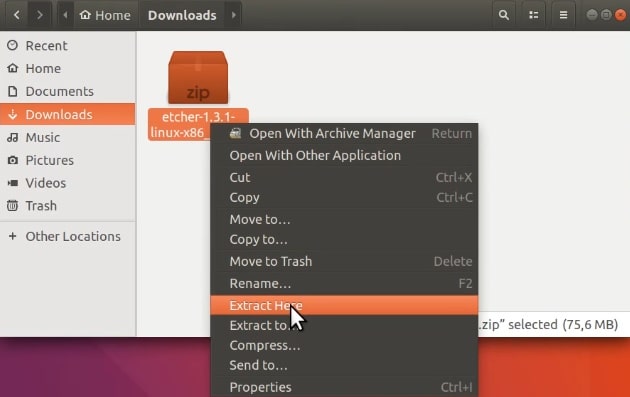
When the download is complete, open your file manager and extract the archive.
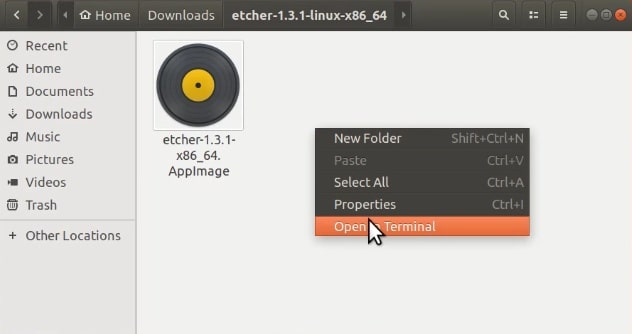
Then, enter the Etcher folder, and you will see a single file with extension .AppImage. If you double-click on it in Ubuntu, it should start automatically.
Possible Etcher installation problems
However, if it does not start automatically, it means there was a problem launched in this program. To check what is wrong, it is necessary to run the program from the terminal. Yes, unfortunately, you may need to use a terminal sometime. But there is nothing too complicated. So, click with the right mouse button in the file manager and select the Open in Terminal option. This will open the terminal in the current working directory.
Next, you need to run the file in the terminal, to see if any error occurs. You run the program in the format ./PROGRAM_NAME. You can also list the available files inside the folders to check the correct file name of the program. In this case, it will be similar to this:
./etcher-1.3.1-x86_64.AppImage
And when I try to launch Etcher from the command line, I see this error message:
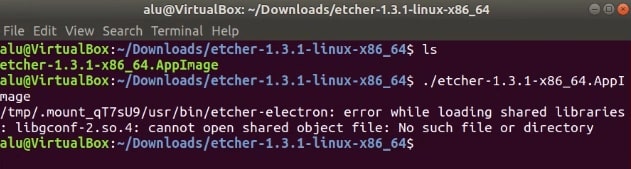
So, as you can see in the image, the problem is that the libgconf-2 package is not installed and it is a critical component of Etcher. So, the solution is to install it. You can search for it in your package manager (preferably Synaptic), or run this command:
sudo apt install libgconf-2-4
After that, Etcher should start on double-click on its file in the file manager.
Burn ISO to USB in Linux using Etcher
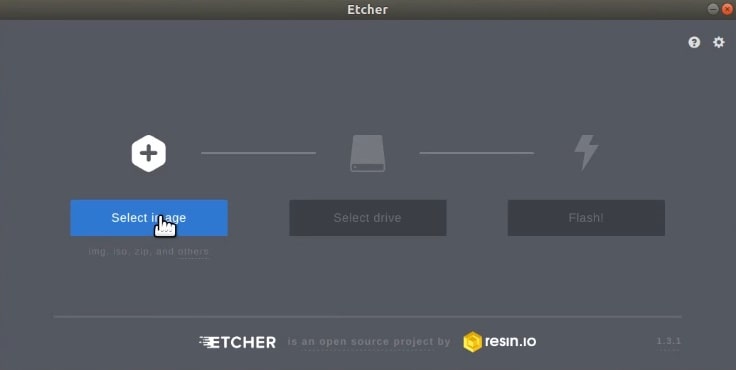
Once Etcher has opened, the first step is to select the ISO to burn. To do this click on the Select Image button.
Navigate and select the ISO. In this case, I will just use a mini ISO of Ubuntu.

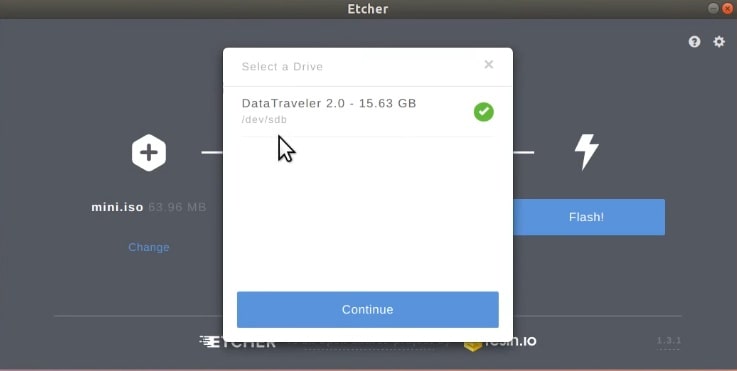
Next, you need to select a USB Drive where to write this ISO file. Etcher usually finds USB flash drive automatically but make sure it has selected the right USB Drive because if you have several USB drives connected to your computer it might select the wrong one. So, you can change the USB drive by clicking on the Change link.
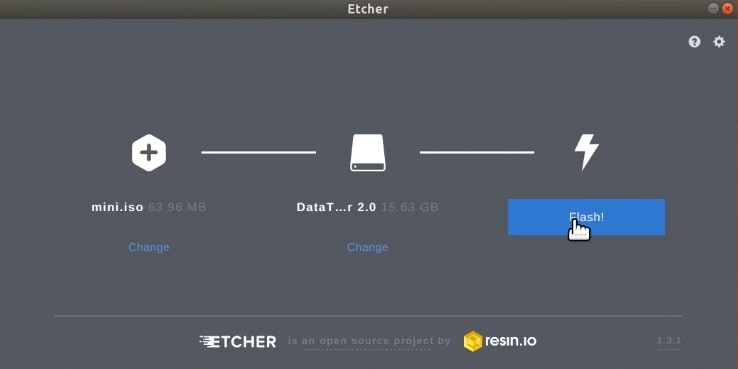
When you have done this, all that is left is to start the burning process. To do this, click on the Flash! button.
If there is no error, at the end of the whole process you will see a window like this one.
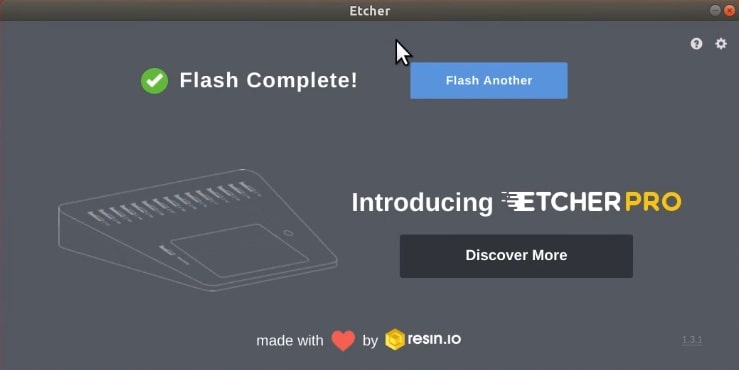
And that is it, an ISO has been burned to the flash drive successfully. Now, you can reboot your system and select the USB Drive during the boot process and it will boot the ISO image you have just written to USB flash drive. The next will be the installation of your favorite Linux distribution.
Restore your USB after the installation
It may also happen that after you use your USB as a bootable drive, it does not function as a regular USB for data storage. If this is the case, you simply need to wipe its file system and format it to normal. I have showed this procedure in this post
CONCLUSION
Etcher is a very user-friendly and reliable program to make a bootable USB Drive in Linux with the graphical interface. It is a cross-platform application, so you can also use it in Windows or Mac. Finally, if you value open-source software, Etcher is open source
If you like this post, I recommend you to read about encrypting hard drives in Linux.
Comments
Nazar
That was just great. Didn’t expect to have the intalation as easy as possible and as well running so nice.
Average Debian User :) (A Cool Dude.)
I had an error in running etcher AppImage which I was automatically aborted while trying to run it in my Linux Debian 10 system. Now I just tried being a root (sudo -i) and running etcher. Now it did work.
Andres Moreno
Sadly, Etcher does not support Windows ISO burning. A message will show alternative programs (maybe not so user-friendly) that can do the job.
Lloydixxx
Exactly. Tested but the USB i'm creating is a non-bootable one :( :( :(
Average Linux User
This post assumes you want to create a bootable LINUX USB.
Writing the Windows ISO indeed is more complicated. I have not tested it, but many users suggest to use UNetbootin to write Windows ISO. Let me know if it works.