How to make a GIF with GIMP

This tutorial will show you how to make GIFs with GIMP.
GIMP (GNU Image Manipulation Program) is very powerful free image editing software, you can do a lot with it including making GIF animations. Let’s have a look at how to make GIFs with GIMP.
In one of the previous articles I showed you how to use the Linux command line to make GIF animations. However, the command line is not for everyone. So, in this tutorial you will learn how to make GIFs with GIMP, which is a graphical program.
Configuring an animation
The process is the same regardless of what operating system you use. GIMP is the same in Linux, Windows, and Mac.
Open GIMP. Go to File → Open as layers and select all the images you want to make a GIF of. If you want to make a GIF from a video, you first need to extract images form it. I showed how to extract images from a video using VLC player, which also works across Linux, Windows, and Mac.
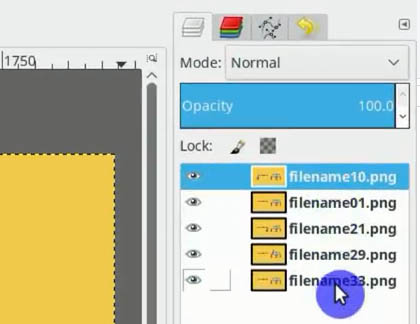
When all your images are imported, go to the Layers panel on the right part of the screen and make sure that the order of the images is as you want it to be. The animation will go from the bottom to the top.
To order the layers, use the file names or gradually make the top layer invisible clicking on the eye sign near the file name.
Crop images
When you are sure that the order is as intended, you can crop all the images with the crop tool.
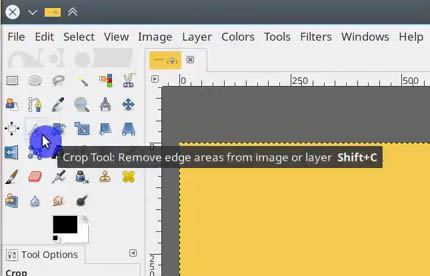
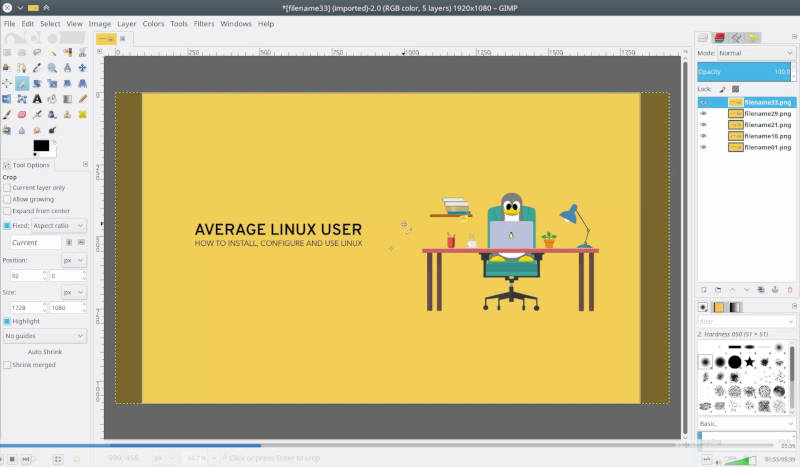
Using the crop tool, you can also change the aspect ratio on the tool panel on the left part of the screen. Enter the values in Size field and check Fixed: Aspect ratio box.
To crop the images, select the area to crop and press Enter.
Next, resize the images because they are likely quite large and the GIF file will be large too. Go to Image → Scale Image. Here you can select the size and the resolution.
You can keep the resolution at 72, but the GIF file will probably be too large. You need to find the lowest resolution possible but not too low when it is impossible to see what is in your GIF. I will use the value of 50.
The same applies to the size. You need to use as small size as possible. I will use 400 px on the longest side. Also, when you change the size, make sure that the proportions are locked. For that, do not forget to click in this icon:
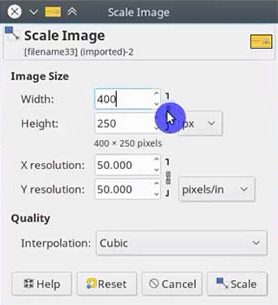
Press Scale.
Then change your zoom level to 100% view and look at your GIF in real size. If the size and quality is too low, press Ctrl + Z and adjust the size and resolution until you are satisfied with the results.
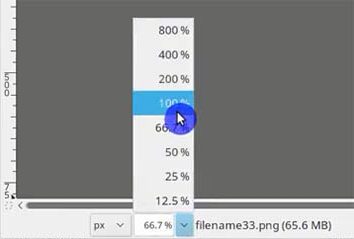
Making a GIF with GIMP
Now, you can make a GIF from these images. Go to Filters → Animation → Optimize (for GIF). This will open the animation in the new tab. This operation will reduce the size of the source images and the GIF by removing some overlapping between images information. Importantly, you need to save this project. Go to File and click Save.
After that, go to Filters → Animation and select Playback to see how your animation will look like frame by frame.
If everything is fine, go to File and Export this project as a GIF. Check As animation and Loop forever boxes. Make sure that you selected the file extension as .gif.
Next, specify the delay between frames in milliseconds. The higher the value, the slower will be the animation. Also, make sure to select “Use delay entered above for all frames”. Frame disposal did not change much according to my experience, so you can keep it at “I do not care”.
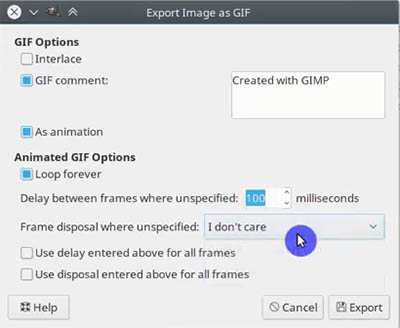
Then go to the file manager and check your GIF. If you don’t like its speed and size, go back to the project and change the images resolution and the delay time. Do not forget to save the animation again with new parameters.
Summary
Gimp is a great tool. Besides, processing images, you can also use it to create the GIF animation of any complexity in a simple graphical interface. The app offers a lot of settings and configurations. However, if you prefer the command line tools over GUI, I showed how to create a GIF with from the command line too.
 Never miss a post from us, subscribe to our newsletter
Comments
m
Awsome!