Install Windows 10 in VirtualBox (UEFI)
Some Linux users face a problem of the need to run Windows-specific utilities in Linux. The simplest and reliable way to do that is to use Windows in a virtual machine inside Linux. In this post, you will learn how to install Windows 10 in VirtualBox and make this Windows system completely functional including full-screen mode, shared clipboard, shared folder and other handy features that help integrate Virtual environment and your main system.
Content
- Install VirtualBox
- Create a Virtual Machine for Windows 10
- Configuring VirtualBox for Windows 10 installation
- Download Windows 10 ISO
- Install Windows 10 in VirtualBox
- Fix the screen resolution for Windows 10 in VirtualBox
- Enable Shared Folder
- Enable Shared Clipboard
- Enable files drag and drop
VirtualBox is an application developed and maintained by Oracle that allows you to install operating systems in a virtual environment inside other operating systems. Thanks to VirtualBox we can install several operating systems, including Windows 10, in our main Linux system. VirtualBox is very intuitive to use but some tips are required to make an installed system fully functional.
Install VirtualBox on your system
VirtualBox is a very popular application in Linux. So, it is available in most of the official repositories of the most used Linux distributions. You should be able to find it in your Software Center.
However, it is possible that the version in the repositories is a bit out of date. If you want to download the latest version or if you are using Windows or macOS, then you can download it from the VirtualBox website.
Create a new Virtual Machine for Windows 10
To install Windows 10 in VirtualBox it is necessary to create a virtual machine. Click on the New button. You can also do it with the keyboard shortcut CTRL + N.
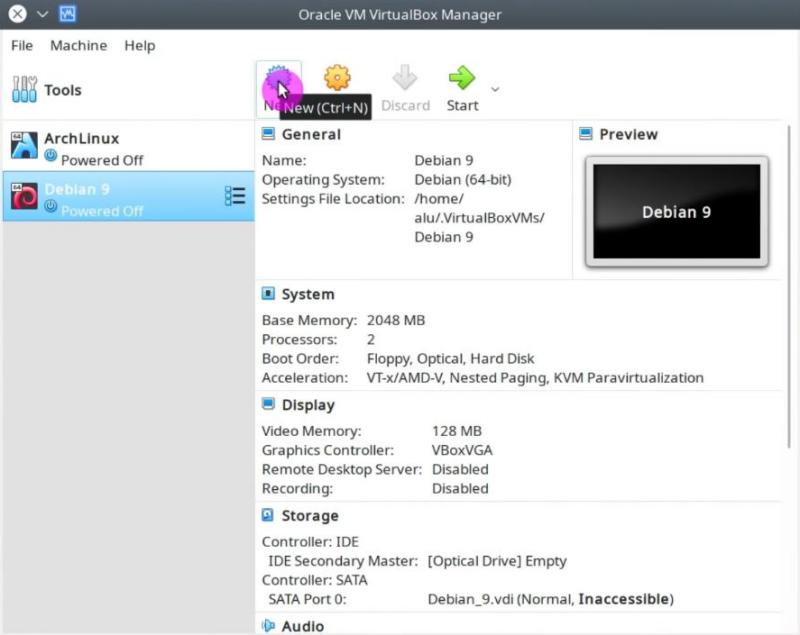
In the opened window, you have to type the name of a new virtual machine. If you type the name Windows 10, VirtualBox will complete the rest of the fields. However, if it does not detect everything correctly, you can modify some of the fields. Then click on the Next button:

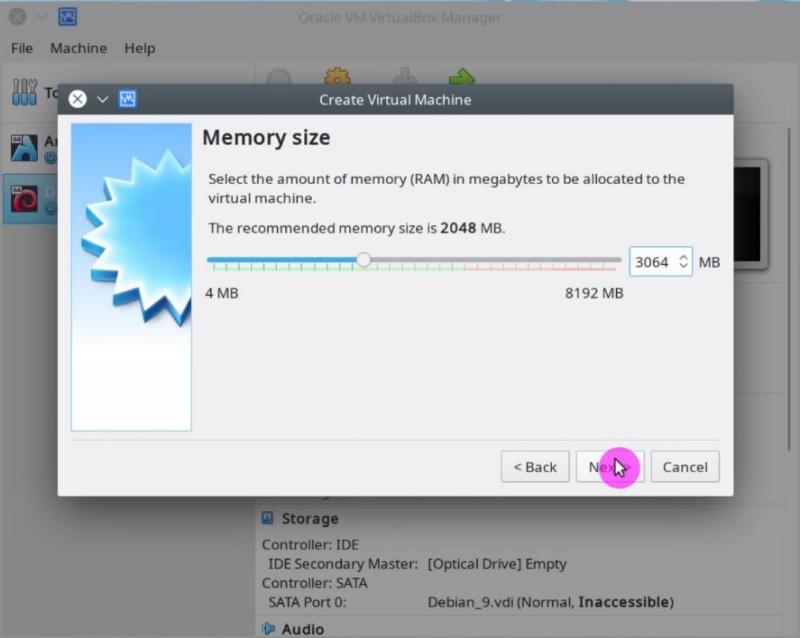
Next, you have to define the size of the RAM that the new virtual machine will use. For Windows 10 the recommended size is at least 3Gb. Then, click on the Next button:
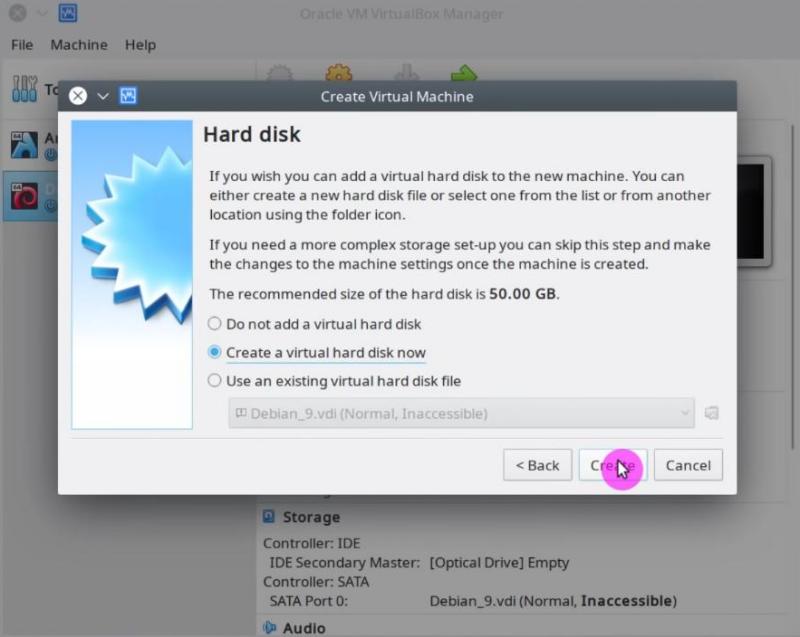
After that, you need to choose the virtual hard disk that the virtual machine will use. Normally you have to create a new one. So, choose the second option and click on the Create button:
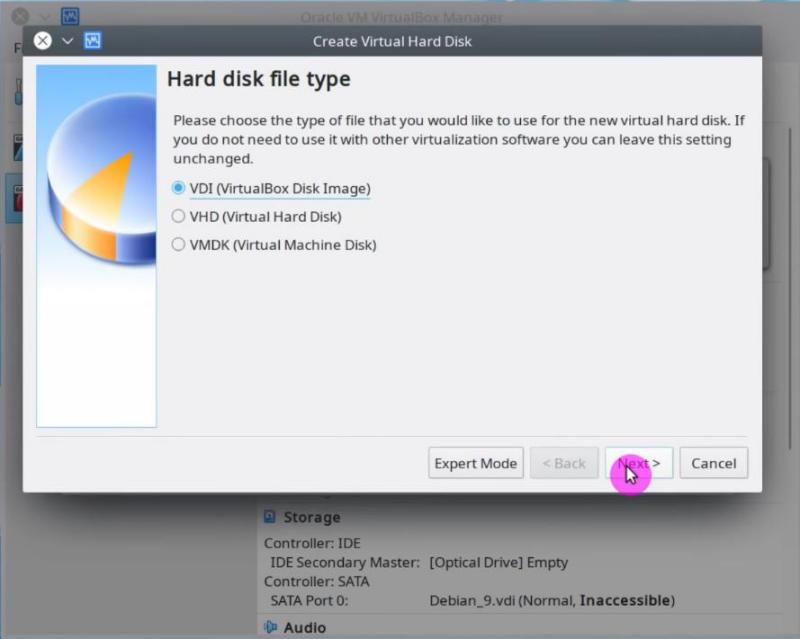
Then you have to choose the type of hard disk. There are three options, choose the first one (VDI):
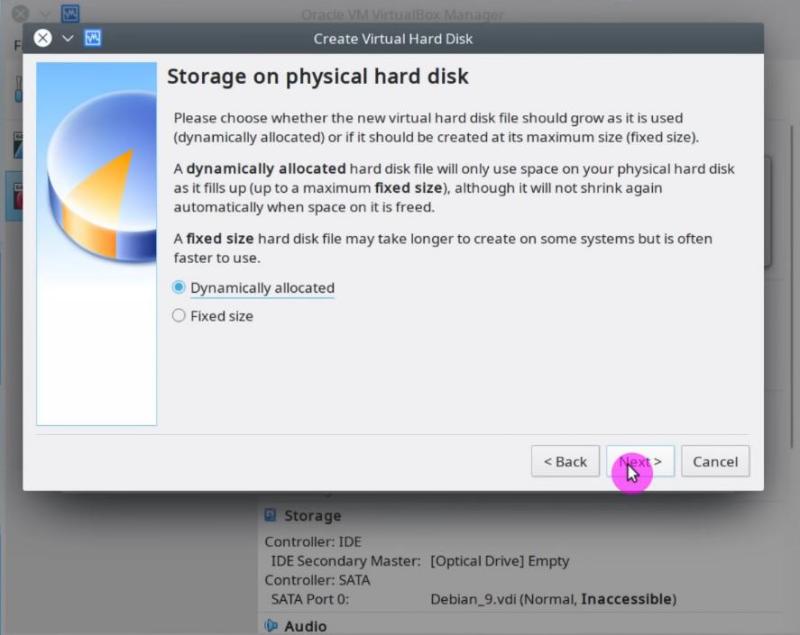
In the next window, choose Dynamically Allocated. This way the virtual disk will use only the amount of space that is taken by the virtual system instead of the maximum allocated space. This option helps to use the disk space more effectively:
Finally, you have the option to set the path where the virtual hard disk file will be located and its size:
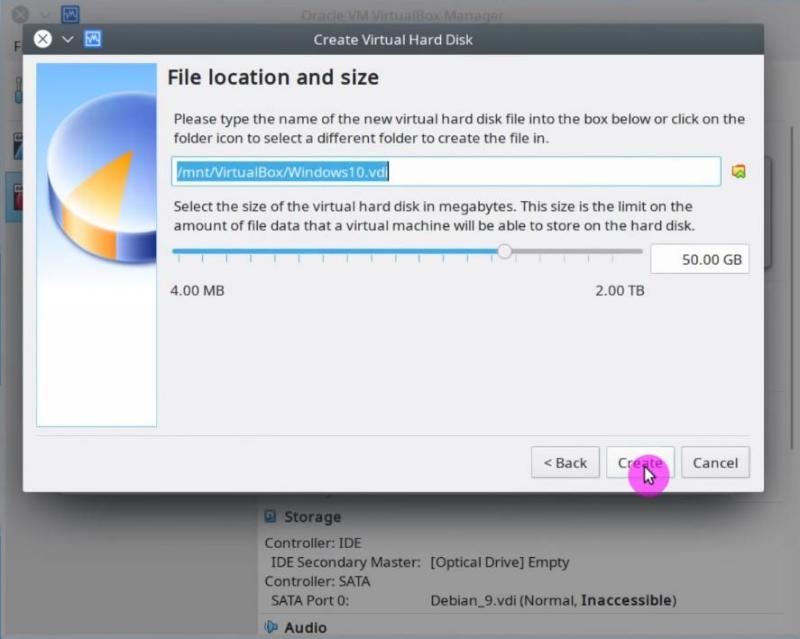
After this, the virtual machine will be created.
Configuring VirtualBox for Windows 10 installation
There are a few more things to be adjusted before you can use it to install Windows 10.
First, from the main VirtualBox window select the Windows 10 virtual machine and click on the Settings button:

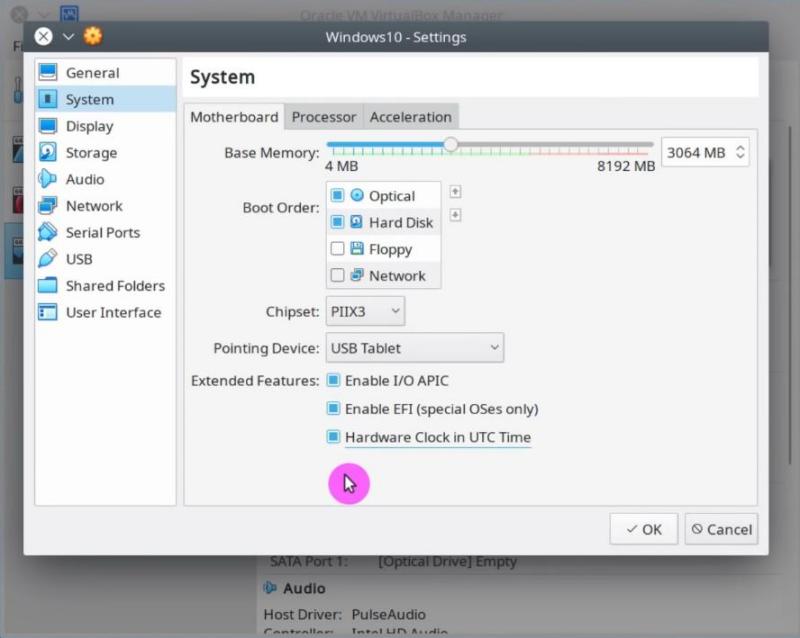
Now you will see the options of this virtual machine. On the left side click on the System section and then the Motherboard tab, and enable EFI because Window 10 requires the EFI mode:
Then, in the Processor tab increase the number of processor cores to be used by the virtual machine. Check how many cores VirtualBox will allow you to use without warning. In my case, I have 4 cores and VirtualBox allows me to allocate 2 cores for the virtual machine without any harm for my main system:

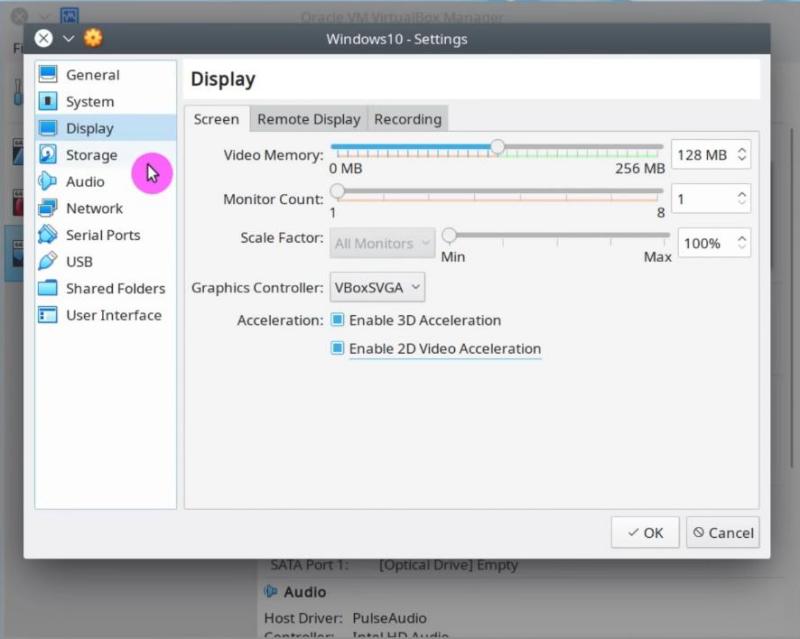
After this, click on the Display section and increase the amount of Video Memory for the virtual machine. I recommend 128Mb minimum. Also for Windows 10, you need to enable 3D and 2D Video Acceleration:
Now, it is necessary to define the location of the ISO file of the Windows 10 ISO image. Click on the Storage section, and select the small disk icon that says Empty. Then, click on the disk image on the right side and select your Windows 10 ISO image:
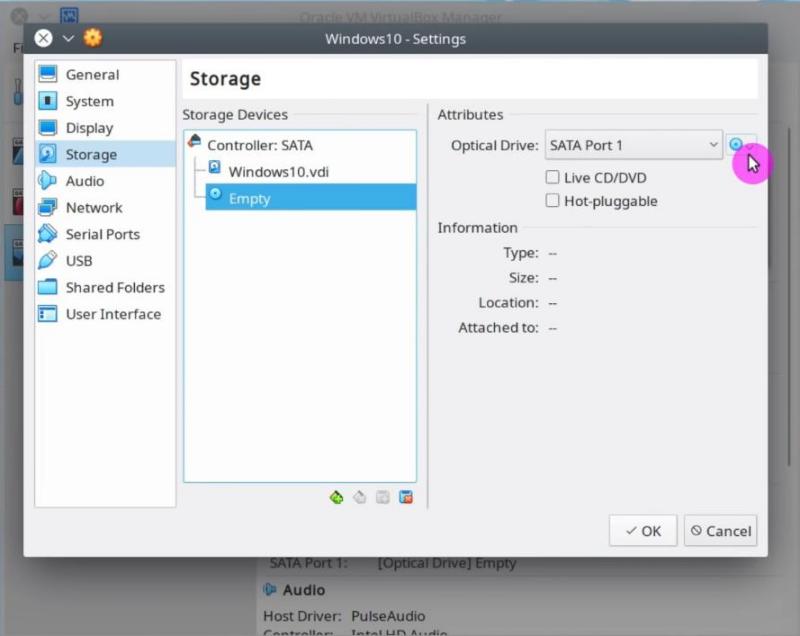
Next, click on the Ok button.
Download Windows 10 ISO
In case you do not have the Window 10 ISO image, you can download it from the Microsoft website:
Then, add this ISO image to VirtualBox as shown above.
Install Windows 10 in VirtualBox
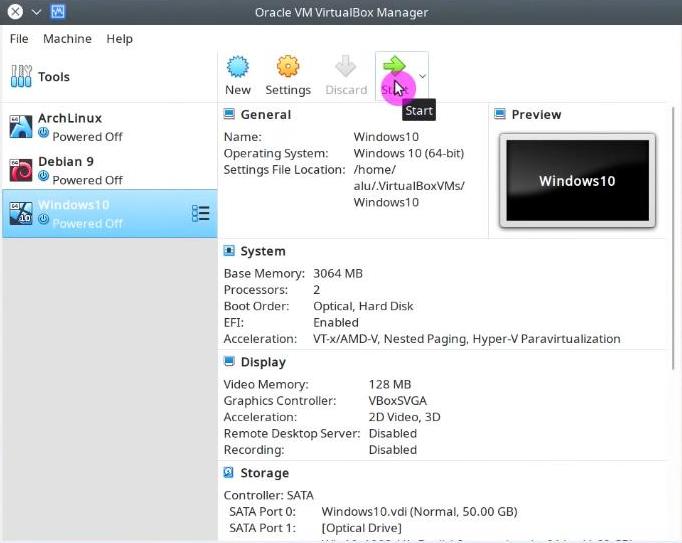
Now you can start the virtual machine. Select it and click on the Start button:
VirtualBox mouse pointer Capture
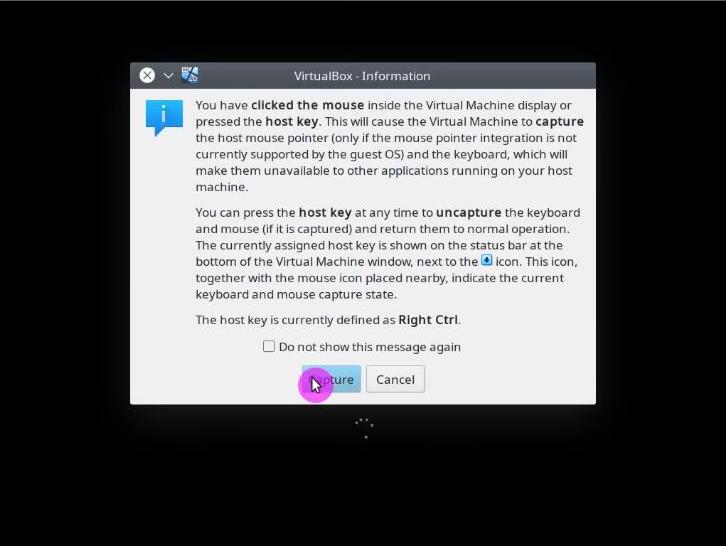
When you start the virtual machine you will be asked if you want the guest system (Windows 10) to capture the events of the mouse and keyboard. Read the instructions on how to use mouse integration with VirtualBox and agree to Capture:
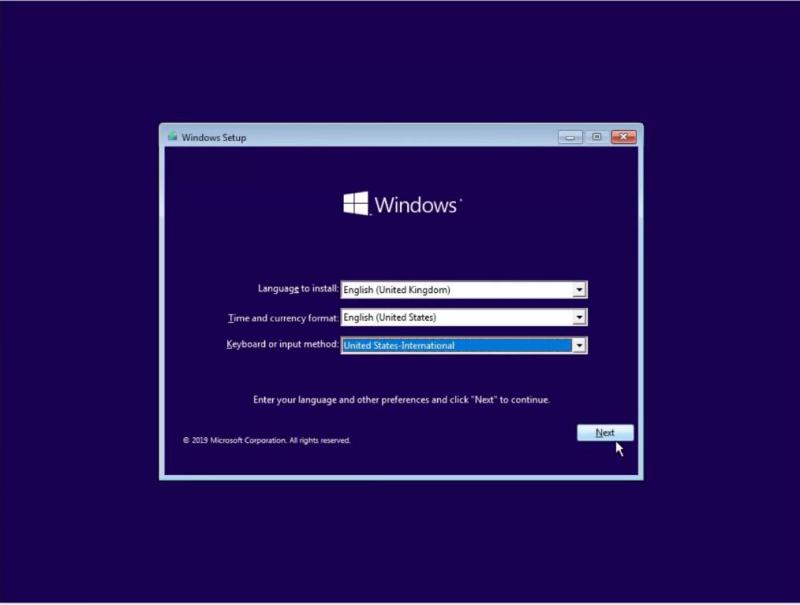
The rest of the process is the standard Windows 10 installation.
Windows 10 installation
First, choose the language, keyboard layout, and time format:
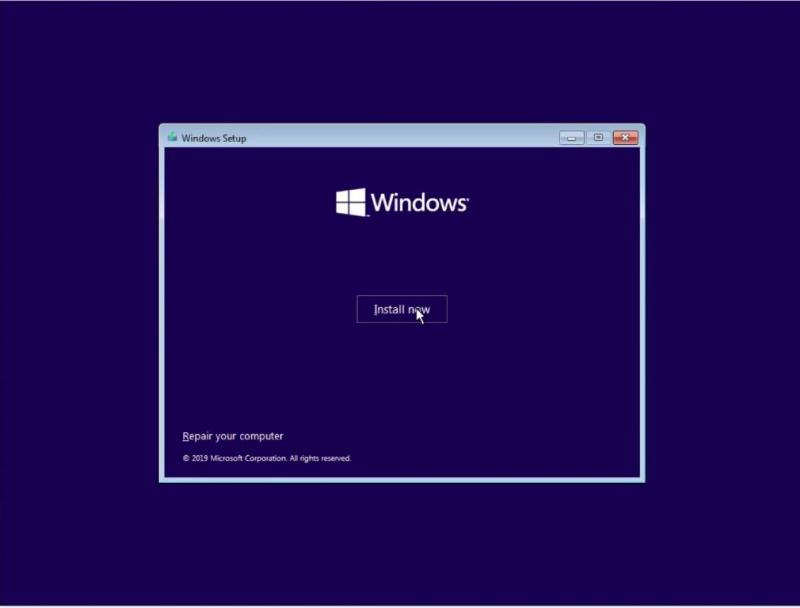
After that, click on the Install Now option:
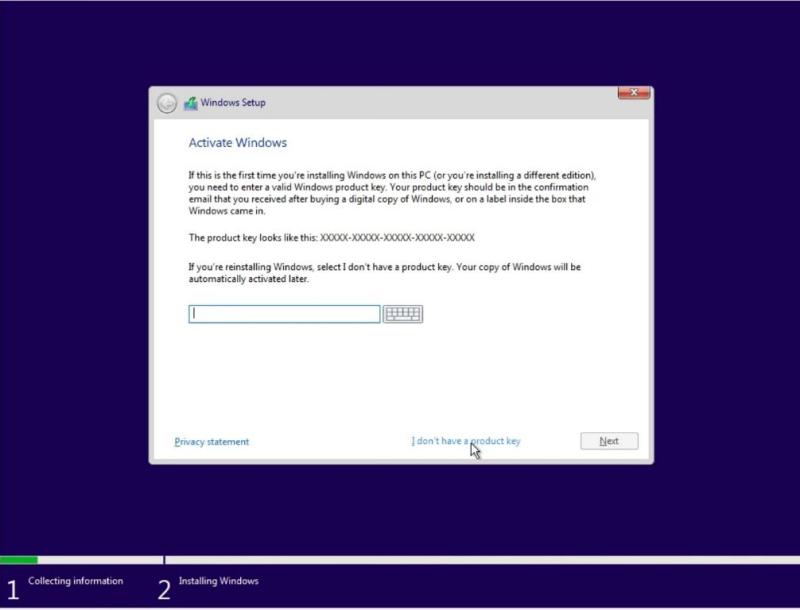
If you have a valid Windows 10 license, you can add it on the following screen. If not, you can click on the option I don’t have a product key and continue in a trial mode:
If you downloaded the ISO from the Microsoft website, it will contain several types of systems. You can select whatever version you prefer. I select Windows 10 PRO:

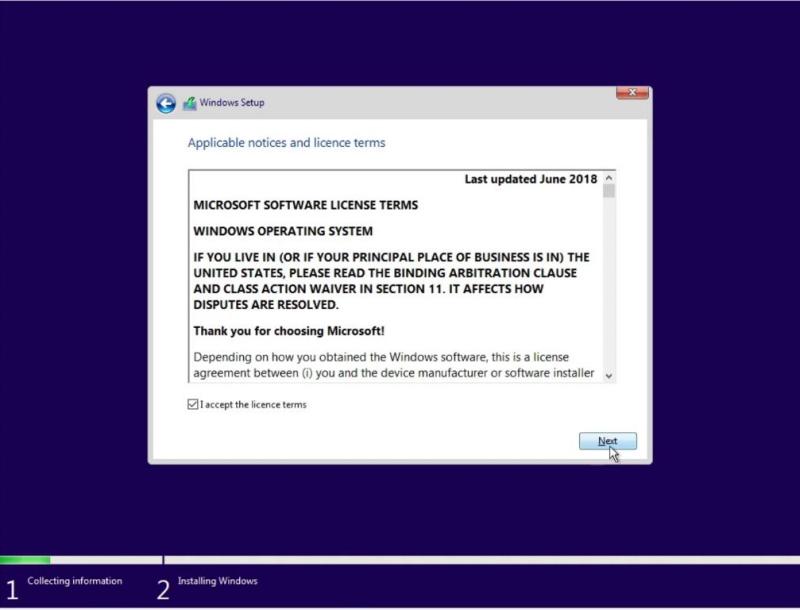
Accept the terms of the license and continue:
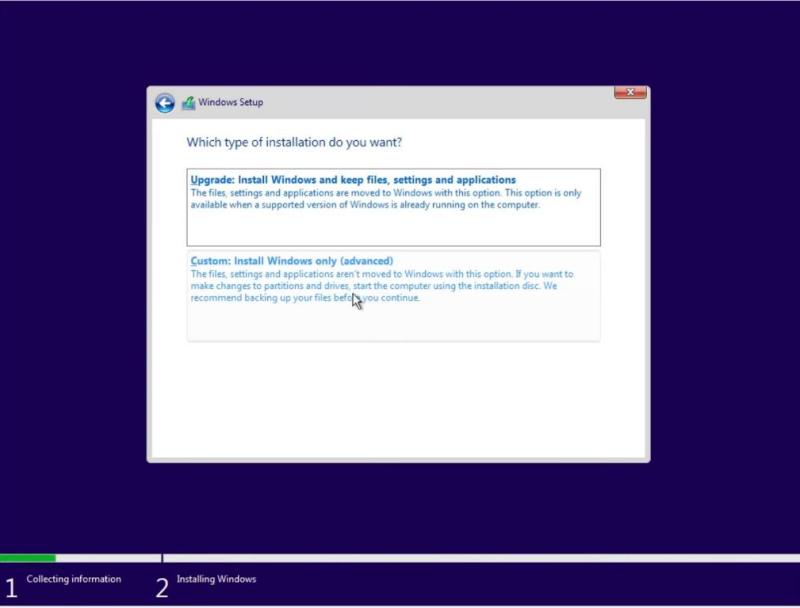
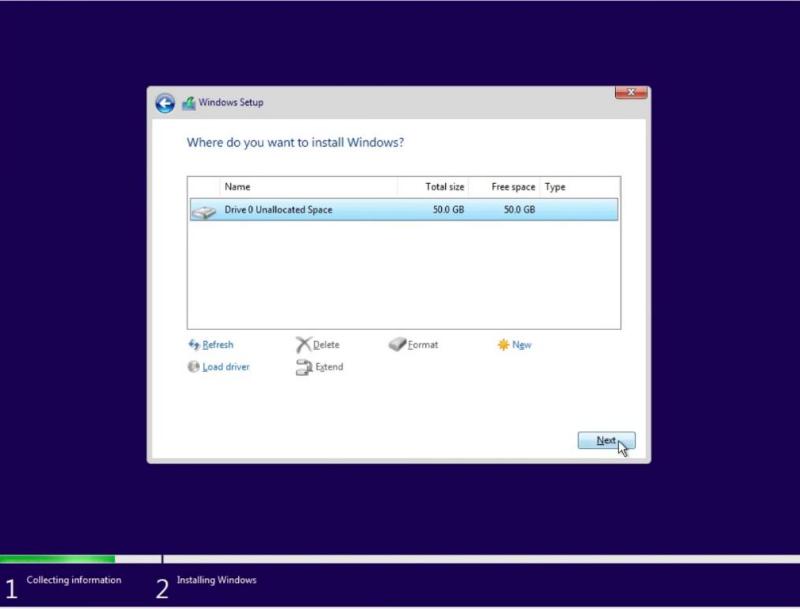
As the hard disk is newly created and has no partition created you will have to choose the Custom: Install Windows only option:
In this screen, you will only have to select the only visible disk and click on the Next button. The installer will create and format the partition automatically:
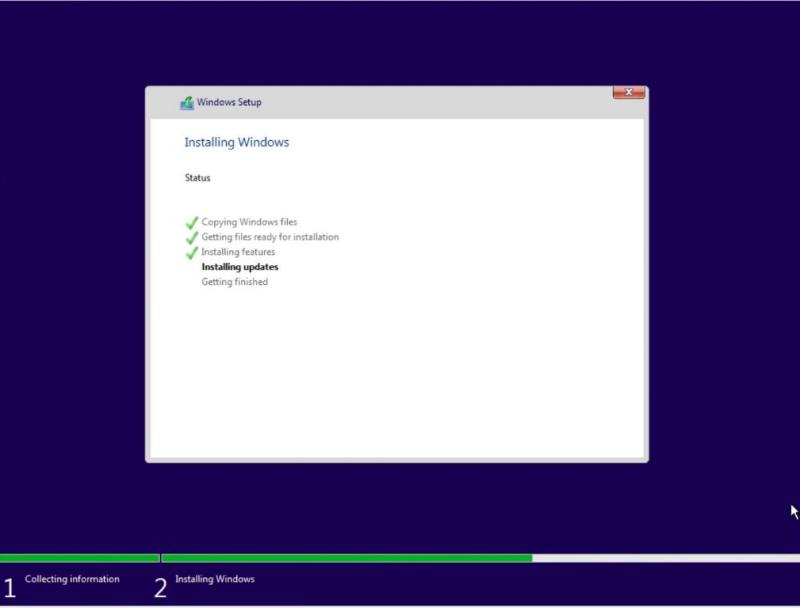
Then, it will start the installation:
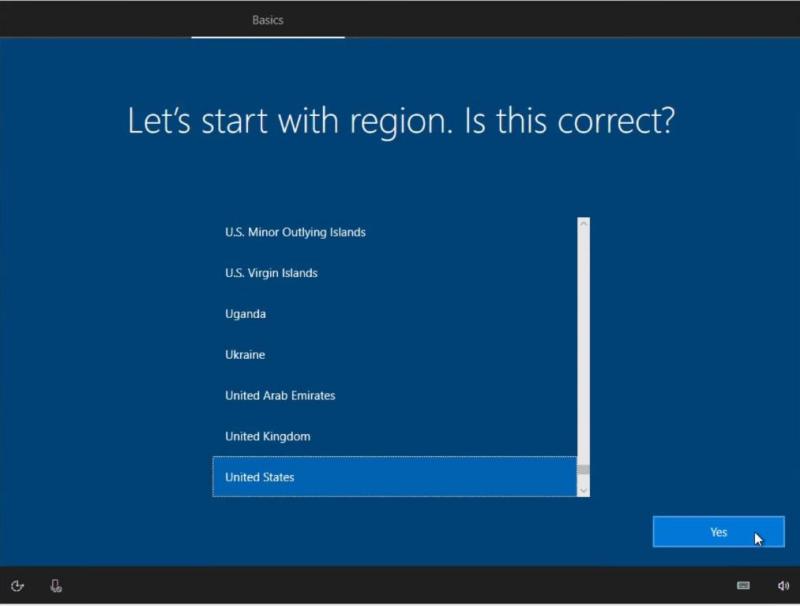
The Windows 10 installer will restart virtual machine several times. This is normal. After the restart, you will need to provide the information on your region:
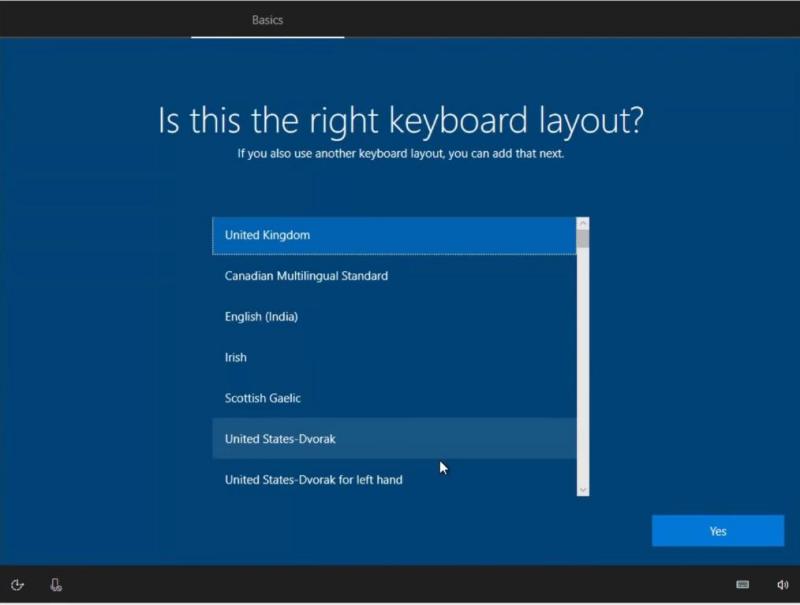
Keyboard layout:
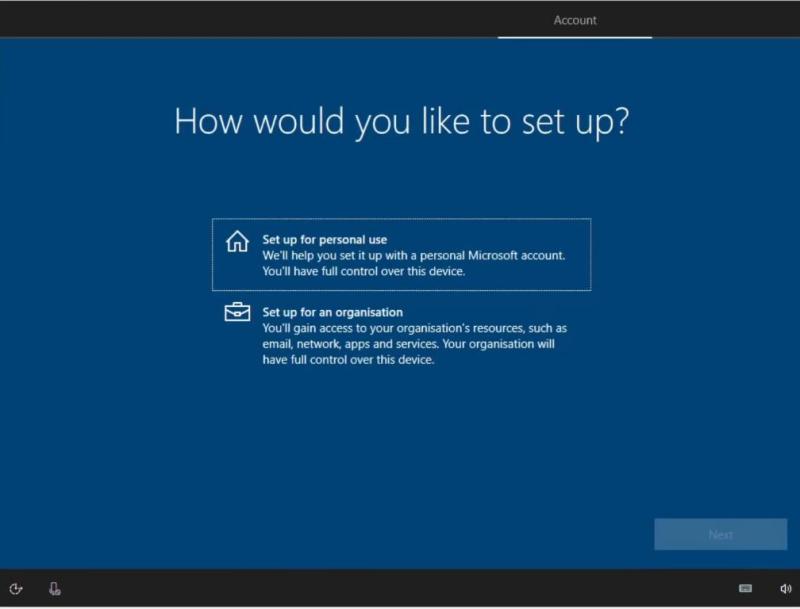
Then, you can choose to configure it for personal or business use. Likely, you will need to choose for personal use:
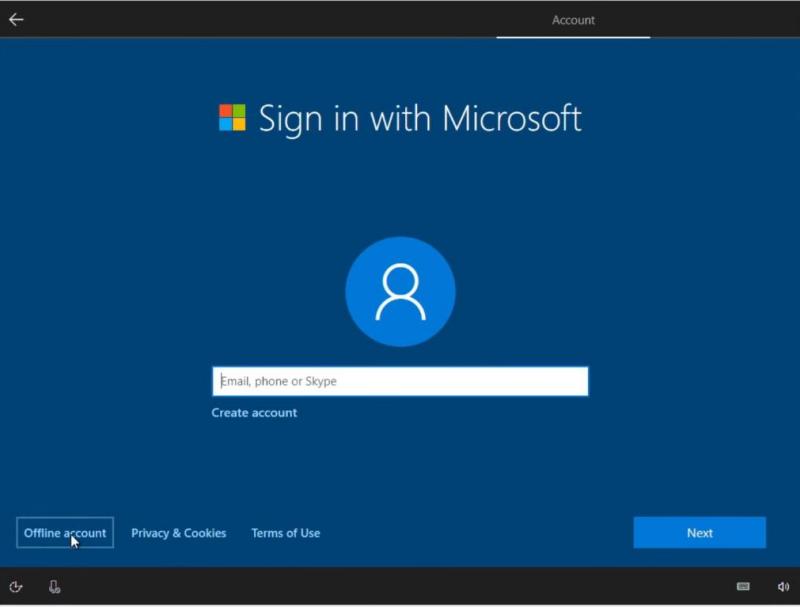
Next, you can log in to your Microsoft account or skip it by choosing Offline account:
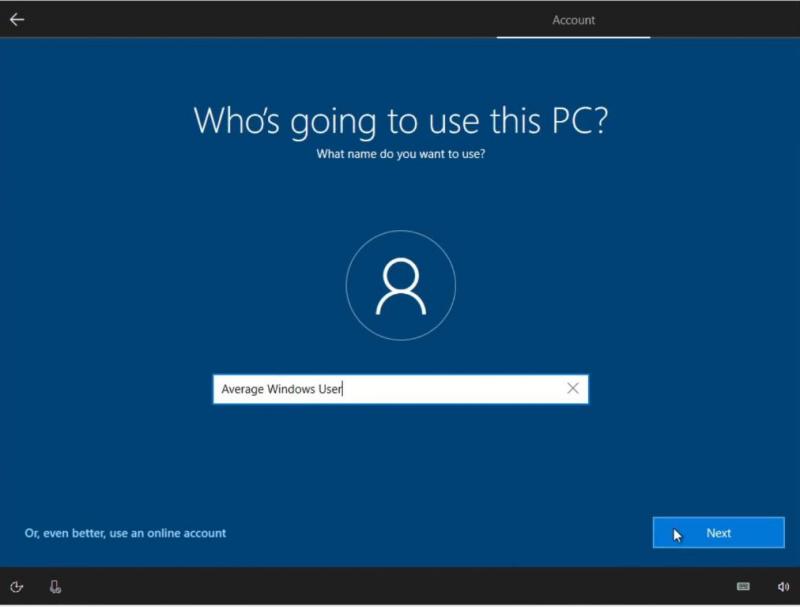
Type the name of the user who will use the system:
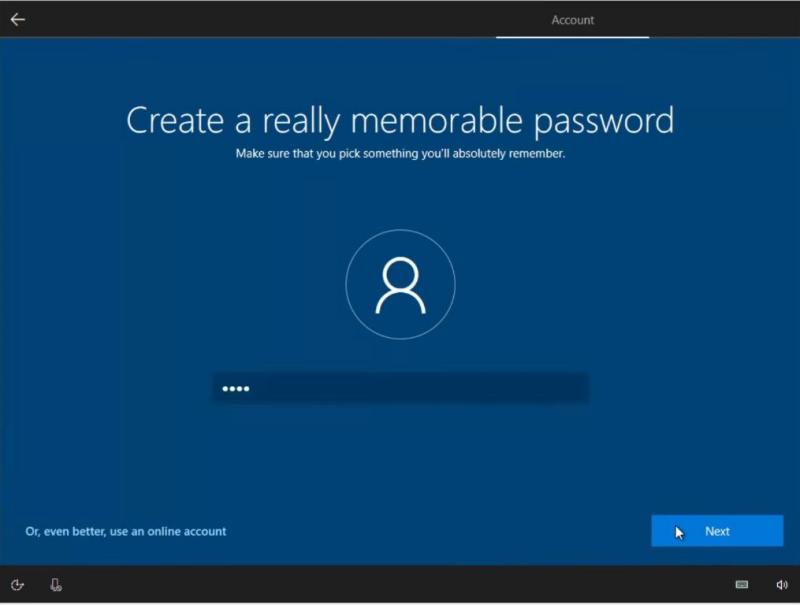
Set a password for the system:
If you do not use multiple Windows 10 devices, you can skip this section:
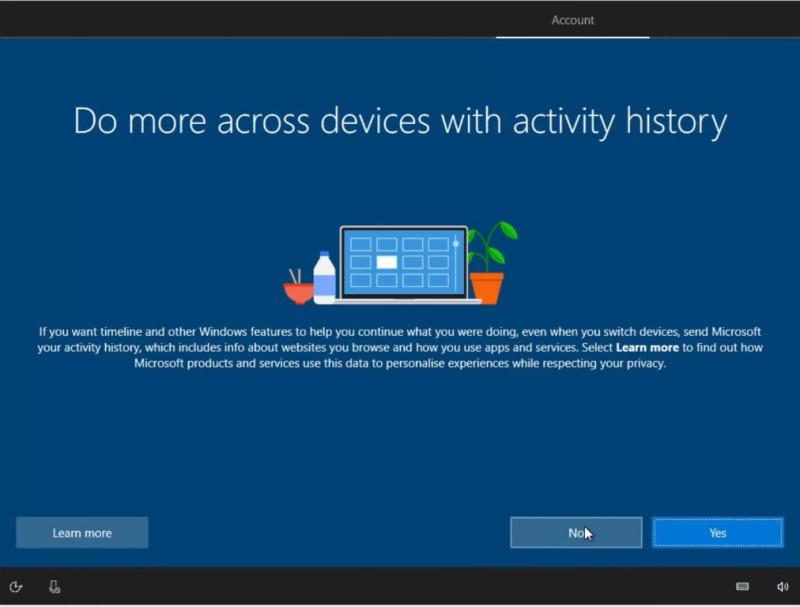
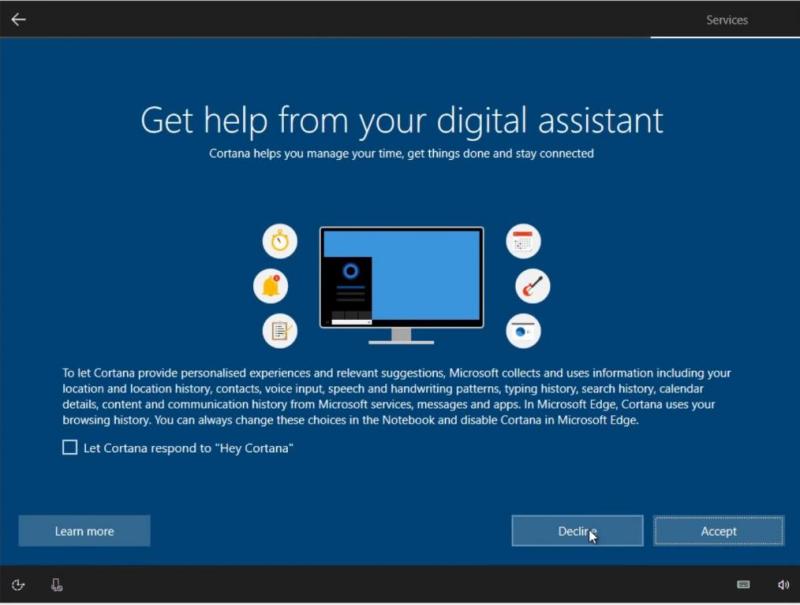
The following screen corresponds to the Cortana configuration. Probably, you won’t need it in a virtual machine, so you can also skip this section:
Configure your privacy settings. I usually disable all options in this screen:
![]()
Finally, you have to wait about half an hour to complete the install and then you will be able to log in to your Windows 10 in VirtualBox:
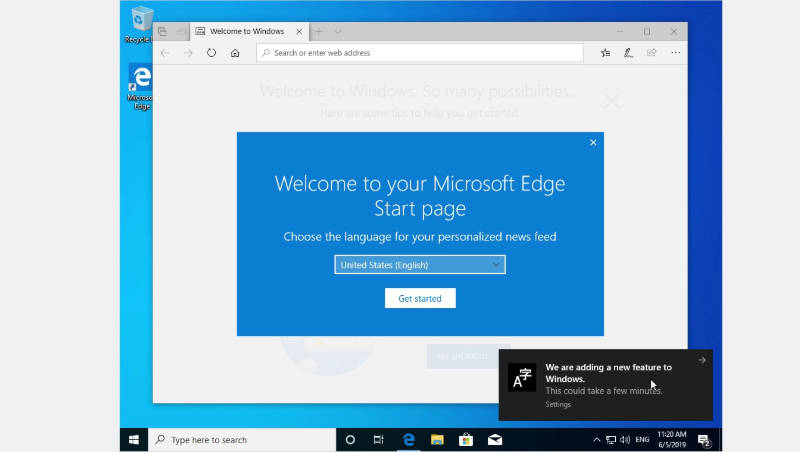
At this stage, Windows 10 is correctly installed but it is not fully functional. So, you need to do a few additional steps to get maximum from your Windows 10 in VirtualBox.
Fix the screen resolution for Windows 10 in VirtualBox
One of the first things you will notice is that this Windows screen is too small and not adapted to the size of your screen (see the image above). To fix that and also enable some additional features, you need to install VirtualBox Guest Additions.
Install VirtualBox Guest Additions
Go to Devices in the VirtualBox menu of the running Windows 10 and click on the Insert Guest Additions CD image option:
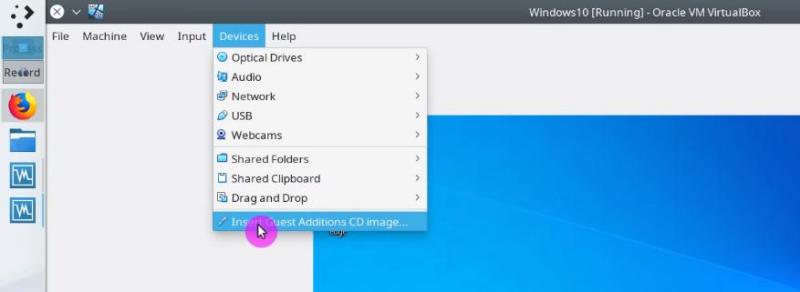
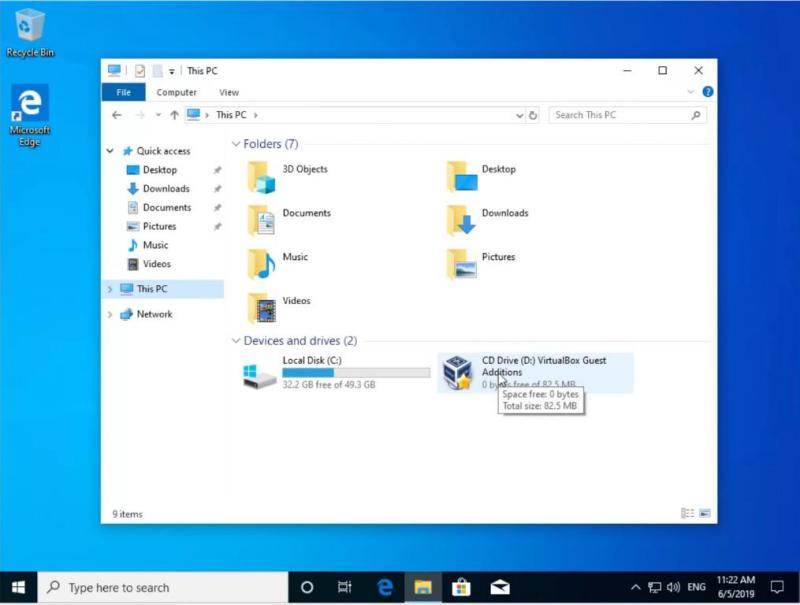
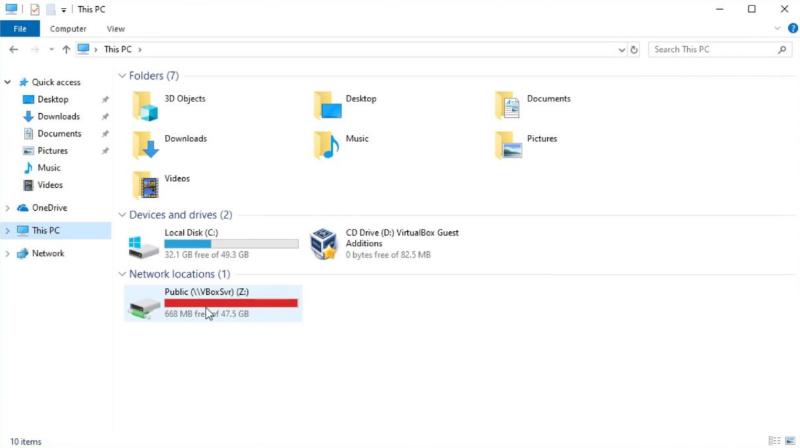
Then, in your Windows 10 system, open the file manager and go to This PC on the left side. In the Devices and Drives section, you will find the VirtualBox Guest Additions CD:
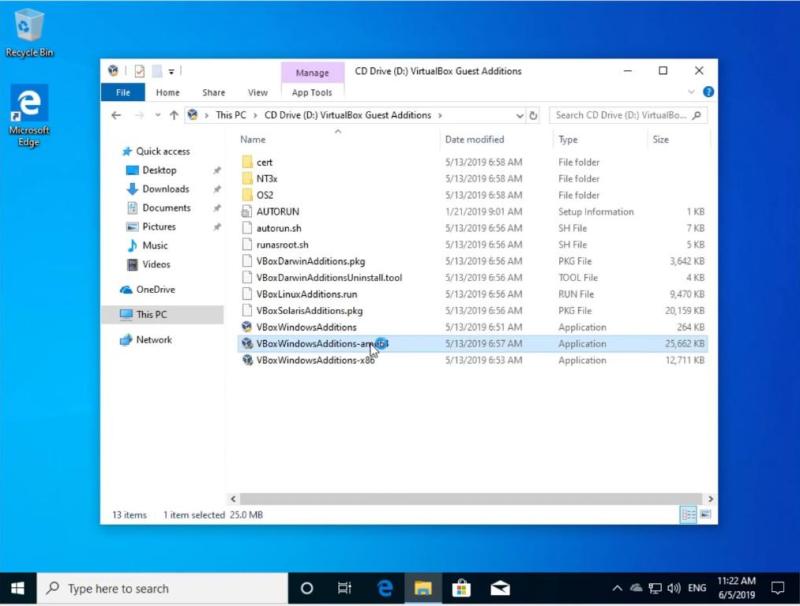
Once you have entered the image, you will see many different files. If the installed Windows 10 is 64-bit, you have to install the VBoxWindowsAdditions-amd64 file but if the system is 32-bit then you have to install VBoxWindowsAdditions-x86. Most Likely, you have the 64-bit system. So, install it by double-clicking on the file:
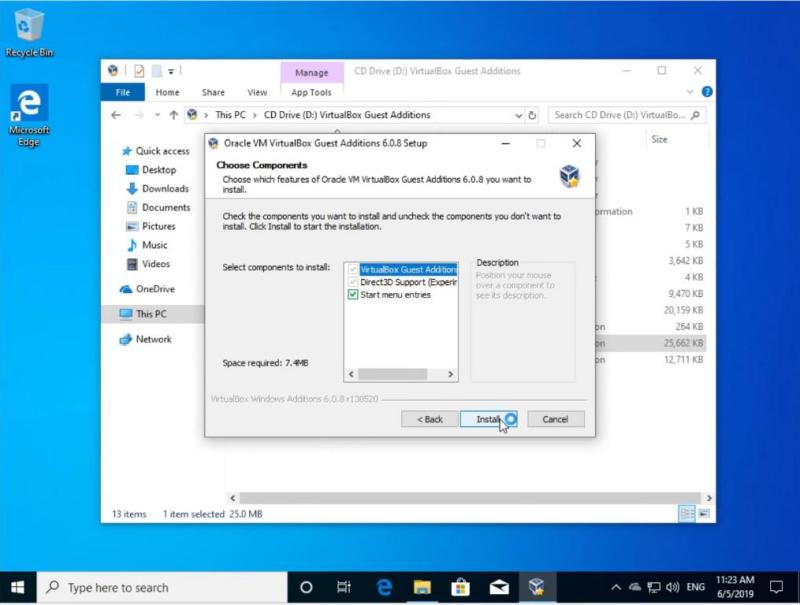
During the installation, keep all options by default:
Note: The screen will blink several times during the installation process. This is normal and there is nothing to worry about, just wait for the installation to finish.
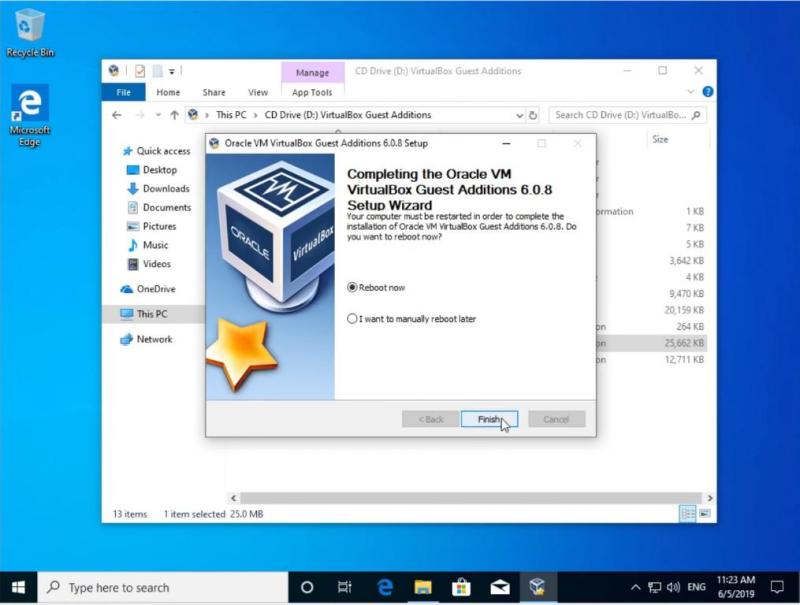
Once the installation is complete, it is necessary to restart the system to apply the changes:
When you start your system, your Windows 10 screen will adapt to the size of your real screen:
Test full-screen mode
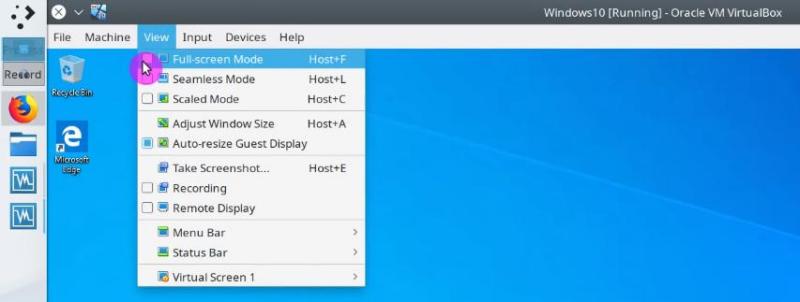
You can even view this Windows 10 in the full-screen mode. To that end, go to the View menu and click on the full-screen mode option or simply press the keys right CTRL + F:
So, you can enjoy full-screen mode. To exit from the full-screen use the same shortcut right CTRL + F.
Enable Shared Folder
When working with virtual machines it is also convenient to share files between the host and the guest systems. This can be achieved with a Shared Folder.
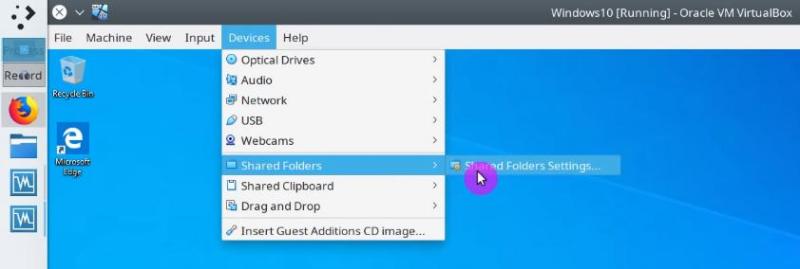
To enable it, go to the Devices menu and in the Shared Folders category click on the Shared Folders Settings option:
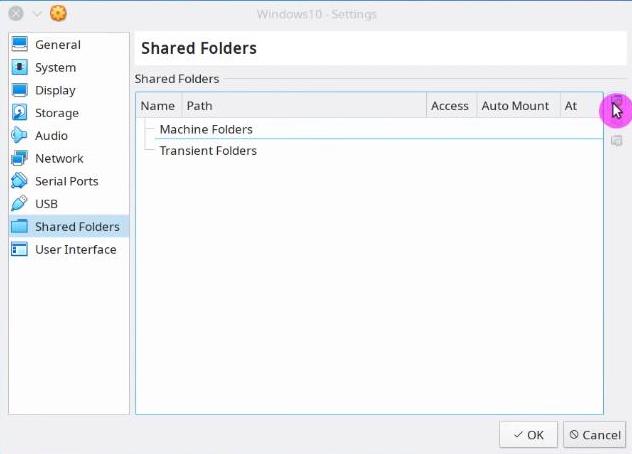
In the opened window, select the Machine Folders option and click on the small folder icon on the right side:
In Folder Path field, choose the path of the folder you want to share. In my case, I usually share my Public folder. If you want to increase the security of the folder you can check the Read-Only option to prevent Windows 10 from modifying the contents of this folder. This way only Linux system can modify this folder. It is also better to make the folder mount automatically and make it permanent:

In the end, reboot the Windows 10 system to apply the new configuration.
After the reboot, you will find the shared folder in This PC section of the Windows 10 file manager. You can now use it to share files between to your Linux and Windows systems:
In the case of a Linux system as a guest, the process of enabling the shared folder is little different. Check out my post about How to enable a VirtualBox shared folder for Linux guest systems.
Enable Shared Clipboard
Another productive feature is the sharing of the clipboard between the two systems. That is, when you copy the text in one system, it will also be available in the other.
To enable this feature, you have to install VirtualBox Guest Additions as you have seen above, then go to the Devices menu and in the Shared Clipboard section click on the Bidirectional option.

Now if you can share the clipboard content on both systems.
Enable files drag and drop
Finally, you can also enable bidirectional drag and drop of files to share them between systems. I recommend using a shared folder for this purpose because a shared folder is more reliable. But you may try the drag and drop too.
To enable it, go to the Devices menu and in the Drag and Drop section click on the Bidirectional option:

Now, you can drag a file from your host system and drop it to the Windows 10. It should also work the other way, but it did not work for me. Again, that’s why I recommend using a shared folder.
Conclusion
These were the essential steps to get Windows 10 working in VirtualBox. If you are required to use some Windows application but you run Linux as your main OS, this can be a lifesaver. Install Windows 10 in VirtualBox and running Windows programs inside it is not an ideal solution, but it is very reliable. All Windows programs will work correctly.
You can also try using emulators like Wine, but in my experience, very few Windows applications run well in Wine. Many users also prefer to dual boot Linux and Windows, but I am against such option. So, I think installing Windows in VirtualBox is the best solution to get Windows programs working in Linux.
Comments
analogtek
That is the only safe way to use windows. A shell of Linux protection.
dsa
sad
George
Win 10 will not install if I have the EUFI box checked. It get startup.sh scrip errors and it exits the script and goes no further. Without the EUFI I was able to get it installed, but in the past Win 10 has been very unstable starting in VirtualBox.
Average Linux User
I installed it in the UEFI mode and everything worked fine. If you installed in the legacy mode, it is also fine.
Mark Lloyd
Windows 10 requires EFI?
My Installation (Win 10 64-bit, Xubuntu host) has been working for several years and does NOT have EFI enabled.
Also, I heard EFI (in VirtualBox) works for Mac OS only.
Ken
Many newer manufactures do not allow MBR boots from the HDD or SSD anymore. For instance, a new Dell will not allow an MBR boot even using legacy options unless its from a USB or other external media. This started around 2018, so if your machine is a few years old, then its still capable of mbr or gpt boots more than likely. The most you can do now in the bios is change to allow legacy for externals, but not internals. They are phasing out mbr boots altogether it seems in favor of the gpt uefi boots.
EFI in Virtual Box works fine in Windows. I use it to create a sysprep image for deployments.
cool man
download link please
Joe
Can't even get started in the install. Keeps giving me an error about a kernel driver not installed. Oh well, tired of wasting time on this.
i don't know
it helped me a lot thank you you are awesome!!!!
Average Linux User
Thank you for the comment
Xavier
Not A Very Detailed Infromation Dont Use Virtualbox But Its The Worst Thing Ever!
Average Linux User
I disagree and I believe it is the best virtualization software.
Jason
I just want to say thanks for this tutorial. I'm fairly new to Linux and the only thing that I cannot do to make the complete switch, is use Microsoft Office. I can now always boot into Linux with Virtual Box :)
Average Linux User
I also used to boot W7 in VirtualBox to run MS Office. Now, I have learned how to use LibreOffice and I do not need MS Office anymore. LibreOffice is much better.
Xavier
Very detailed information. I've already use VirtualBox, but it is the first time I try to install Win10 on Linux. Using all your recommendations, I got an error message “VT-x/AMD-V hardware acceleration is not available on your system. Certain guests (e.g. OS/2 and QNX) require this feature and will fail to boot without it.” and finally I'm under the UEFI Interactive shell. I'm use an “old” PC (AMD Athlon(tm) 64 X2 Dual Core). Any idea ? Thanks
Ilja Konovalov
I had this problem too, you need to restart you computer, and during the startup press f2 or delete. You will enter your bios and if you press right arrow you will go ta screen where you can enable something like safe virtual machine. Then click the right arrow a couple pf times until you get to a screen that says exit bios. Select save and exit and your done. This worked for me.
Shijou
Thanks, Ilja, for sharing this hint! I think I have the same problem. I found a setting to enable VM in general but that didn't solve the problem. I don't get the warning about hardware acceleration any more but I still end up in the UEFI interactive shell. I'd be grateful if anyone could share a more detailed description of which option to set to which value.
Average Linux User
Press the
Ckey at the start up to load the installation ISO in VirtuialBox.I will publish a VirtualBox tutorial next week on my channel.