Making a Lower Third Animation in Kdenlive

Kdenlive is a powerful, free and open-source video editor. Here, we are going to use Kdenlive to create a lower third animation.
Content
- Introduction to Kdenlive’s user interface
- Creating our first clip
- Creating multiple clips
- Placing clips on the timeline
- Animating the small rectangle clip
- Animating the rest of the clips
- Adding an alpha channel
- Enhancing the animation with sound effects
- Using lower third animation in the video
For those of you who are not familiar with the term, lower third animation is a small animated banner placed in the lower area of the screen. This term comes from the television industry and it is extensively used by news channels. It is also frequently used by YouTubers.
Now, fire up your Kdenlive and let’s get started!
Introduction to Kdenlive’s user interface
The section is intended towards newcomers with little or no prior experience in Kdenlive.
-
Project Bin — Think of the project bin as a place where all your resources are stored. By resources, I mean all clips, audio and video files/effects that you are going to use in the project.
-
Effect Configuration Panel — The panel for configuring the current effect that you are working with.
-
Compositions/Effects Section — Contains all sorts of Kdenlive’s builtin effects. (filters, animations, colour tooling etc.) Allows us to add the effect to our clip by simply dragging and dropping it on the target clip.
-
Timeline Section — The section where we compose all our effects and clips to make a video. This includes configurations like when the particular effect/clip starts, when does it end, how long it lasts etc.
-
Project/Clip Monitor — The window where we can play our clip or our whole project/video to see how it looks.
Creating our first clip
The first thing that we will do to make lower third animation is to create a clip that we’ll be animating.
Kdenlive offers us the following clip types:
- Colour Clip
- Slideshow Clip
- Title Clip
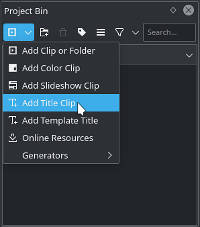
We’ll be using Title Clip. You can access the Title Clip by clicking the Add Clip button in the Project Bin which will show a pop-up menu:
Having chosen Title Clip, you’ll be presented with a window like this:
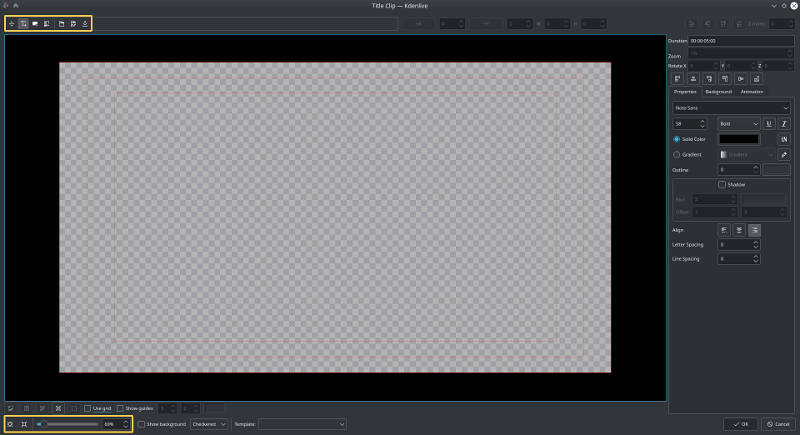
We will design our clip in this window. The clip will consist of three rectangles and a text box. Notice the toolbar at the top. The first three buttons are used to move, add a text box and add a rectangle, respectively.
The following images show the steps to make the clip:
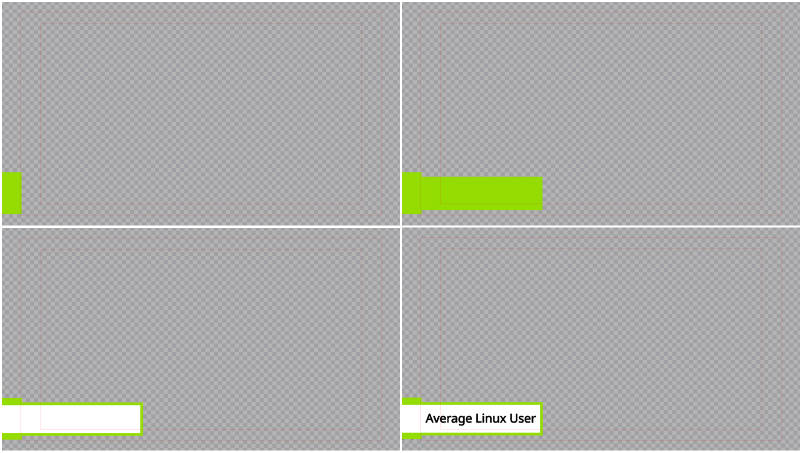
You’ll notice on the last image how the white rectangle is on top of the small yellow rectangle from the first image. To make our animation look more appealing, let’s bring the small rectangle from the first image to the top.
You can achieve this by selecting the small yellow rectangle and increasing it’s Z-index (in the top right panel) to 1000.
Finally, click Ok to save your clip and let’s move on. Great work so far!
Creating multiple clips
To create the complete animation clip, we need a set of clips that are going to represent different parts of the animation. Let’s duplicate the newly created Title Clip (main) four times and rename the duplicates accordingly.
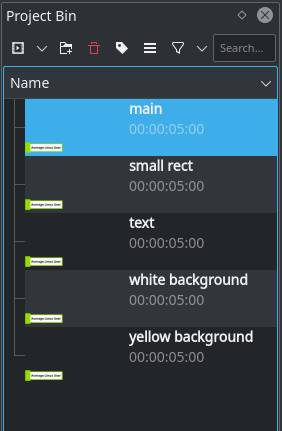
As you can probably conclude from the names of clips, each clip will contain only a single element, and you need to remove the rest. From the text clip remove all rectangles except the actual text, from the white background clip remove text and yellow rectangles but leave the white rectangle intact etc.
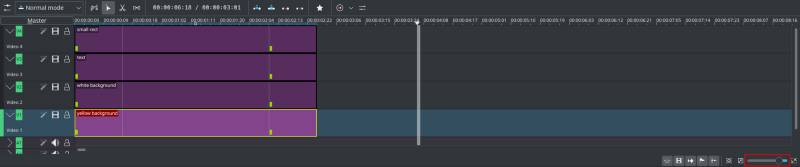
Placing clips on the timeline
Now that we have prepared clips for the animation, it’s time to put them on the timeline! By default, you will notice that Kdenlive has four tracks, the first two being for video clips, and the second two for audio.
Since we have four video clips, you’ll need to add two more video tracks on the timeline. This can be achieved by right-clicking on the existing video track on the timeline -> Insert Track.
Lastly, drag them on the timeline in the following order from top to bottom:
- small rect
- text
- white background
- yellow background
On your timeline, resize each clip to be 3 seconds long. If the clips look tiny on the track and it’s hard to edit them, increase the zoom by dragging the slider in the lower right corner to the right.
In the end, you should end up with a look similar to mine:
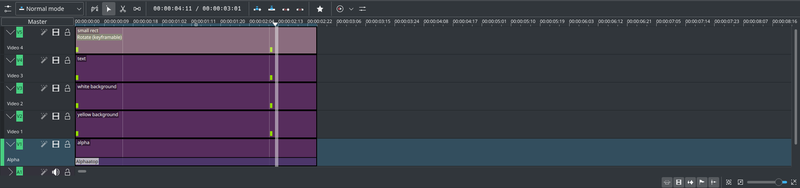
Animating the small rectangle clip
This is going to be the first clip that we will animate. Select small rect clip on the timeline and add Rotate (keyframable) effect to it (drag and drop it on the clip in the timeline).
Take a look at the effect’s configuration section. We’ll use this section to configure how our clip should be animated. The animated small rect clip will consist of four keyframes with the following configuration:
- Time: 00:00:00:00, Rotate X = -300
- Time: 00:00:00:11, Rotate X = 0
- Time: 00:00:02:13, Rotate X = 0
- Time: 00:00:02:24, Rotate X = -300
Keyframes are added by dragging the slider to the chosen time which is displayed in the Clip Monitor and clicking the + icon.

Animating the rest of the clips
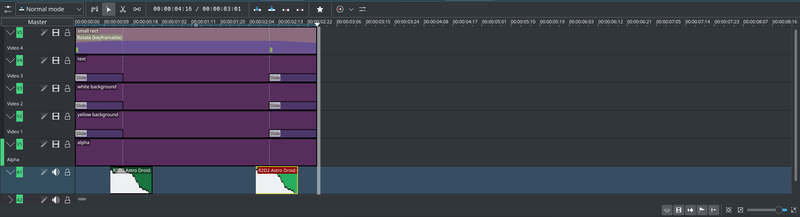
We’ll use six Slide effects to animate the rest of the clips. Search for Slide effect in the Effects section and place it on the timeline. Here’s how it should look like (dark purple boxes are Slide effects):
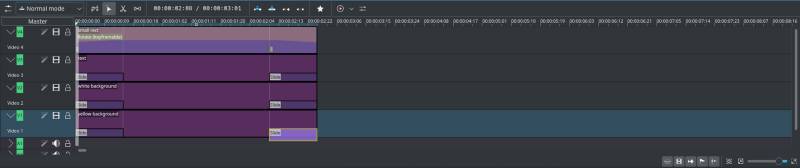
Duration of each Slide effect is 00:00:00:15. You can edit duration by right-clicking on the effect, or by resizing it with your cursor.
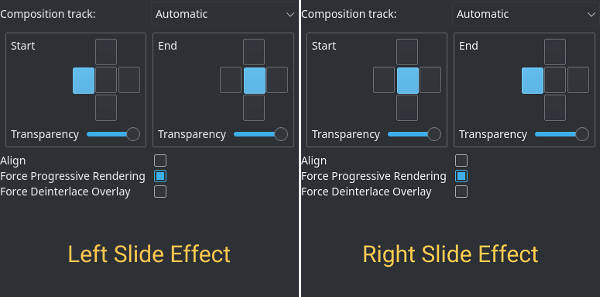
While adding Slide effect you’ve probably noticed the configuration panel which has Start and End sections for controlling the direction of the Slide effect. Modify three Slide effects on the right to have the End section selected on the left (by default it’s in the middle).
Adding an alpha channel
NOTE: For Kdenlive users with the version ≤ 19.12.1, adding an alpha channel is mandatory. Otherwise, the clips won’t animate.
Before diving into creating an alpha channel, let me first explain why does it exist & what is the purpose of it? Alpha channel is used to change the background of the clip. Since lower third animation is expected to be used with the videos, we need to make it transparent so the viewers can watch the video.
You can create an alpha channel by creating a blank (transparent) Title clip and placing it below other clips on the timeline. You will also need to add the Alpha top composition/effect to the alpha clip on the timeline.
Enhancing the animation with sound effects
To make the animation even more professional, I’ll show you how to add sound effects. By clicking on the ▶️ button in the Project Bin panel, a menu will open which has Online Resources entry:
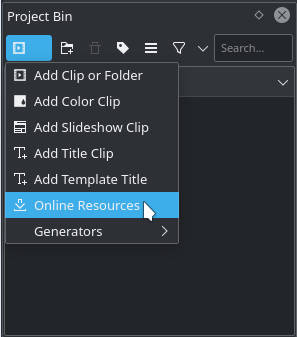
Click on it and search for Astro Droid sound effect. Clicking Import will open a popup asking you to save the file, and after you’ve saved it, another popup will prompt you to login with the Freesound account. If you don’t have it or don’t feel like creating it, click on Get HQ Preview File Instead.
Kdenlive will import the sound effect for you in the Project Bin. Place it on the soundtrack twice. The first instance should go at the beginning (position 00:00:00:11) and the second instance at the end (position 00:00:02:06).
Using lower third animation in the video
First of all, congratulations! You’ve just created your first lower third animation in Kdenlive! You can now use it in any other project. You need to import this Lower Third Animation Kdenlive project and place it on the timeline above any video you want.
Conclusion
I hope this post has inspired you to learn even more about Kdenlive and broke stereotypes that you may have had about Kdenlive. Creating a lower third animation wasn’t hard at all!
To learn more about Kdenlive, I would encourage you to go to the official Kdenlive’s website which does a very good job in thoroughly explaining video editing concepts.
Comments
someone
hi! did you hire ghostwriters to write this article or did you wrote it yourself? i ask you because you stole some ideas here :)
George
Apparently, yes!
Vladimir Mikulic
I (Vladimir) wrote it, not ALU. Sorry for the confusion!
Average Linux User
I wonder what ideas were stolen 🤔