30 Things to do After Installing Ubuntu 20.04/21.04
In this post, we are going to explore 30 things to do after installing the most popular Linux distribution - Ubuntu. If you are eager to learn what Focal Fossa brought to the table as well as some other tips and tricks, stay with me!
Content
- Software & Updates Manager
- Install drivers
- Activate minimize to Dock
- Decrease Swap use
- Install Codecs and Microsoft fonts
- Install JAVA
- Install additional apps
- Install Password Manager
- Configure Theme and Dock
- Configure Hi-DPI Display
- Turn on Night Light
- Add Online Accounts
- Automatic Date and Time
- Xkill shortcut
- Add/Remove Dock Apps
- Move Applications menu in Dock
- Enable GNOME Extensions
- Install Extensions app
- Install Tweaks
- Install additional themes
- Set up Firewall
- Change Firefox Settings
- Enable Netflix support in Firefox
- Change the look of LibreOffice
- Schedule Backups
- Test Webcam and Microphone
- Connect Android phone
- Check Snap apps
- Clean system Ubuntu-Cleaner
- Laptop Tweaks
1. Software & Updates Manager
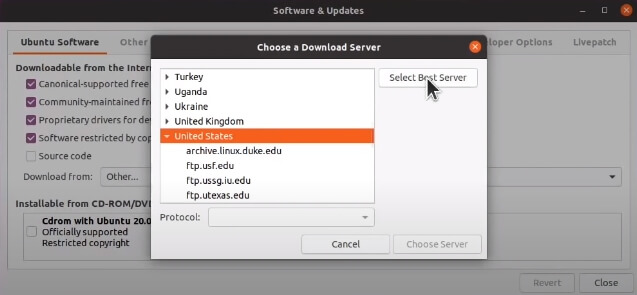
Ubuntu downloads software updates from the main server by default. Depending on your location, the main server may not be the closest to you. To make the update process faster, let’s configure Ubuntu to use the closest server to your location.
Open menu → Software & Updates → Download from → Other → Select Best Server → Choose Server → Reload.
2. Install drivers
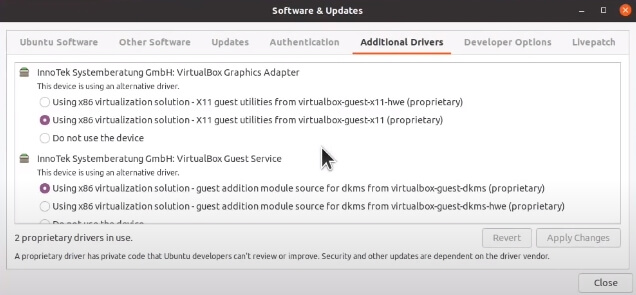
The very next essential thing to do is to install drivers for your system. Fortunately, it’s pretty easy to do in Ubuntu.
Open menu → Additional Drivers → Select the recommended drivers → Apply Changes.
3. Activate minimize to Dock
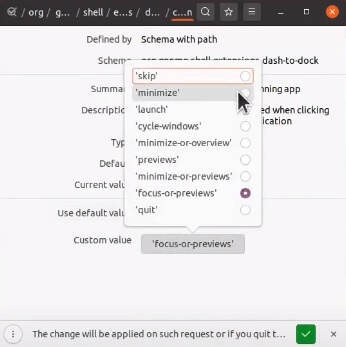
The most annoying “feature” in the default Ubuntu installation is the inability to minimize open app window by clicking on the app’s icon on the panel/Dock.
We can change this behavior by using the Dconf Editor.
Open Ubuntu Software → Search for Dconf Editor → Install.
Open Dconf Editor → Search for click-action → Click on /org/gnome/shell/ extensions/dash-to-doc/click-action → Disable default value and select “minimize” as a custom value.
4. Decrease Swap use
One of the ways to boost your system performance is by decreasing swappiness value. This feature forces your Linux system to use your RAM, instead of your hard drive. If you are not familiar with Linux swap, check out our article.
Check the current swappiness value by executing:
cat /proc/sys/vm/swappiness # 60 (default)
Open /etc/sysctl.conf for editing:
sudo gedit /etc/sysctl.conf
Add vm.swappiness=10 at the end and save the file.
Reboot your system and check the swappiness value:
cat /proc/sys/vm/swappiness # 10
5. Install Codecs and Microsoft fonts
Due to some licensing issues codecs & Microsoft fonts don’t come pre-installed on Ubuntu. Without codecs, Ubuntu won’t be able to play certain media formats. The absence of Microsoft fonts will likely cause you issues if you work with Microsoft Office files.
Install them by running the following commands:
sudo apt install ubuntu-restricted-extras libdvd-pkg ubuntu-restricted-addons

sudo dpkg-reconfigure libdvd-pkg
6. Install JAVA
Java is a popular programming language which many apps rely upon. Thus, it’s crucial to have Java installed to be able to run those apps.
sudo apt install openjdk-14-jre
7. Install additional apps
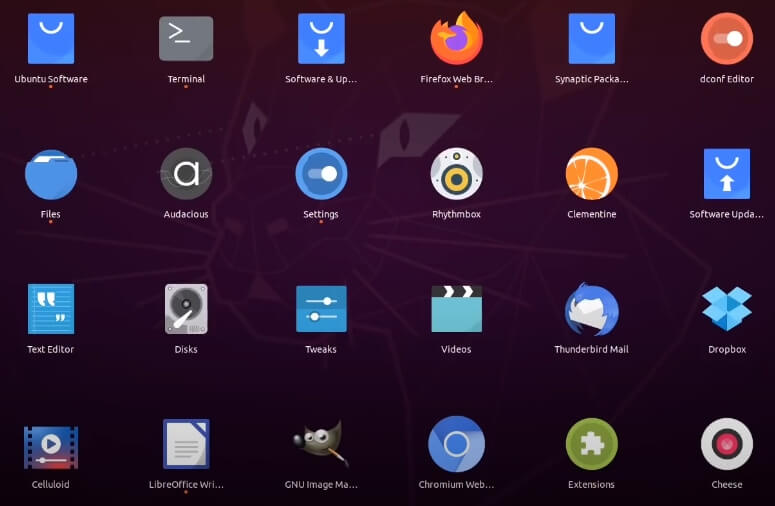
Ubuntu bundles essential apps for an average user, but you likely use other apps outside of Ubuntu ecosystem like:
- Chromium/Chrome
- Celluloid
- Audacious/Clementine
- Dropbox
- Gimp
- Spotify
- Skype/Zoom
- VS Code/Sublime
- Simplenote/Cherrytree
- Steam
You can install all these apps in the comfort of Ubuntu Software. The only exception is Celluloid which you can install by running the following commands:
sudo add-apt-repository ppa:xuzhen666/gnome-mpv
sudo apt update
sudo apt install celluloid
8. Install Password Manager
In today’s modern age, using a password manager is a necessity. With the rise of quantum computing and more powerful hardware than ever, we need to take great care of our passwords.
Luckily, we have an open-source and easy to use password manager - KeePassXC.
Open Ubuntu Software → Search for KeePassXC → Install.
First and foremost, you’ll need to create a database which will store all your passwords. This database is only accessible by a single master password. Make sure it is a good password and you remember it.
After completing the database setup, KeePassXC is ready to store your passwords. You can click on the “+🔑” button on the top menu to add a new credential.
When you need to log in to your account, you can right-click on the entry and copy your username and password.
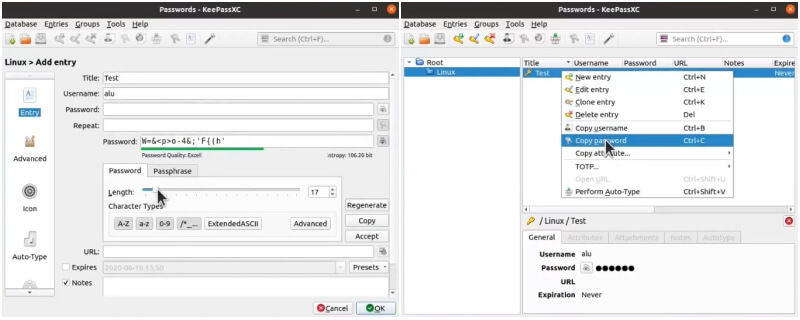
You should have very different passwords for all accounts but you do not need to remember them, you only need to remember the master password that enrypts all passwords stored in the KeePassXC database.
9. Configure Theme and Dock
Ubuntu 20.04/21.04 features three themes:
- Light
- Standard
- Dark
You can try them out in Settings → Appearance.
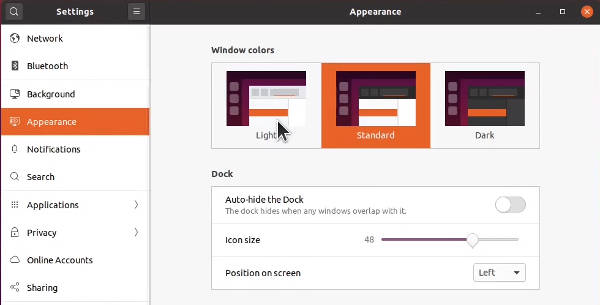
Optionally, you could enable Auto-hide the Dock, set custom icon size of apps in the dock as well as change dock’s position on the screen.
However, you also can install additional themes as I show below.
10. Configure Hi-DPI Display
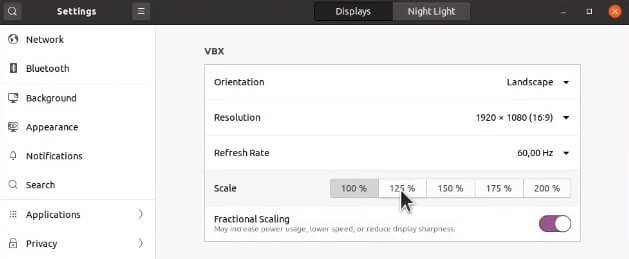
Newly introduced feature in Ubuntu 20.04/21.04 is Fractional Scaling. For those of you who have Hi-DPI screen, this feature allows you to configure the scaling of your screen. (Settings → Displays)
If you encounter a black screen, it means that your screen doesn’t support the selected scaling and will revert to the old one after 15 seconds.
11. Turn on Night Light
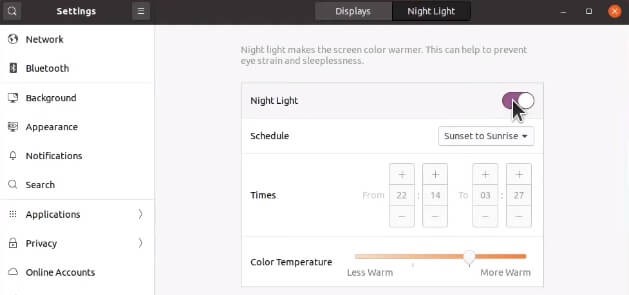
Good news for night owls, Ubuntu offers built-in night light. It will reduce the amount of blue light at night. Night light helps in preventing eye strain and sleeplessness.
Open Settings → Displays → Night Light (tab at the top).
12. Add Online Accounts
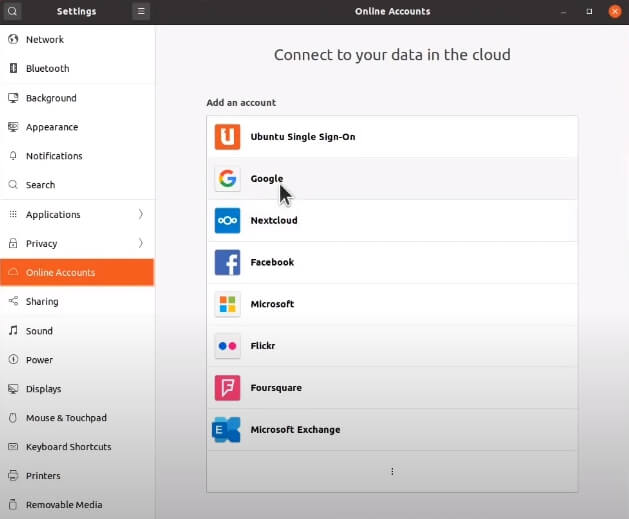
Online accounts can easily be configured with Ubuntu 20.04/21.04 by going to Settings → Online Accounts. If you are using Google account, you can sync your data (Mail, Calendar) & Google Drive files which are accessible from the default file manager.
13. Automatic Date and Time
Usually, date and time are set correctly by default. In case if they are not, you can change it in Settings → Date & Time.
14. Xkill shortcut
xkill is a Linux command primarily used to force-quit unresponsive apps.
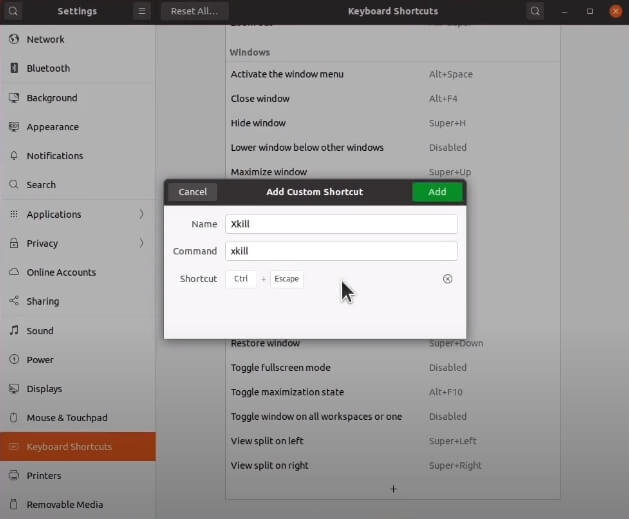
You can configure the shortcut for this command in Settings.
Open Settings → Keyboard Shortcuts → Scroll to the bottom → Click on + button to add a new shortcut → Set name and command to xkill → Set Shortcut → Press keyboard keys to set shortcut (I use CTRL + Esc)
15. Add/Remove Dock Apps
To add an app to the dock:
Open menu → Right-click on the app that you would like to add → Click on Add to Favourites.
To remove an app:
Right-click on the app in the dock → Click on Remove from Favourites.

16. Move Applications menu in Dock
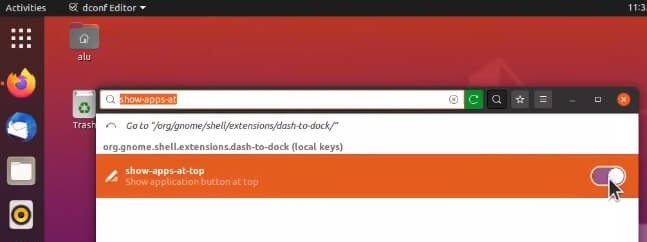
Applications menu in Ubuntu is located at the bottom left corner of your screen. Alternatively, you could move it to the top by using Dconf Editor.
Open Dconf Editor → Search for show-apps-at-top & enable it.
17. Enable GNOME Extensions
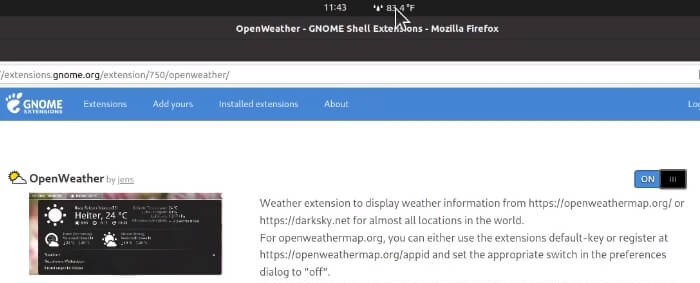
GNOME extensions, as the name implies, allow you to extend the functionality of your desktop.
Open Synaptic → Search for chrome-gnome-shell → Mark for Installation → Apply.
Now, you can go to the GNOME Extensions website and install some extensions. Have fun with customizing your desktop! If you would like to know the extensions I use, check out this article.
18. Install Extensions app
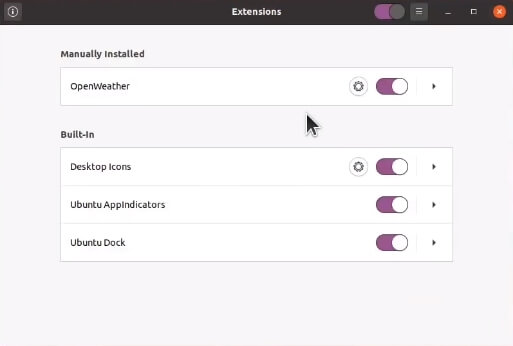
If you are extensionsholic, the easiest way for you to manage all your extensions is with the Extensions app.
Open Synaptic → Search for gnome-shell-extensions → Mark for Installation → Apply.
19. Install Tweaks
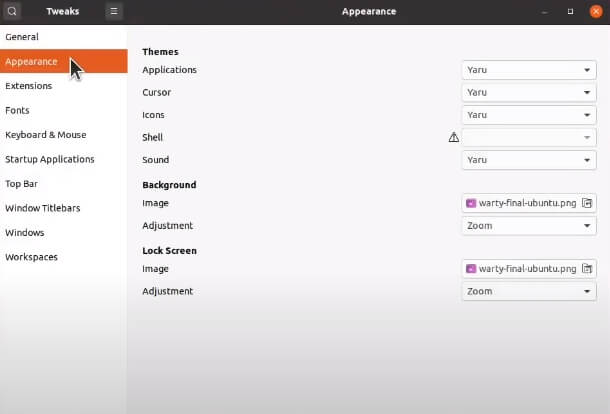
GNOME Tweaks is another desktop customization app that allows you to configure niche settings that are not available by default like:
- Appearance (advanced)
- Fonts
- Startup Applications
- Top bar
- and many more!
Open Synaptic → Search for gnome-tweaks → Mark for Installation → Apply.
20. Install additional themes
As I already mentioned above, Ubuntu comes with three default themes. Not a fan of either of them? No worries, the community’s got you covered.
User Themes extension will allow you to load custom GNOME themes. To install the themes, we’ll need another app - OCS-url.
Open Ubuntu Software → Search for ocs-url → Install.
Custom GNOME themes can be found on Gnome Look website. I’ll use the Tela icon theme & Flat Remix as my desktop theme. Click on files tab and click install under OCS-Install column.
Open Gnome Tweaks → Appearance → Select Flat Remix as applications theme & Tela as an icon theme.
21. Set up Firewall
While there are not many viruses for Linux, it’s advisable to enable a firewall which protects against network intrusions.
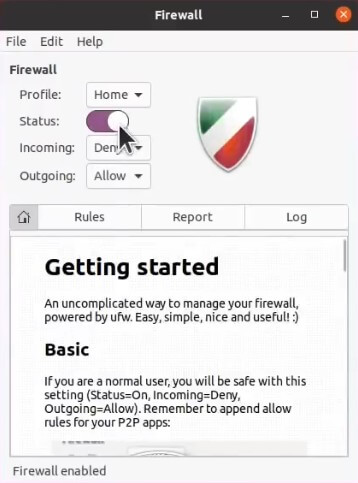
Open Synaptic → Search gufw → Mark for Installation → Apply.
Open the Firewall and enable it.
22. Change Firefox Settings
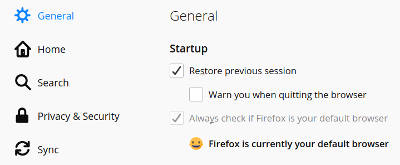
My favourite feature of Firefox is the ability to restore the previous session. This feature can be useful if you take breaks between long work sessions and would like to resume your work.
Open Firefox → Options (hamburger menu) → Preferences → Enable Restore previous session.
The next thing we can do to improve the browsing experience in Firefox is to customize the toolbar. I like to remove the spaces around the default search bar and replace this space with another “true” search bar.

The difference between the two search bars is that the first one doesn’t always behave like a search bar. Let’s say you would like to lookup an email address. The first search bar will open your default email client, while the second one will perform the actual search.
Lastly, if you use Firefox across multiple devices, you might find Firefox Sync feature useful. You can enable it by going to the hamburger menu (top right corner) and selecting Sign in to Firefox.
23. Enable Netflix support in Firefox
We can’t use Netflix with default Firefox settings. The reason for this is because Firefox comes with DRM-controlled content option disabled.
Open Firefox → Options (hamburger menu) → Preferences → Enable Play DRM-controlled content.

24. Change the look of LibreOffice
LibreOffice is a well-known office suite alternative for Linux. It comes with balanced default settings, but I’ll show you some tips to make it even better.
Open LibreOffice Writer → View → User Interface → Enable Single Toolbar & Tabbed interface.

Open LibreOffice Writer → Tools → Options → Icon style → Select Colibre.
![]()
Now your LibreOffice’s UI is identical to Microsoft’s office. Optionally you could experiment with more styles. You can install them by opening Synaptic and searching for libreoffice-style.
25. Schedule Backups
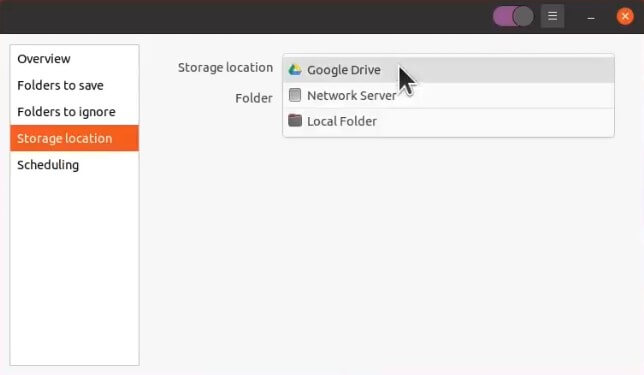
Ubuntu comes with an easy to use Backups app for backing up your data. Simply, open Backups and enable it. By default, it will back up your home directory and ignore ~/Downloads and Trash.
However, you can add your directories that you would like to back up/exclude as well as configure the location of your backup.
26. Test Webcam and Microphone
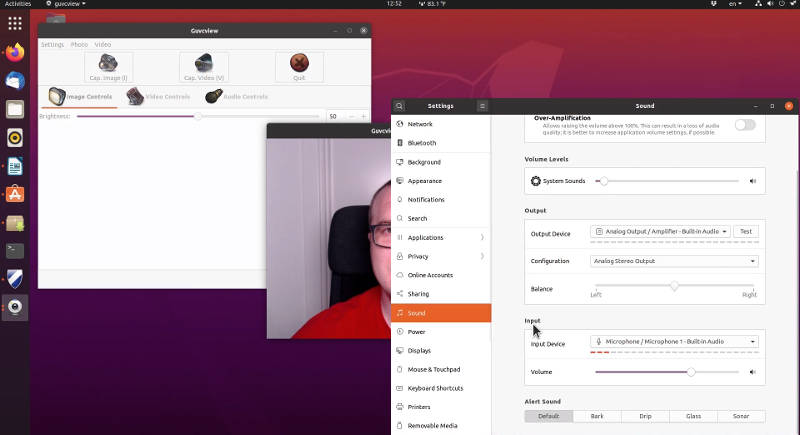
If you have a webcam and/or microphone, it’s good to check if Ubuntu recognizes them. In Settings → Sound, you can check your microphone.
To test the webcam, we need to install an additional app. Ubuntu does come with webcam app Cheese, but it doesn’t recognize my camera.
On the other hand, Guvc recognizes it very well.
Open Synaptic → Search for guvc → Mark for Installation (guvcview package) → Apply.
27. Connect Android phone
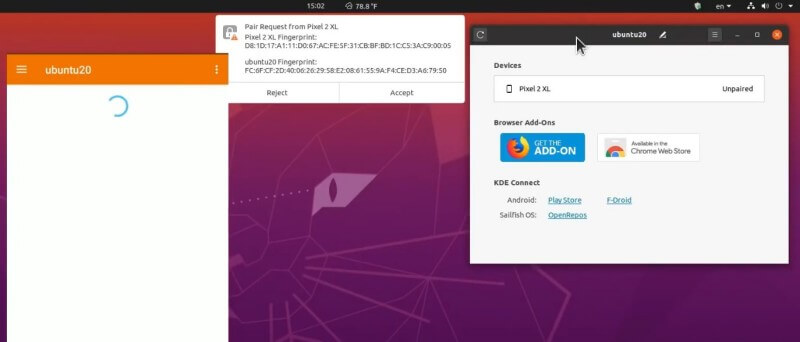
If you are using an Android device, you are in luck. GSConnect extension on Ubuntu together with KDE Connect mobile app lets you connect Android phone with Ubuntu.
Open KDE Connect and click on a network icon on Ubuntu → Mobile Devices → Mobile Settings.
Now, you can request pairing from KDE Connect and accept the request on Ubuntu. If you have Firewall enabled, GSConnect won’t be able to find your mobile phone (KDE Connect).
To whitelist KDE Connect:
Open Firewall → Rules tab → + button → Select KDE Connect as an application & policy to allow.
28. Check Snap apps
Snap is a software packaging format developed by Ubuntu’s parent company Canonical. Still, the vast majority of users prefer regular deb packages. They both have their pros and cons, but I’ll show how you can replace Snaps with deb packages.
snap list # List of installed Snaps on your system
sudo snap remove <snap> # Remove Snap from your system
To differentiate between Snaps and deb packages look at Source entry in the Details section of the app in Ubuntu Software.
If the source is snapraft.io, it means that the package is in Snap format. Otherwise, it’s a deb package.

29. Clean system Ubuntu-Cleaner
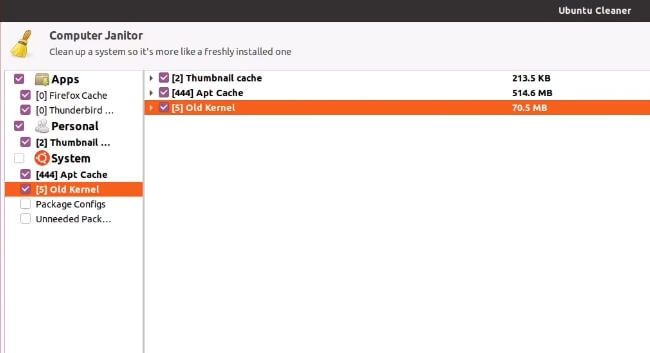
After you’ve installed your apps and configured your system, you might want to clean your Ubuntu. I recommend Ubuntu Cleaner for this task. It’s a simple and user-friendly app that does the job very well.
You can install Ubuntu Cleaner by running the following commands:
sudo add-apt-repository ppa:gerardpuig/ppa
sudo apt-get update
sudo apt-get install ubuntu-cleaner
I tend to clean the application’s cache & old kernels from time to time.
30. Laptop Tweaks
If you are running Ubuntu on a laptop, I have some tips for you to optimize in the best possible way.
To squeeze more juice out of your battery 🔋:
sudo apt install tlp tp-smapi-dkms acpi-call-dkms
You can also configure Ubuntu to show battery percentage:
Open GNOME Tweaks → Top Bar → Enable Battery Percentage.
Conclusion
These were my top 30 things to do after installing Ubuntu 20.04/21.04. I hope you’ve found them useful. Let me know what is your favorite feature in Ubuntu 20.04/21.04 in the comments section.
 Never miss a post from us, subscribe to our newsletter
Comments
Sanya Arora
I’ve just started using Linux and this was a great help. Thanks a tonne.
ra
after entering this: sudo apt install ubuntu-restricted-extras libdvd-pkg ubuntu-restricted-addons it proceeds to this: package configuration, Configuring ttf-mscorefonts-installer(TrueType core fonts for the Web EULA) in the bottom, the progress remains at 1%. what to do? if i close the terminal forcefully, will there be any problem? ThankYou
ra
Problem resolved. I closed the terminal, then ran the same command. Terminal suggested a command to repair. After that it all went smooth. Sorry for the trouble:)
chejnik
Thanks, great tips.
Júlio
Thanks!
J
Thanks!!
Andre
Nice tips. Thanks!
Waseem
I’ve just joined Linux a week ago, and your YouTube video was a great help and informative. I Appreciate your effort and time making this! Thx Vladimir!
Average Linux User
Thank you for your feedback. We’re very happy to hear that.
Z4RX
You misspelled this package
ubuntu-restricted-extrasAverage Linux User
Oops! Thanks! I have corrected it.
InterZone23
command to reduce the swap usage to 10:
sudo bash -c 'echo "vm.swappiness=10" >> /etc/sysctl.conf'and command to apply it without a reboot:
sudo sysctl -pcheers
nice one.
Average Linux User
Thanks for the addition. I try to avoid the command line in Ubuntu posts because many new Linux user are not comfortable using it. They may not understand what a command does.
But of course, the command way is a more efficient way to change swappiness.
Mohamed
Command to install dconf:
sudo apt install dconf-editorAverage Linux User
Thanks for this addition. I try to avoid the command line in Ubuntu posts because many new Linux user are not comfortable using it.