Make a bootable USB drive on any Linux distro
In this post, you will learn how to make a bootable USB drive in Linux system using the native Linux tools.
I know that many of you are scared of the Linux command line. Of course, you can use graphical programs to make a bootable USB in Linux. But believe me, you will benefit so much if learn the Linux command line tools. For example, if you need to make a bootable USB drive in Linux, different distributions provide different graphical programs to do that, but every Linux distribution has the same built-in tool to do the same job. So, you will benefit for it long-term.
Make a bootable USB drive in Linux
To make a bootable USB drive in Linux, you just need to learn one simple command. The command is dd.
sudo dd bs=4M if=path-to-the-ISO of=/dev/sdX status=progress && sync
Options explained:
sudo means to give admin privileges to this command.
dd is the program name.
bs=4M means to use a block size of 4M, so the system will read and write the data in chunks of 4M. This option is simply meant to speed up the process.
if specifies the source to read. Simply put, this is an ISO file of the Linux image you download from the Linux distribution website.
path-to-the-ISO - path to the ISO file. For example, ~/Downloads/archlinux.iso
of specified the destination or where to write this ISO file. In other words, it is your USB drive. This is the most important part of the command, If you do mistake here, you can screw up your whole system. So, be very-very careful.
/dev/sdX means the name assigned to a device by your Linux system. It is some kind of analogy of disks C, D, E in Windows systems.
To find out the name Linux assigned to your flash drive, run this command:
sudo fdisk -l
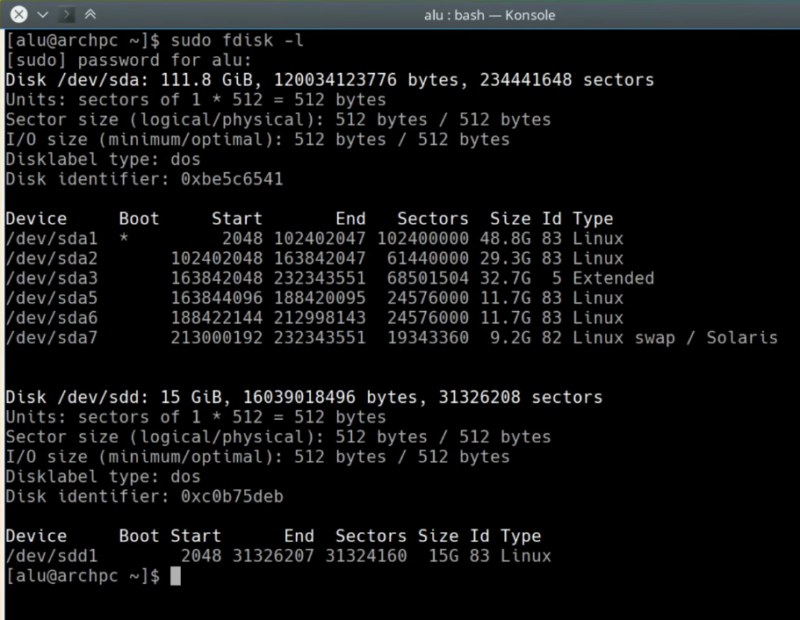
Then you need to analyze the output like the one above. Usually, the USB devices are listed at the end. You find your flash drive by its size. It usually has only one partition. I know that my flash drive is 15Gb. So, its name is sdd. This name is not permanent and it depends on the order the drives are mounted to the system. So, you need to check your USB drive name every time you insert it into the computer
status=progress is not necessary. However, it is helpful because it will show you the progress during the writing process. Without this option, nothing will be printed on the terminal screen.
sync is actually another command, not an option. Sync clears the cache. Thanks to the && signs it will be executed as a chain with dd. This will make sure that all the data is written to the flash drive and nothing is left in the cache.
NOTE: I also need to WARN you that this procedure will wipe all the data from your USB flash drive. So, if you have any important data on it, copy it somewhere else before you run this command. I also recommend to back up the data from other hard drives, so you do not destroy them accidentally.
So, when you are sure that there is no valuable data on the flash drive and you specified all the names correctly, especially the of option, press Enter.
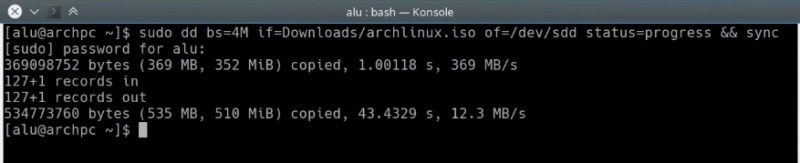
It usually takes several minutes to complete. When the process is finished, you can reboot your system and boot from a newly created bootable USB.
That is the way you can make a bootable USB drive in Linux.
Restore the USB drive
After you have used the bootable USB flash drive, you need to restore it back to its normal not-bootable state. So, to do that, you need to remove the bootable system from it. Run this command:
sudo wipefs --all /dev/sdX
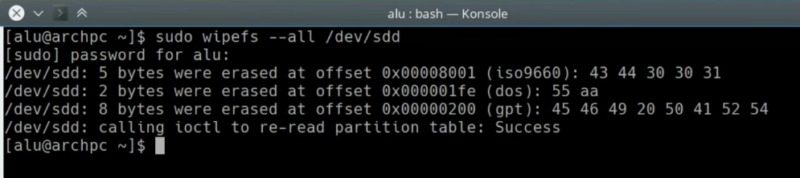
Then, where again sdX is your flash drive name without any number (in my case it is sdd). You can check it with:
sudo fdisk -l
After that create a new partition on it:
sudo cfdisk /dev/sdd
Select dos option.
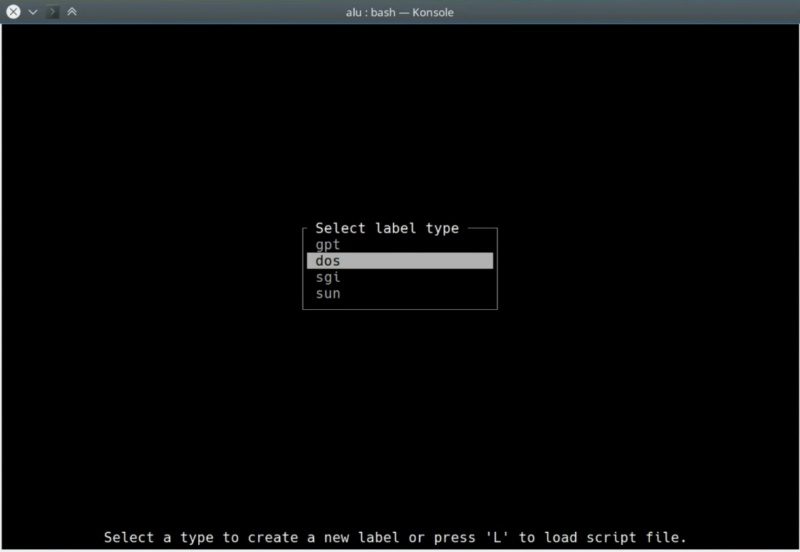
And press enter to create a new partition.
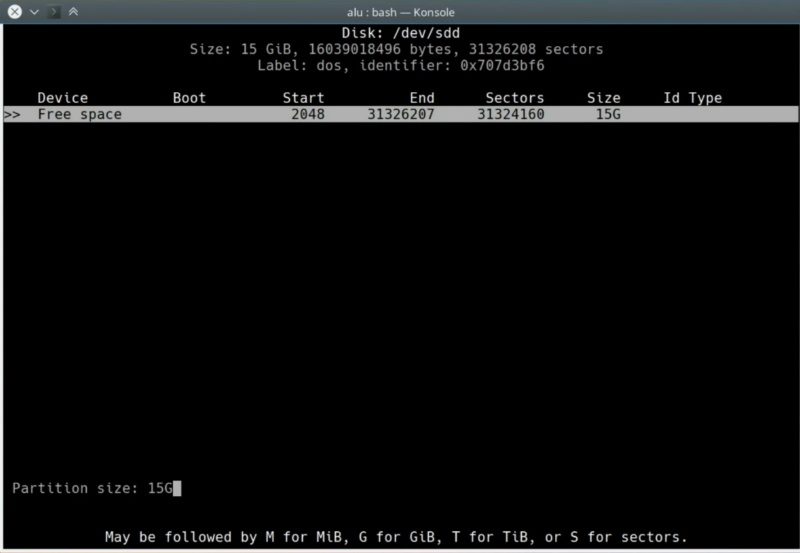
Keep it at its maximum size. So, press enter.
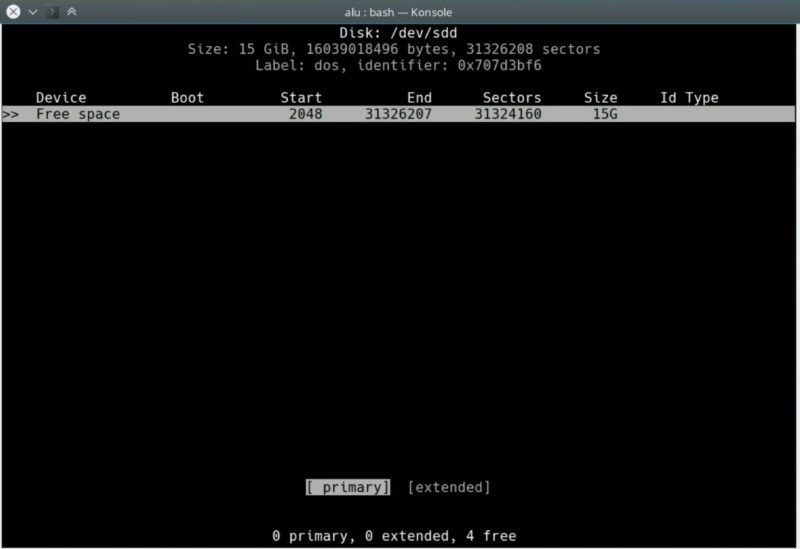
Next, press enter again to make it primary. Navigate with the arrow keys to write and press Enter to write the changes.
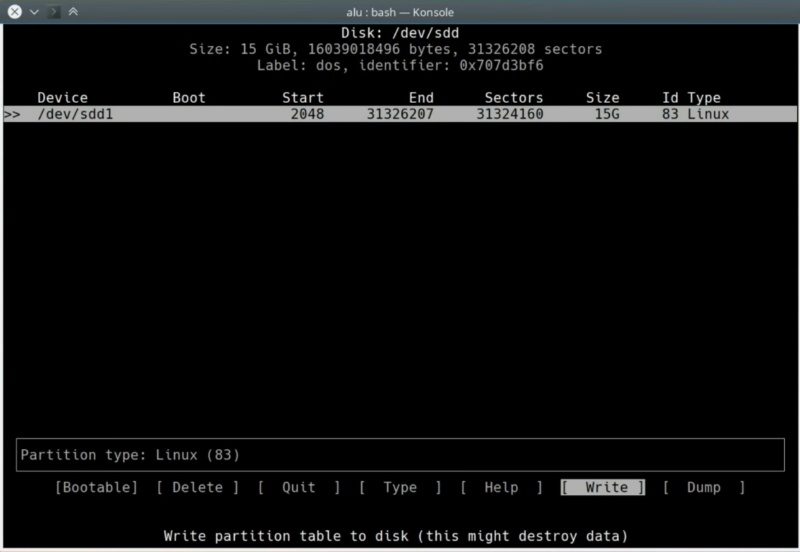
Finally, type yes to confirm and quit the program.

Then, run this command, to check if a new partition has been created:
sudo fdisk -l
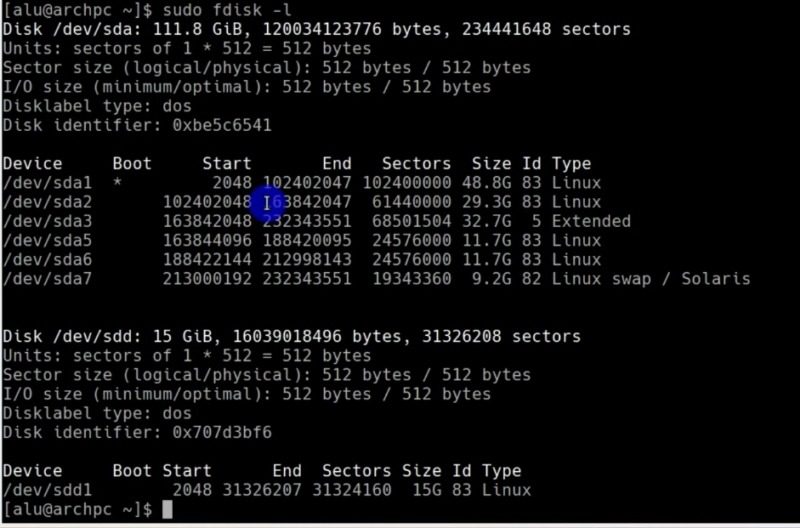
As you can see, the new partition has been created. It is named sdd1 in my example.
Then, format this partition as FAT file system:
sudo mkfs.vfat -n 'ALU' /dev/sdd1

Where ‘ALU’ is the label I give to this drive, you can use your name instead. And sdd1 is the partition name. Unlike in all the previous steps, where you used the device names, in this command you need to specify the partition name which ends with the number.
After these uncomplicated steps, your flash drive is like new and you can use it to store files.
Conclusion
Now you know how to make a bootable USB drive in Linux. You can now proceed to the installation process or test Linux live distributions.
So, leave your comment and give your opinion about this tutorial. Did you like it? Did you know about this tool?
You can also read “Linux Root Folders Explained”.
Comments
Concerned Penguin
is it really healthy to teach new users as destructive a tool as dd? Aren’t there better alternatives even non-GUI-wise?
Average Linux User
There is a tutorial on GUI and more user-friendly tools
Ubermensch
3….2….1…and here we go!! About to try this with the oh so daunting QubesOS. Thank you for the well worded, informative, and VALID method described here. I have been getting to depend on the CLI more and more and this just makes me all warm and fuzzy inside. Thank you ago and be very well.
Average Linux User
Ubermensch, thank you for your commenent!
subAverage linux user
Can you do this with a partition on a multi-partition usb?
Average Linux User
No, you will overwrite all partions.
Abdul
Can this work for a window OS?
Average Linux User
Use Etcher on Windows
Chaloc
Following these instructions I received ‘No boot sector’ upon booting from flash drive. Maybe there is one more piece missing?
Average Linux User
What distro do you try to write to a USB?
I created dozens of bootable USB with this method, and it never failed.
You can also try graphical programs to make a bootable USB.
chinu
sudo mkfs.vfat -s 'ALU' /dev/sdd1 “ it should be “-n” option ? screenshot has -n and text has -s
Average Linux User
Oh, sorry… It is “-n”. I have corrected the post. Thanks a lot for noticing and telling me.
LmP
Can I use it for creating windows installation too?
Average Linux User
I think so but I have not tried.
Jny
I like. Maybe I missed it but can you add persistence when you use this method?
Average Linux User
I think you can, but I personally never did that. From what I have read online, it makes things complicated. So, I would recommend against it.