Install Arch Linux easy (Official Guided Installer).
You will learn the easiest way to Install Arch Linux automatically with the Official Guided Installer (archinstall). You would need to spend only 5 minutes to configure the installation and the rest will be done automatically. If you ever installed Ubuntu, you would be able to install Arch Linux with this guide. You will get a working Arch Linux with a graphical desktop at the end of this tutorial.
Content
What is archinstall?
archinstall is the Official Guided Installer of Arch Linux. You just need to spend 5 minutes ticking the boxes to configure your installation and the rest will be done automatically.
Although it is not a pretty-looking graphical installer yet, it is very close to installers of Ubuntu and other distros. In this article, you will be walked through each step of this installer and you will get a working Arch Linux with a graphical environment on your computer.
Download the installer
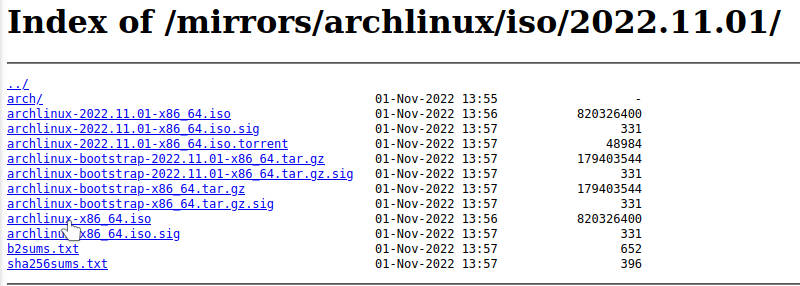
Go to the Arch Linux Download page, and download Arch Linux ISO. If you are not sure about what download option to choose, go to the HTTP Direct Downloads, scroll down to your country section, click on any link and download the archlinux-x86_64.iso file.
Create a bootable USB
Create a bootable USB from this ISO file using the command line on any Linux distro or with the graphical ISO writer.
Boot from the Arch Linux ISO
Boot from this live Arch Linux ISO. You should see this picture on your screen:
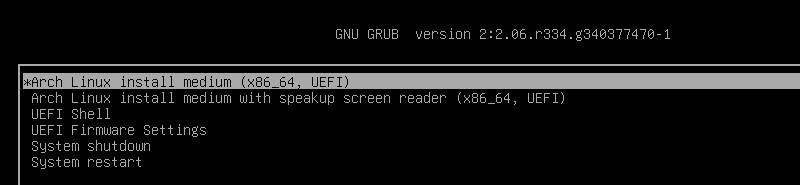
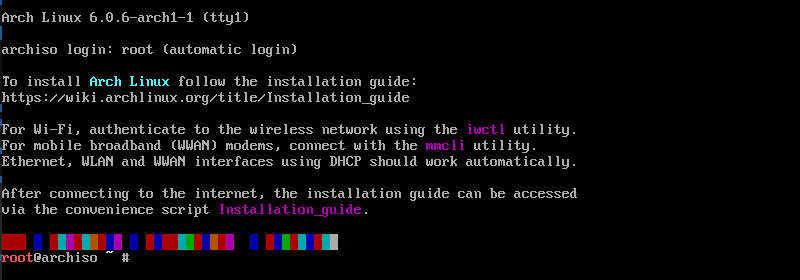
Select the first option Arch Linux Install medium (x86_64, UEFI), and press the Enter key. You should be welcomed with this command line interface:
Test your Internet connection
Wired connection
If you have a wired Internet connection, it should be configured automatically. Test if you can ping any server:
ping -c 3 archlinux.org
Wi-Fi connection
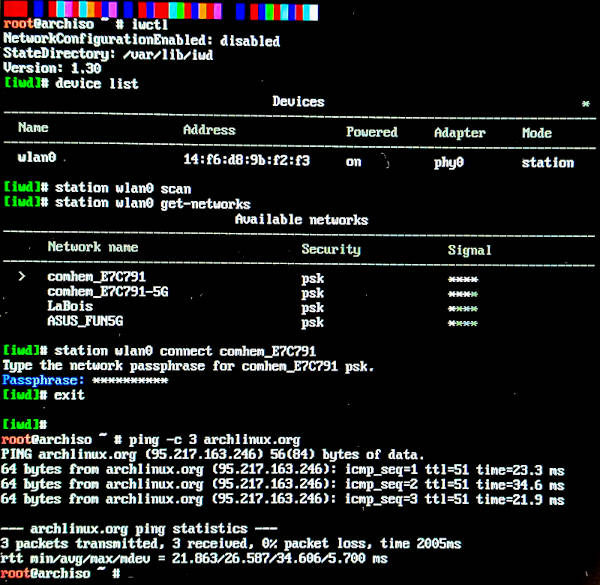
If you are using Wi-Fi, you need to configure it using iwctl.
To launch iwctl, type it in the command line and press Enter:
iwctl
You will get an interactive prompt of iwctl. List available devices:
device list
You should see your Wi-Fi available with a name like wlan0. So, wlan0 is my WI-Fi device name in the commands below, if your device name is different use it instead.
Scan for networks and list available Wi-Fi networks:
station wlan0 scan #this command outputs nothing
station wlan0 get-networks
Finally, to connect to your Wi-Fi network:
station wlan0 connect my_wifi
You may be requested to enter the passphrase of your Wi-Fi to connect. If you see no error after that, your Wi-Fi connection has been established.
Exit the iwctl prompt with the corresponding command:
exit
And test your Wi-Fi connection with a ping command:
ping -c 3 archlinux.org
Here is the screenshot of how I executed these commands on my laptop to connect to Wi-Fi from the Arch Linux installation session:
Broadband modems
Mobile broadband modems can be configured with the mmcli utility. Unfortunately, I have no mobile broadband modem to test and demonstrate it.
Consider Arch Linux installation in VirtualBox
Although this Guided Arch Linux Installer is very simple, I still recommend trying it in the VirtualBox first. Practicing Arch Linux installation in a virtual environment is always a good thing. It will protect you from making mistakes on the real hardware and will give you more confidence.
Install Arch Linux with archinstall
To launch the archinstall guided installer, type archinstall in the command line interface of the Arch Linux installer and press Enter.
archinstall
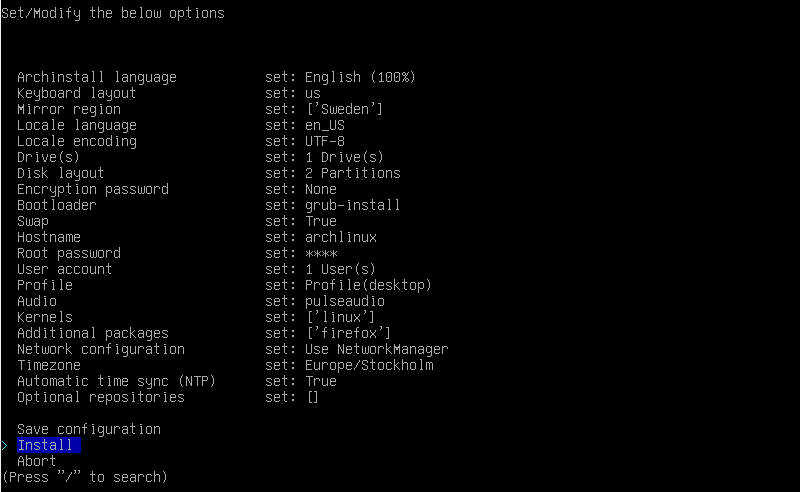
This command will load the Guided Installer:
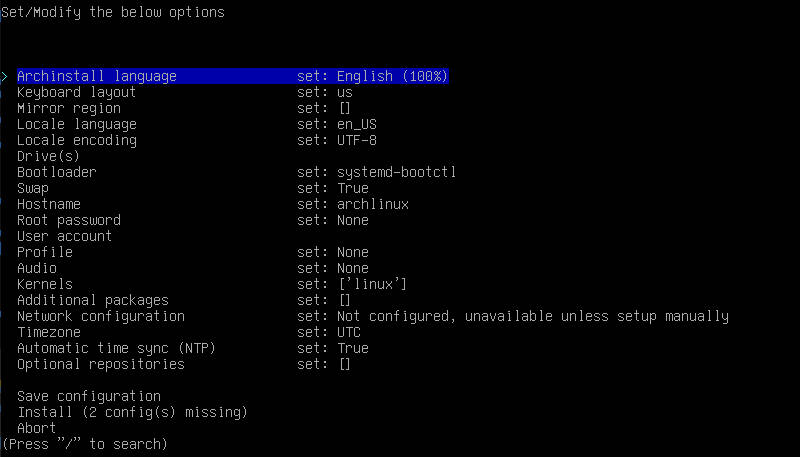
You can navigate among these options by using the arrow keys on your keyboard. Use the Enter key to choose any option and the Esc key to go back/exit.
Now, we will go through each of these options with explanations.
Language and Keyboard layout
I recommend keeping the language and keyboard English US. It will make it easier to follow the installer and you can also change the system language and add additional keyboard layouts later after the installation.
Mirror region
Press Enter on the Mirror region option and search for your country using the arrow keys on your keyboard. You can also press ‘/’ and type your country name for a quick search.
Locale language and encoding
I also recommend keeping the locale language and encoding en_US UTF-8. If necessary, you would be able to change it later after the installation.
Drive(s)
When you select the Drive(s) option, you are presented with a list of hard drives you have on your computer. Select the one where you want to install Arch Linux.
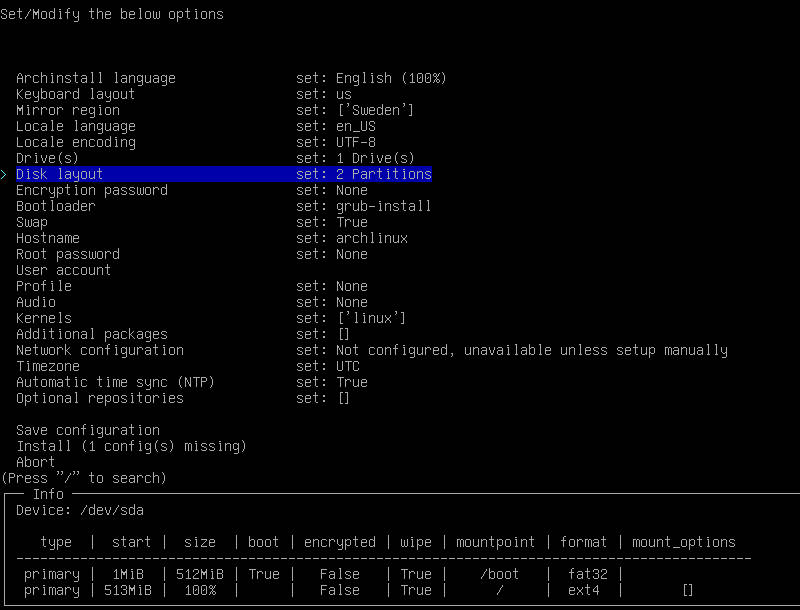
Disk layout
In the disk layout option, you need to configure the partition layout of your Arch Linux installation. I recommend choosing Wipe all selected drives and use a best-effort default partition layout and use the ext4 filesystem. NOTE, this will delete all your data from the hard drive, so install this Arch Linux on your test computer or back up all the data first. You can also use VirtualBox for this Arch Linux installation, to get some practice before you install it on real hardware.

Unfortunately, this partition manager is not user-friendly and you are very likely to do a mistake or misconfigure your partitions. The automatic partitioning on the other hand works really well. For example, it automatically detected that my system is UEFI and created /boot partition for it and the rest was allocated to the system (/ - root partition).
Encryption password
I recommend skipping the disk encryption. I assume this automatic installation is used by beginners, and encryption is rather an advanced topic. If you are a beginner Arch Linux user, you may lock out yourself from the data by using the encryption password.
Bootloader
By default, the archinstall script offer to use systemd-bootct. It is a good option, however, I recommend switching to GRUB. GRUB is more configurable and I find it to be easier for new users.
You need to enter the Bootloader option and select yes, when you are asked if you want to switch to GRUB:

Swap
Swap is enabled by default and the archinstall script is going to create it automatically. It is going to be a swap file.
Hostname
Hostname is the name of your computer. It is archlinux by default and I recommend keeping it like that. However, you can change it to whatever you want as well.
Root password
Set the password for the administrative task. you need to type it twice. Note, you won’t see any stars or other signs while you are typing it.

You can also skip setting a root password and just add sudo rights to your regular user. But it is better to have a root password in the Arch Linux system.
User account
After you have set a root password, create a regular user account. Give it a name and assign a password to it.
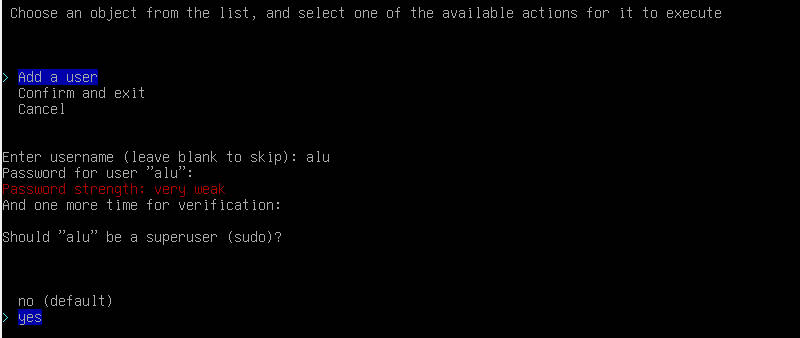
Make sure you choose Conform and exit at the end.
Profile
In the Profile option, select the desktop option:
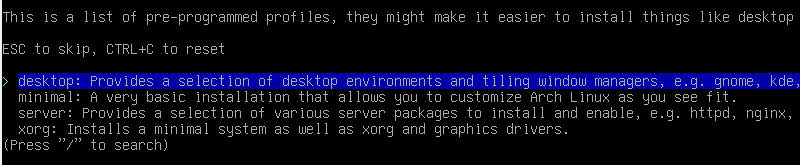
And choose what desktop environment you want to install. I usually recommend using XFCE but as far as I know new users prefer something fancier, so you can also use GNOME or Plasma 5 from KDE:
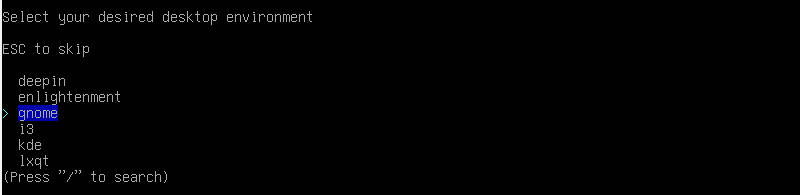
Next, you will be offered to choose which graphics drivers to install. Select according to your hardware. If you are not sure, just install All open-source drivers.

Audio
The Arch Linux installer offers to use pipewire by default. Pipewire is more advantageous in features but I still recommend choosing pulseaudio here. I have seen some users complaining that pipewire doesn’t work well on their hardware. To minimize potential problems, go for pulseaudio here.

Kernel
Keep the default choice linux as a kernel. There is an option to use the LTS and Zen kernels, but for a new user it is not necessary at this stage. One can also switch to another kernel later.
Additional packages
This automatic Arch Linux installation is very minimal and it lacks most of the packages you expect to have after the installation such as web browser, office suite, etc.
I recommend adding only a web browser here. Just type firefox and press Enter here:

All other essential packages can be installed after you have a working Arch Linux system as I describe in my Things to do after installing Arch Linux.
Network configuration
The options are self-explanatory here. Choose NetworkManager here:

Timezone
This one is clear. Select your time zone. Remember to use / for quick search.
Optional repositories
I recommend skipping this option for now. I may add additional repositories later after you have installed Arch Linux and used it for a while.
Install
After you have configured your Arch Linux installation, just select the option Install and press Enter.
You would need to press Enter the second time to confirm the installation. The installation may take a few minutes to a much longer time depending on your internet speed.
After the installation, you would be asked to chroot into a newly installed system. You need to select no because you can do all post-installation configuration after you boot into the graphical interface of your newly installed Arch Linux.

If the installation finished without any error, type reboot and press Enter:

Hopefully, you would boot into your newly installed Arch Linux. If you boot into the installation media, remove your live USB and reboot again.
Test your Arch Linux desktop
After you log in to your Arch Linux, test it. For example, you can watch my video on 10 things to do first in Arch Linux. Both the graphics and audio should work fine out of the box.
Things to do after installing Arch Linux
Next, you can use some of these 10 recommendations to configure your Arch Linux after the installation.
Warning
Although this automatic installer makes life much easier for a beginner, it has its drawbacks. Archinstall stores passwords in plain text and it uses different defaults than the regular installation process:

So, after you have tried Arch Linux and you liked it, I recommend re-installing it but using the regular installation process. It requires more effort but you would get a real Arch Linux experience. I have a guide on how to install Arch Linux the Arch way. I believe it will make the installation a bit easier.
Comments
Panos
The King is back. Thank you for yet another excellent article.