20 Things to do After Installing Pop!_OS 22.04
Learn 20 Things to do after installing Pop!_OS 22.04 to improve your Pop!_OS desktop experience. Most of these things are must do after any Pop!_OS installation.
Content
- 1. Update Recovery Partition
- 2. Switch to Hybrid Graphics
- 3. Update Firmware
- 4. Configure Hi-DPI Display
- 5. Install Synaptic
- 6. Install Codecs and Microsoft fonts
- 7. Back up files
- 8. Enable Firewall
- 9. Install ThinLinc
- 10. Install GNOME Tweaks
- 11. Enable GNOME extensions
- 12. Install Google Chrome
- 13. Netflix support in Firefox and other settings
- 14. Automatic Date and Time
- 15. Activate Night Light
- 16. Configure Dock
- 17. Install Guvcview
- 18. Disable Bluetooth
- 19. Show Battery Percentage
- 20. Install Ubuntu-Cleaner
- Try ThinLinc!
1. Update Recovery Partition
Recovery Partition is very handy tool provided by Pop!_OS. It is a copy of the installation media that you can use to repair or reinstall your Pop!_OS system. The advantage is that you don’t need to have a separate USB stick with the Pop!_OS installer on it, you can just boot from this recovery partition on your computer if something unexpected happens to your system.
To update recovery partition, you need to go to:
Settings -> OS update and recovery -> Update Recovery Partition
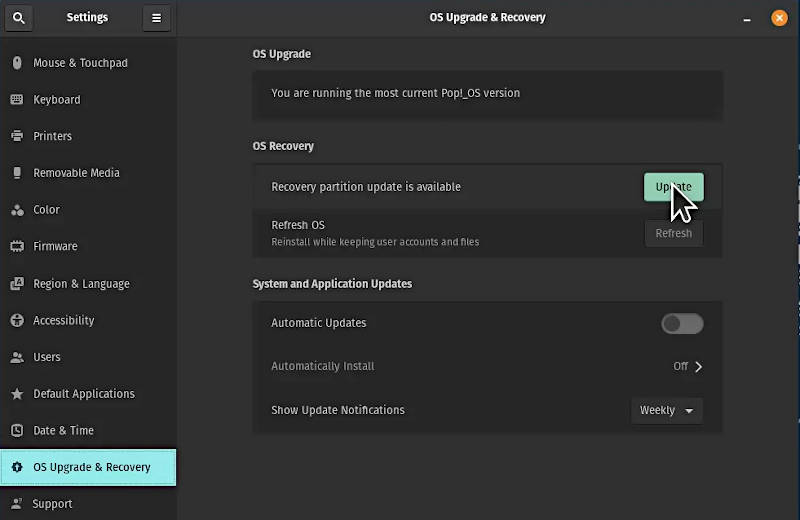
You may need to wait a few seconds to see that your recovery partition has some updates available. If any updates are available, click to update. It will take quite some time to download and write all the information for the recovery partition. After the update is done, you will see that you have the most current version of the recovery partition.
Now, if anything happens to your system, you can boot from this recovery partition.To that end, you just need to restart your system and hold the space key during the boot process and then you will enter this menu where you can choose Pop!_OS recovery mode.
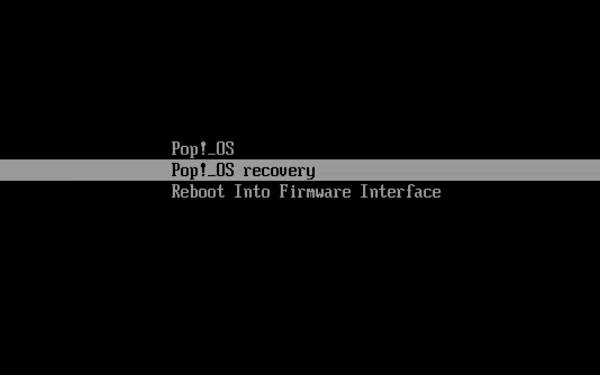
If you boot from this Pop!_OS recovery partition, it will be exactly the same as a live session from a USB drive. You can proceed with refresh your installed system which is basically the same as re-installing it. You can also do some smaller repair of your system that is very well described in the article provided by System 76.
2. Switch to Hybrid Graphics
One of the strongest sides of Pop!_OS is its hardware support and in particular graphic card support. For example, you can benefit from the Hybrid graphics option.
If your hardware has two graphic cards e.g. integrated Intel graphics and dedicated Nvidia, you can make your Pop!_OS to switch between them intelligently. Pop!_OS will use integrated graphics most of the time and it will automatically switch to the discrete graphics when there is higher demand for graphical performance.
To enable this feature, you need to go to:
System tray (right part of of the top panel) -> click on the battery icon -> select hybrid graphics
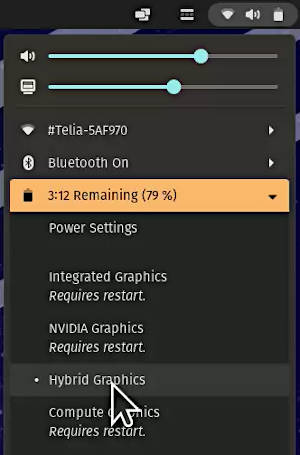
You would need to restart your system to apply the changes. After the restart your Pop!_OS will intelligently switch between integrated and dedicated graphic cards depending on what is required by your system.
3. Update Firmware
If you are running Pop!_OS on the System 76 hardware, you would benefit from having the latest firmware on your system. Firmware updates provide fixes for different security vulnerabilities and improvement of hardware functionality. So, you do want to have the latest firmware updates 🙂.
To check for available Firmware updates, go to:
Settings -> Firmware -> Install updates if available
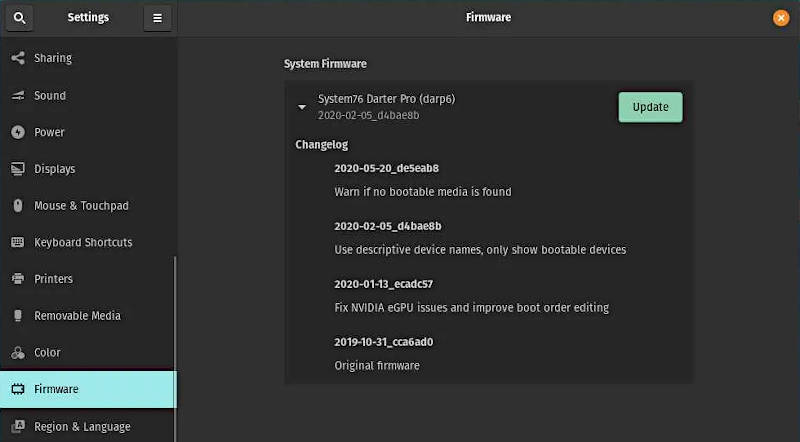
After you click the Update button, you would also need to click Reboot and Install to start installing the updates. During the update process you may be prompted to press Enter a few times. When the update process is finished, you will see a corresponding message on the screen. The system may shutdown after that, it is normal, just press the power button to turn it back on.
You can learn more about Firmware updates at the system 76 website
4. Configure Hi-DPI Display
Most likely your Pop!_OS will automatically recognize the resolution of your screen and set the correct display settings. If it doesn’t, you can manually fix it just go to:
Settings -> Displays tab -> enable fractional scaling -> Switch to the most suitable scaling mode

If the settings look right on your screen, you need to accept them, otherwise Pop!_OS will revert to the previous settings automatically.
5. Install Synaptic
Synaptic is an old-school graphical package manager provided by Debian. I think synaptic is a nice addition to Pop!_Shop or the software center of Pop!_OS because Synaptic lists all the packages available for your system while Pop!_Shop lists only some major packages. I will show you what I mean in the next thing to do after installing Pop!_OS. First, let’s install Synaptic.
You can use the command line
supo apt install synaptic
Alternatively, search for synaptic in Pop!_Shop and install it.
After the installation, Synaptic will be available in the menu. It’s not a fancy looking package manager but it very powerful if you check all the available options of this program.
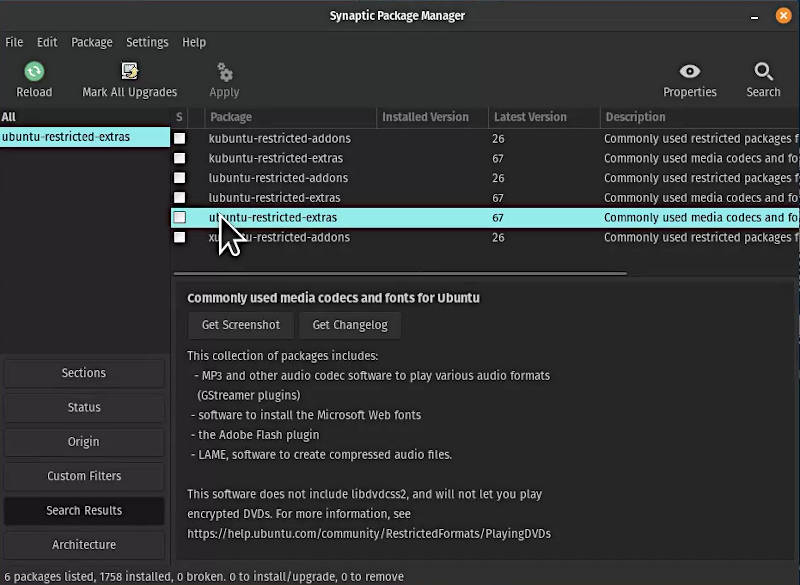
6. Install Codecs and Microsoft fonts
This is the step where you can benefit from using Synaptic package manager. To install codecs and Microsoft fonts, you need to install the package that is called ubuntu-restricted-extras. If you search for it in Pop!_Shop, you won’t find it. However, it is available in Synaptic. Right click on it in Synaptic, mark it for installation and click apply.
You can also install using the command line:
sudo apt install ubuntu-restricted-extras
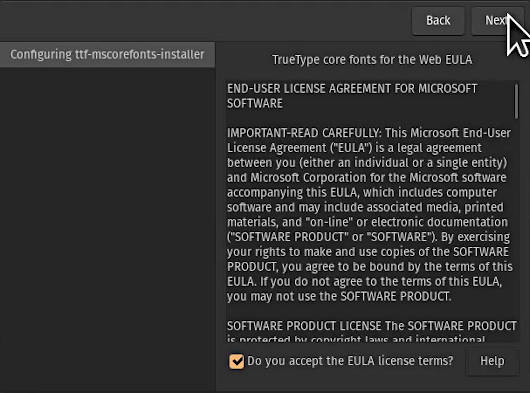
During the installation process, you will be offered to accept Microsoft fonts license. If you are installing trough a terminal, use Space, Tab and Enter keys to navigate between options.
To check if Microsoft fonts have been installed successfully, just open LibreOffice and check if such classical fonts as Arial, Comic Sans, Times New Roman are available.
Microsoft fonts installation bug in Pop!_OS
After my installation of ubuntu-restricted-extras, I could not find Microsoft fonts in LibreOffice. After some investigation, I found that there is this bug with ttf-mscorefonts-installer in Pop!_OS.
I tried a few solutions offered in the bug discussion, but only this one worked:
- Download the Debian version of
ttf-mscorefonts-installerfrom the Debian official repository:
wget http://ftp.us.debian.org/debian/pool/contrib/m/msttcorefonts/ttf-mscorefonts-installer_3.8_all.deb
- Install it with
dkpg:
sudo dpkg -i ttf-mscorefonts-installer_3.8_all.deb
- Check if Microsoft fonts appear in LibreOffice.
I hope this Debian solution will work for you too.
7. Back up files
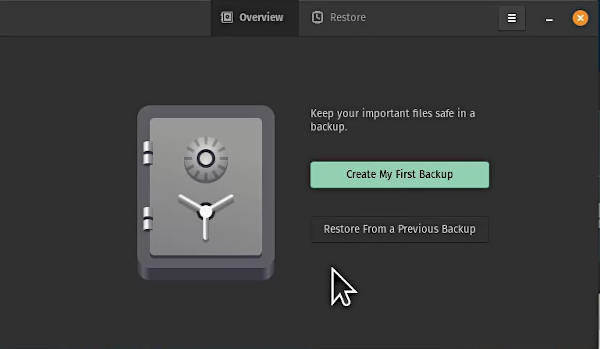
System 76 recommends to install Deja Dup for backup, so this is what I also recommend you to do. It is available either as a Flatpak or deb package. I personally usually prefer the Debian versions.
You can find Deja Dup in Pop!_Shop or install it through a terminal:
sudo apt install deja-dup
After the installation, open it from the menu and schedule the backup of your files. It is very straightforward to configure. The interface is minimal and has clear explanation on how to create a backup schedule for your files. I have shown how schedule a backup with Google Drive in my video on things to do after installing Ubuntu.
8. Enable Firewall
Enabling firewall in linux systems is not an essential for security of your Pop!_OS but firewall adds an extra layer of protection to your system and I recommend you to enable it. As I always say it’s better to be safe than sorry.
You can use the command line tool ufw to enable it as I show in my article on the Linux firewall. But I assume most users prefer to graphical interface to configure firewall. To have a graphical interface, install gufw through Synaptic/Pop!_Shop or through the command line:
sudo apt install gufw
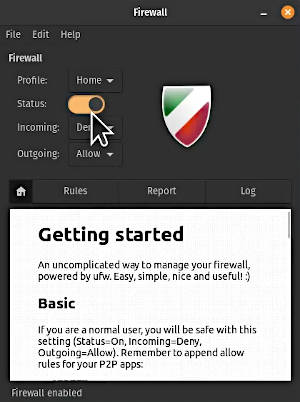
After the installation open it and just enable it. Its default settings to deny incoming and allow outgoing connections are fine for most desktop users. If you want to learn more about how to use linux firewall including how to add different firewall rules, please read my article “Do I need a Firewall in Linux?”.
9. Install ThinLinc
This is also not an essential thing to do after installing Pop!_OS, but ThinLinc is extremely useful program if you need remote access to your Pop!_OS desktop. With ThinLinc you can work in your Pop_OS! remotely from another Linux computer, macOS, Windows, and even a web browser.
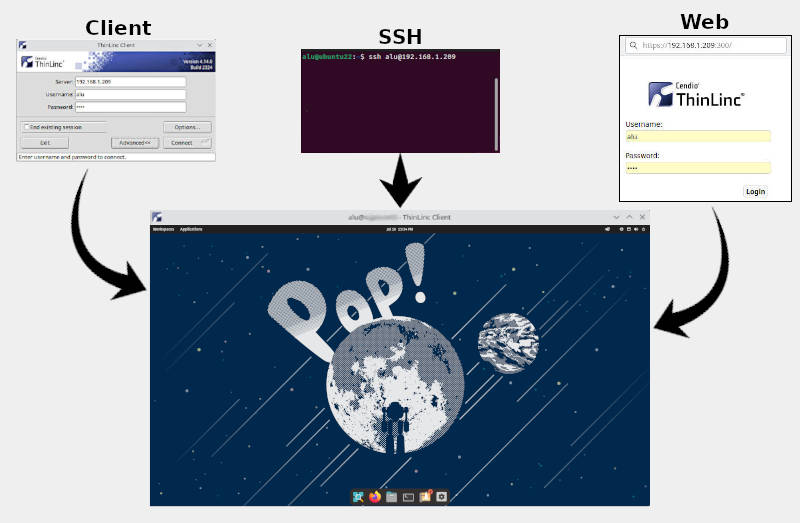
ThinLinc sponsored this article and it is a great piece of software that I recommend you to try. I believe you will like it. ThinLinc is based on the open-source software and it is free for up to 10 concurrent users.
Installation of ThinLinc takes a few clicks and everything is automatic including configuring firewall. After the installation, you can connect to your Pop_OS! using its IP address trough a web browser or ThinLinc client if you want optimized performance. You can see the demonstration of all these features in the video below where I install ThinLinc in Ubuntu:
ThinLinc can be installed in most Linux distros. It is the best program for Remote Desktop in my opinion. ThinLinc is especially great in server-based infrastructure by providing secure and reliable remote access to Linux desktops with redundancy, load balance, and high availability for multi-user access.
10. Install GNOME Tweaks
Pop!_OS uses GNOME desktop so by installing GNOME Tweaks you will have some extra options to configure your Pop!_OS desktop.
To install it go to Pop!_Shop or Synaptic and search for gnome tweaks and install it. Here is a terminal command as well:
sudo apt install gnome-tweaks
After the installation, open it through the menu. It has a number of useful options to tweak your GNOME desktop. Many of these options are already available in the Pop!_OS settings. However, there are some unique options that you will find only in GNOME Tweaks.
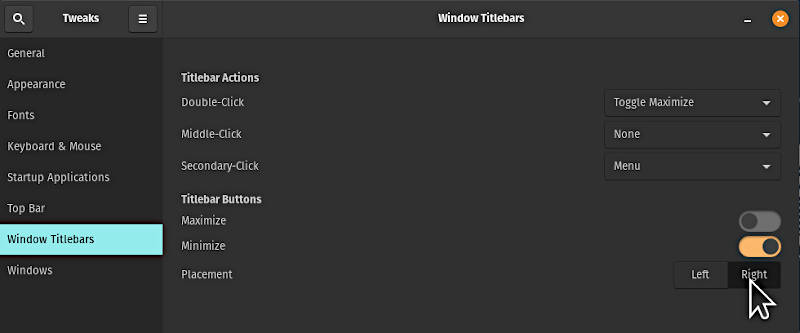
For example, you can change the location of the windows buttons. By default they are located on the right but many linux users may like it on the left. You can easily move them with GNOME Tweaks.
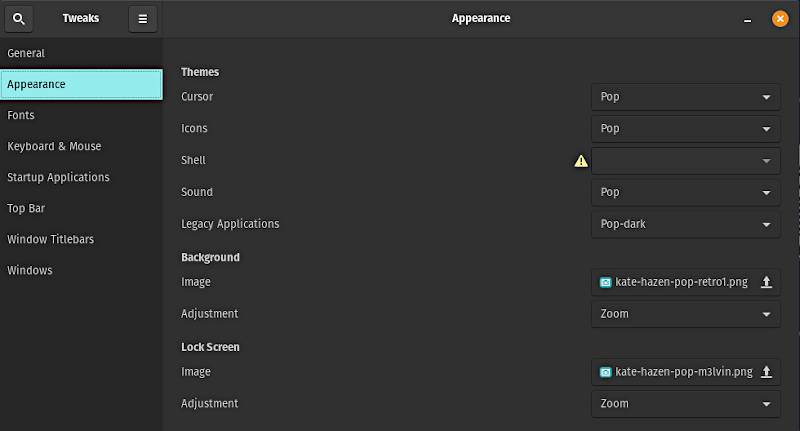
I particularly like GNOME Tweaks application because of its Appearance tab that gives an option to install some extra themes in your Pop!_OS. You can learn how to install additional themes in GNOME desktop and activate them through GNOME Tweaks in my previous article.
11. Enable GNOME extensions
GNOME is very extensible and configurable desktop thanks to its extensions. Unfortunately, installation of additional extensions are not enabled in Pop!_OS by default. But you can easily enable it.
1. Go to extensions.gnome.org.
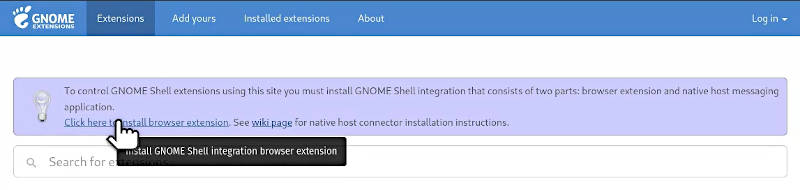
2. You will see a blue message with a link offering you to install a browser add-on. Click on the link and install it.
3. Restart your browser after the installation.
4. Go to extensions.gnome.org again and you won’t have that warning message anymore. It means you can start installing different GNOME extensions right from this website.
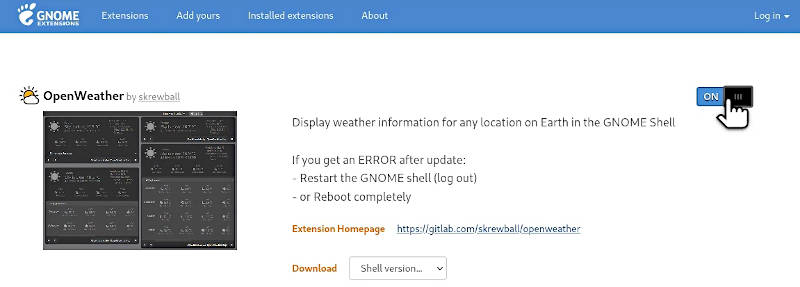
5. You can test how it works by installing the Open weather extension. If you don’t like this extension you can also disable it right on the website.
With enormous amount of extensions available at extensions.gnome.org you will be able to change your Pop!_OS to anything you want just be careful and don’t turn your Pop!_OS desktop into a Xmas tree 😄.
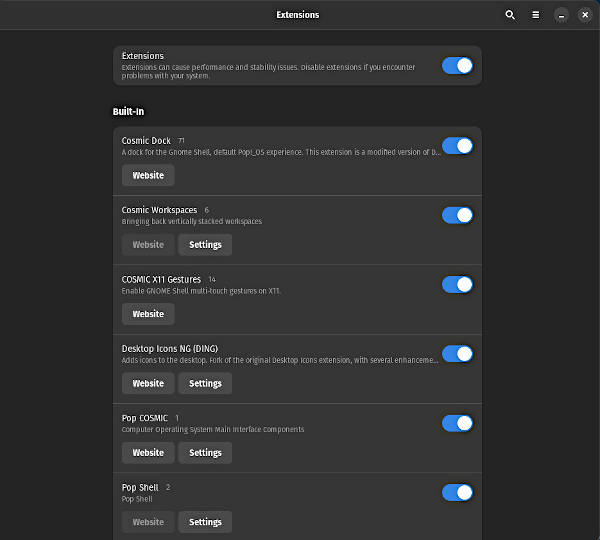
In addition, there is also an Extension app that show the list of all the installed extensions on your Pop!_OS.
12. Install Google Chrome
I am a big fan of Firefox and I use Google Chrome only as my additional browser. If you also want to use it as additional browser or as your main browser, you can easily install it trough the Pop!_Shop, Synaptic or terminal:
sudo apt install google-chrome-stable
After the installation Google Chrome will be available from the menu.
13. Netflix support in Firefox and other settings
If you use Firefox as your main browser, you may want to do some additional settings in your Firefox browser.
1. Go to Settings -> General and enable open previous windows and tabs. So, Firefox will remember the state at which close it and open again with the same tabs. This is extremely useful feature.
2. Scroll down on the same General Settings page and enable Play DRM-controlled content. This is essential if you want to play Netflix videos in your Pop!_OS.
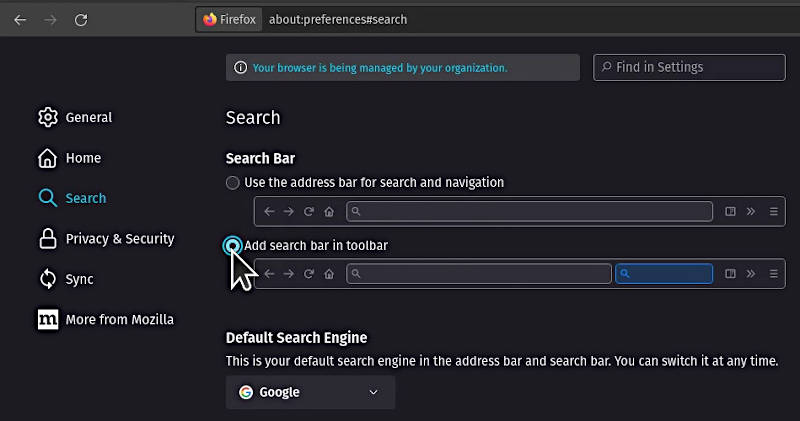
3. Go to the Search Settings tab and switch from the default united search-address bar to a separate web address and search field. This is much more functional in many cases. For example, if you want to google an email address, you will get the search results if you enter it in the search field, but if you enter it in the navigation filed, Firefox will open your email client.
14. Automatic Date and Time
Pop!_OS uses the time set on your computer which may not be the most accurate one. You can make your Pop!_OS to sync time with internet and this way your time will be more precise. To do that, go to:
Settings -> Date and time -> Enable automatic date and time
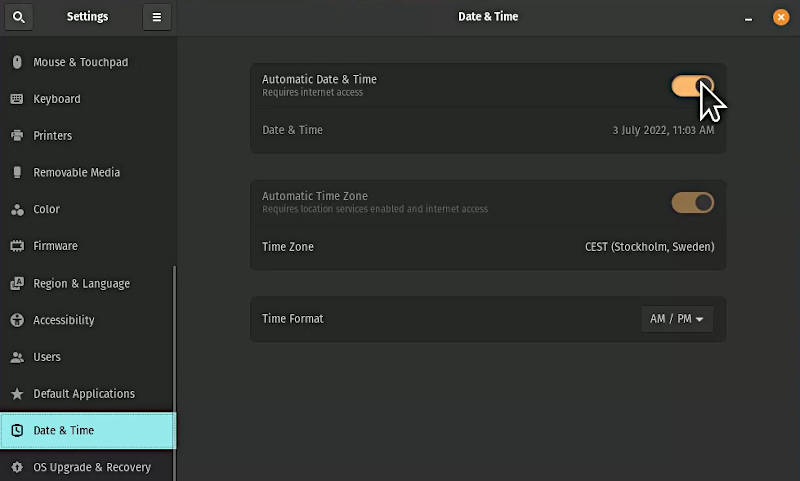
Now, your time will be very accurate.
15. Activate Night Light
Night Light reduces the amount of blue light on your screen in the evening and during the night which is better for your eyes and it also helps you to fall asleep easier if you work later on your computer. To activate it, go to:
Settings -> Displays -> Night Light tab -> enable
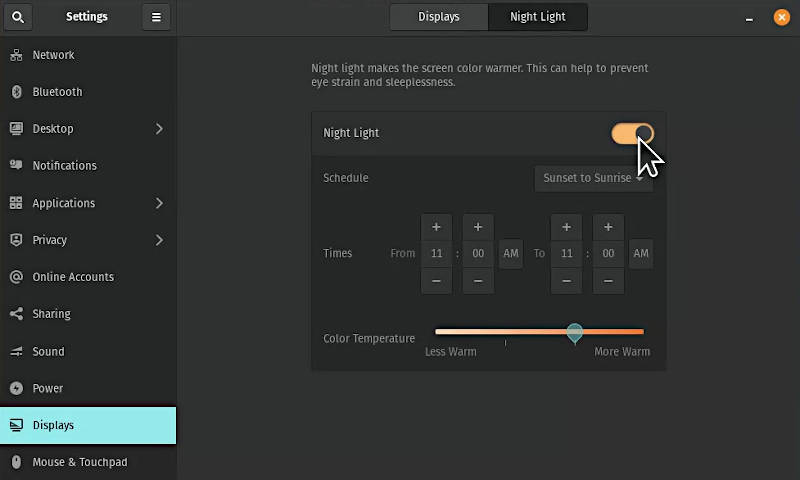
You can also adjust the temperature of the screen and set a custom schedule. However, I think the default settings are fine for most users.
16. Configure Dock
There are a few things you can do to improve the behavior and look of your Pop!_OS Dock. I will show you what I usually do in my Dock.
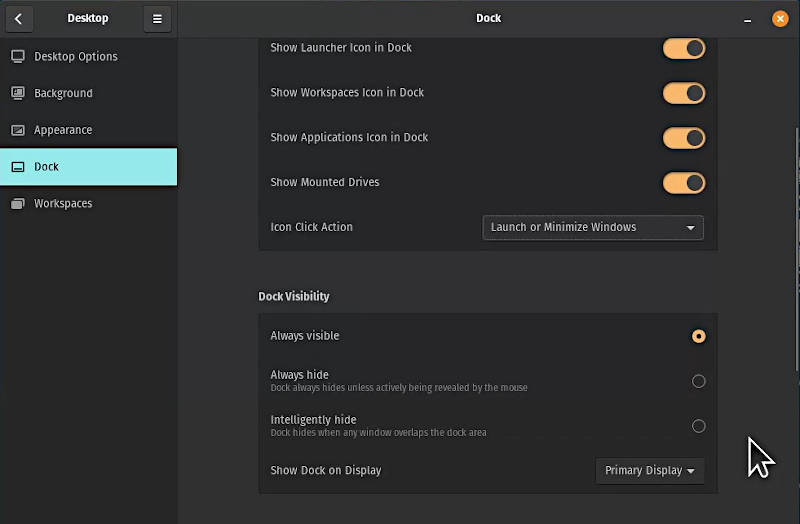
1. Go to Settings -> Desktop -> Dock and change the Icon Click Action to minimize windows. Now, if you click on the open window in Dock it will minimize. I complained about why this behavior is not enabled by default in my ubuntu reviews.
2. I also switch to Intelligently hide Visibility behavior. By default, dock is always visible even when you maximize the window. But if you choose to intelligently hide and you maximize the window, dock hided and appears again only when you minimize your window.
3. I usually also switch the position of Dock to Along the left side the screen. I think it is more ergonomic location.
4. You can remove Show applications and Show desktop buttons from the dock. The same options are available in the top panel. Right-click on these icons and select Remove from Favorites. You can also remove Show Launcher because you can press the Super (Windows) key to open it.
5. Go to Applications -> right click on the apps that you use the most often -> select Pin to Dash. These apps then will appear in your dock for quick access.
I hope these small dock tweaks will improve your productivity and ergonomic of your Pop!_OS desktop.
17. Install Guvcview
Guvcview is a program that provides you access to your web camera. Unfortunately, I know that many people use the Cheese app which is also very nice but I think Guvcview is much better.
You can find and install it through Pop!_Shop, Synaptic or terminal:
sudo apt install guvcview
After the installation open it from the menu and you will be able to test if your web camera works.
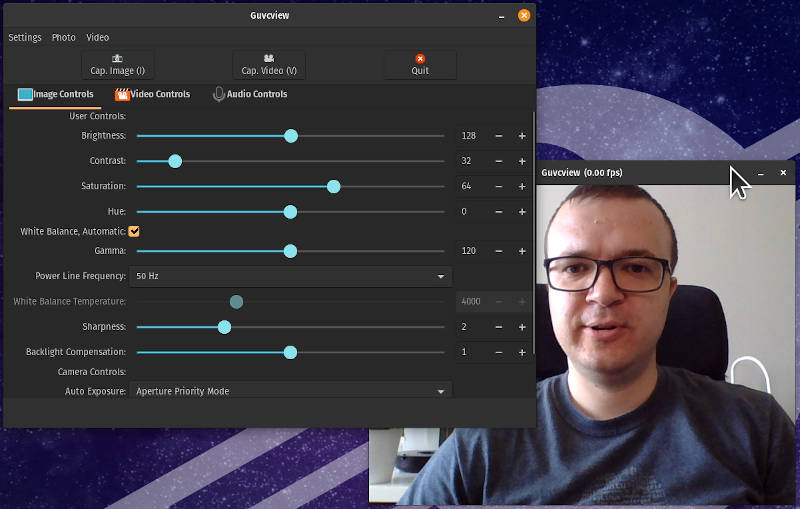
You can also use this app for various things such as recording video, audio and taking pictures. Although it looks a little bit outdated, it is a fantastic app.
18. Disable Bluetooth
Pop!_OS has bluetooth enabled by default. It drains your battery because it constantly search for devices nearby. If you are not using your bluetooth devices all the time you with your computer, I recommend you to disable it.
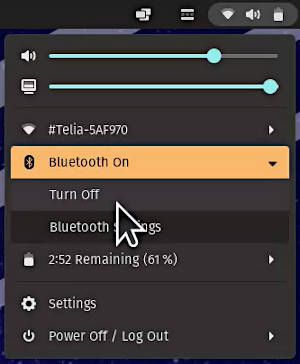
You can do it through the System tray in the top panel or through Settings -> Bluetooth -> disable
19. Show Battery Percentage
Pop!_OS and I think most of the GNOME desktops show no battery percentage in the top panel. This is fine if you like minimal desktop but I like the precision. So I prefer to have exact number in the top panel to see how much battery is left.
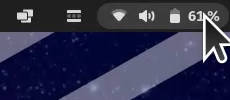
To show battery percentage:
Settings -> Power -> enable Show battery percentage
Now, you will see exactly how much battery time is left on your computer.
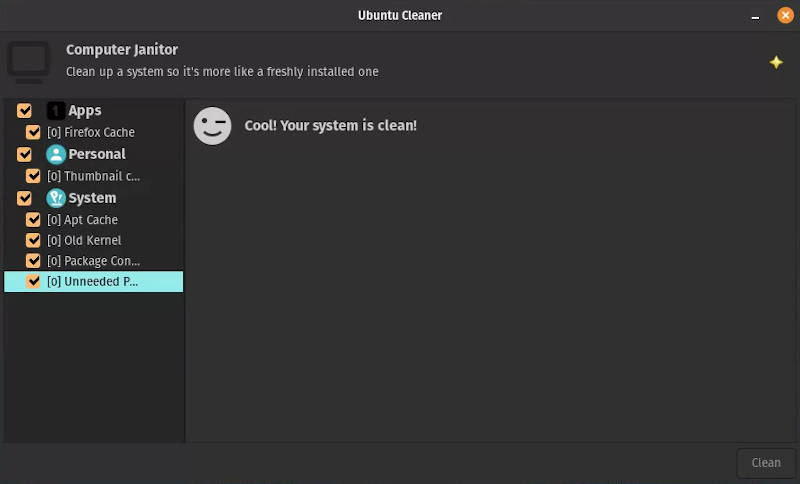
20. Install Ubuntu-Cleaner
The last thing I recommend to do after installing Pop!_OS 22.04 is to install Ubuntu-Cleaner that helps you to keep your Pop!_OS clean. It is designed for Ubuntu but Pop!_OS is based on Ubuntu so it should work in Pop!_OS very well.
To install it, you need to add additional repository, refresh and install it:
sudo add-apt-repository ppa:gerardpuig/ppa
sudo apt-get update
sudo apt-get install ubuntu-cleaner
After the installation, open it from the menu and select what you want clean. Just be careful with the System category, if you are not sure what you do, do not clean it.
Try ThinLinc!
I hope you like these 20 things to do after installing Pop!_OS and they were useful. If there is anything else you would like to add to this list, please leave a comment below.
Don’t forget to check out my article about ThinLinc if you need a program for remote graphical desktop access.
Comments
PopOS_Lover
I have a question about no.17 Guvcview installation.
How to ‘ rotate ‘ the Front or Back Camera ? I didn’t find the option or icon to switch it.
Frans Bakker
supo apt install synaptic = sudo etc
Frans
supo apt install synaptic = sudo etc
WebHeer
I think Pop!os is a beautiful and fine distribution. But I am constantly running into a problem. The system frequently freezes and cannot be restarted other than by rebooting. I read the same stories about this in various forums and reddit, but I can’t find a satisfactory solution anywhere.
Sincerely WebHeer
Average Linux User
Sorry to hear about your problem. I am afraid I cannot help. I did not expereice such an issue.