Linux Backup with Graphical Programs
Rsync is probably the best backup program in Linux. But it is a command line tool and not everyone feels comfortable with the command line. Fortunately, you can backup your data using the graphical front-end of Rsync: Grsync, and LuckyBackup. This post is about how to use these two graphical backup programs.
INTRODUCTION
Rsync is the most popular tool to make backups in Linux. It can do incremental backups, so you backup only new files or files that have been changes, but you do not backup the files that have been backuped earlier. This makes the backup process very fast. However, since it is a command line tool, many users are uncomfortable to use it. For such users, there are graphical front-ends of rsync: Grsync, and Luckybackup. In this post, you will learn how to use these two programs.
VIDEO TUTORIAL
Grsync: a simple graphical interface of rsync
Grsync is probably the best option if you are not experienced Linux user and you want to use rsync with a decent graphical interface.
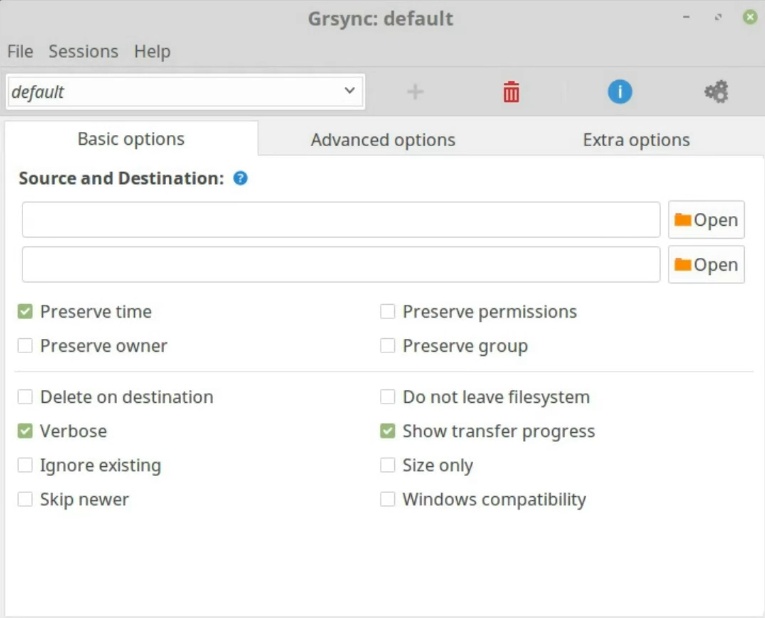
The Grsync interface is quite simple and precisely geared for newbies. It provides the most frequently used options to make a simple backup in Linux. You just need to provide a source and destination of your backup and run it.
However, there is a small caveat which I want you to know about. It is how to use the slash sign (/) in the source and destination fields.
How to use / in the source and destination fields of Grsync
In the help message of Grsync, you can read that
- if you add a slash (
/) at the end of your source directory, it will copy its content - if you leave it without a slash (
/), the program will create a new directory in the destination with the name of your source and copy all the files there.
Let me demonstrate how it works.
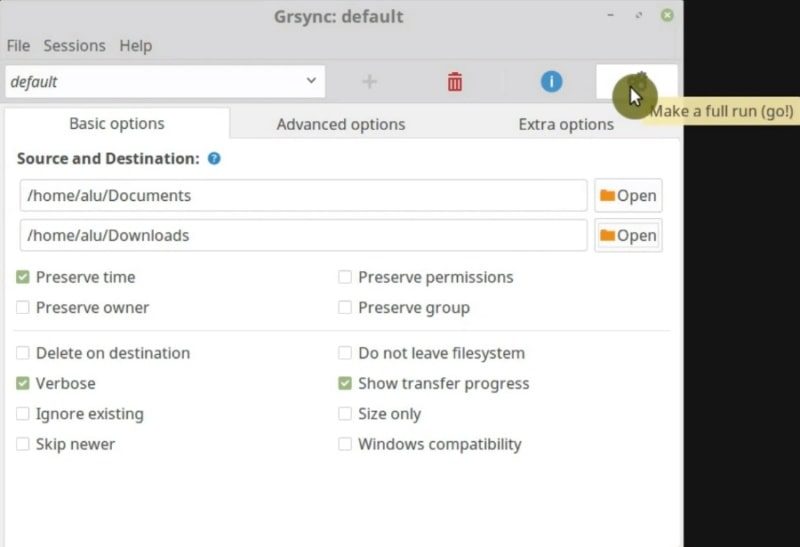
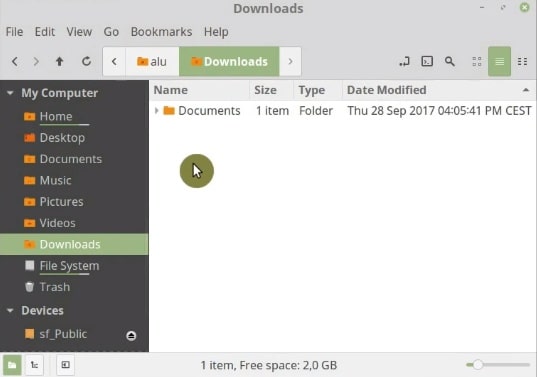
First, I am going to backup the directory Documents to Download without a slash in the end.
With this option, the Documents directory has been created during the backup and all its files have been copied inside it.
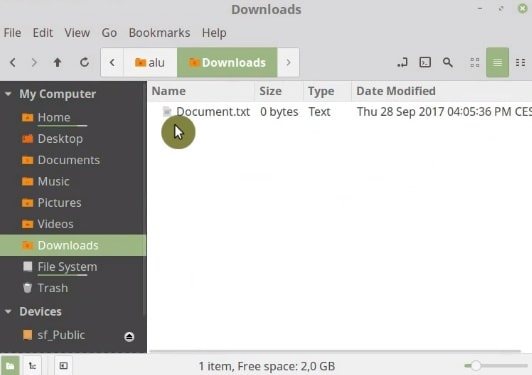
Now, I will re-run the backup with a slash at the end of our source. Of course, I removed all previously backed up files from the Downloads folder.
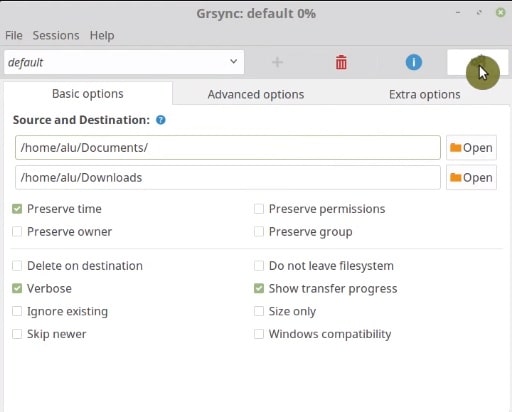
As you can see now the file Document.txt has been copied to the Downloads folder and the Document folder has not been created.
So, if you want to backup your source as a folder, you do not put a slash at the end of your source path. But if you only want to backup the content, you need to add a slash at the end of your source.
Now, let us have an overview of the backup options.
The Backup options of Grsync
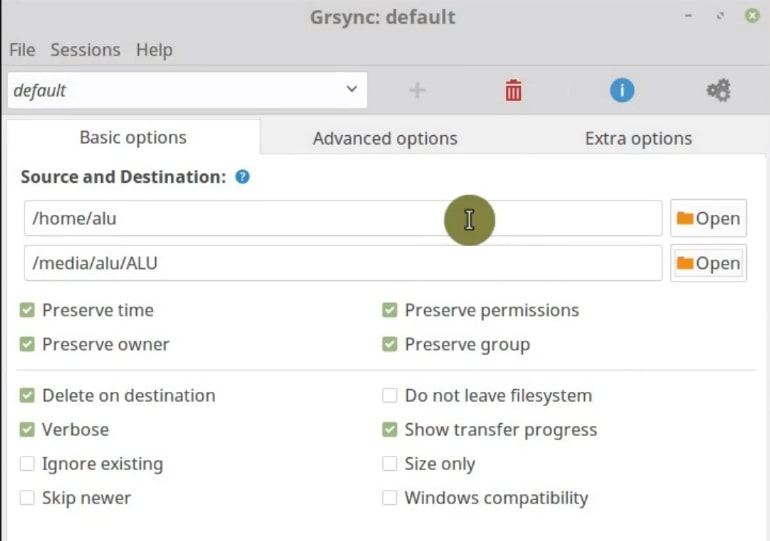
Basic options
Preserve time option means that your files will be copied with the time stamp of their last modification. Without this option, the modification time of your files will be the time when you copied them. This is not very practical. So, make sure this option is selected. Especially if you work with multiple text or multimedia files.
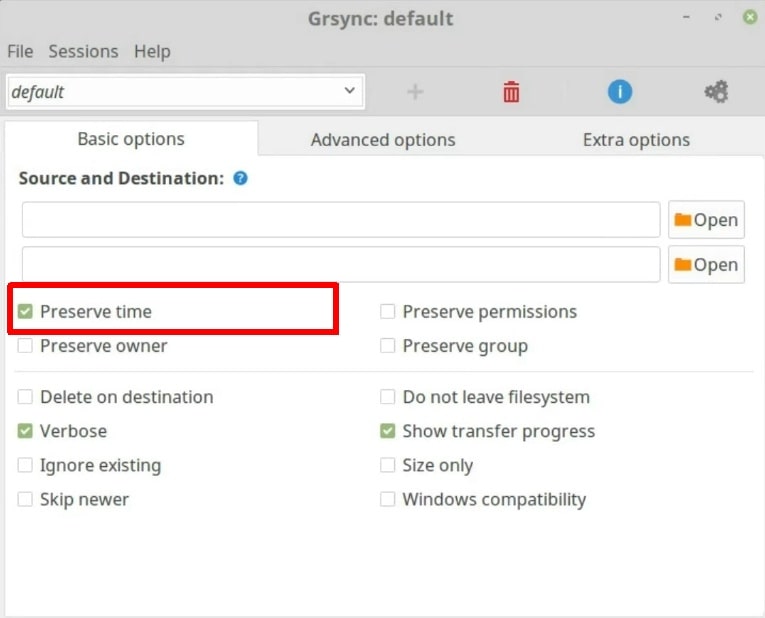
Preserve owner, Preserver permissions, and Preserve group options are important if you want to backup your system, not just your data. In other words, if you just backup your home directory or a specific folder with some data, selecting only the Preserve time option is enough.
Grsync has a very useful option to ensure compatibility with windows. So, if you copy your data files into the FAT file system, you need to enable the Windows Compatibility option.
Delete on destination is another useful option for incremental backups. If you delete a file on your system and run Grsync it will delete that file from a previous backup of your system as well. This way your source and destination basically just mirrored. It is useful because it saves space.
Verbose means to show more detailed information on the screen during the backup process. It is optional.
If you enable the option Ignore existing, Grsync will only copy new files and will not backup the files which you modified after the last backup. It is a good idea to keep it unselected.
Skip newer is also seldom used. You may need this option if you modified a file on your backup hard drive and you want to keep this new version and do not replace it with older version during the backup.
Do not leave filesystem option means that it will not copy the content of any mounted partition/device. I recommend selecting this option and backup all the partitions separately. It is a safer way to do backups.
Show transfer progress option just shows the progress.
Size only option enables to compare files by their size and if there is any difference, the file in the destination will be replaced with the source file.
All these options belong to the Basic Options tab. Let us see the other options tab.
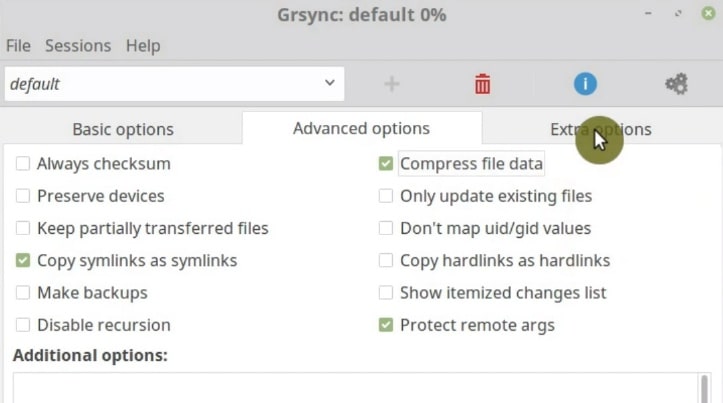
Advanced options and Extra options tabs
There are more options in the Advanced tab, however, you probably will not be using them. I only recommend to enable the Copy symlinks as symlinks option. If you backup through the network, you can enable the Compress file data option for faster transfer to make it lighter.
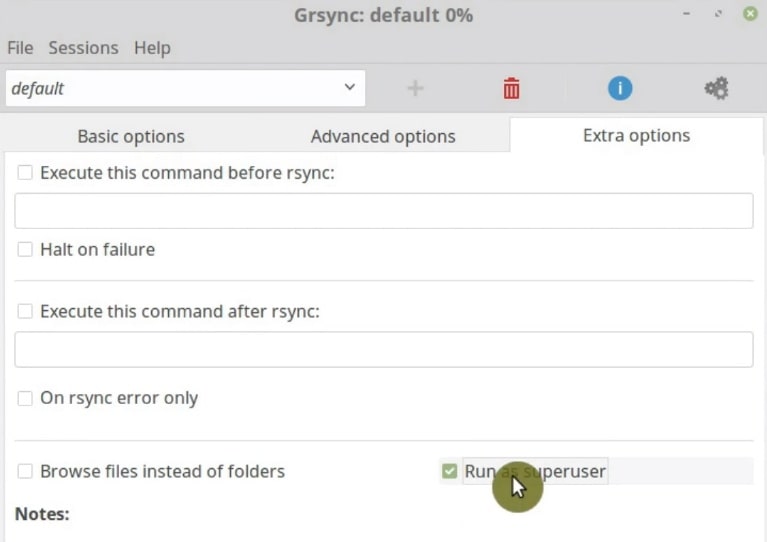
In the Extra options tab, I recommend ticking the Run as superuser option. If you backup your home, you do not need superuser rights, but if you backup your whole system, you need to able the superuser privileges to be able to access and copy all files.
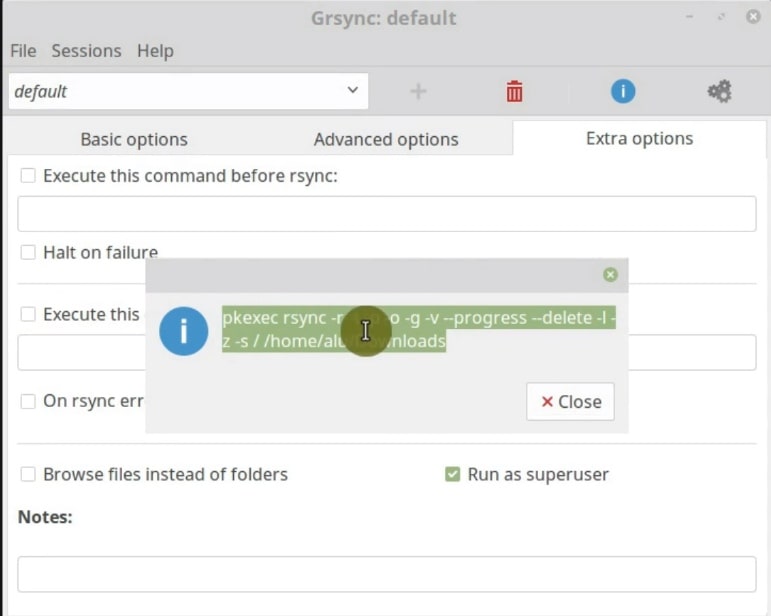
See the command line version of your backup
When you have configured your backup session, you can see the command line version of your backup to copy and save it for later. To do it, go to the File menu and click on Rsync command line and you will see the command that is generated from the options marked for backup.
Make sure the destination has a right file system
It is also important that the destination where you backup your data has the right file system. Some file attributes may not be supported in some file systems, for example, FAT does not support all the options. So, if you use an external hard drive for your backup, I recommend you format it with some Linux file system, for example, Ext4.
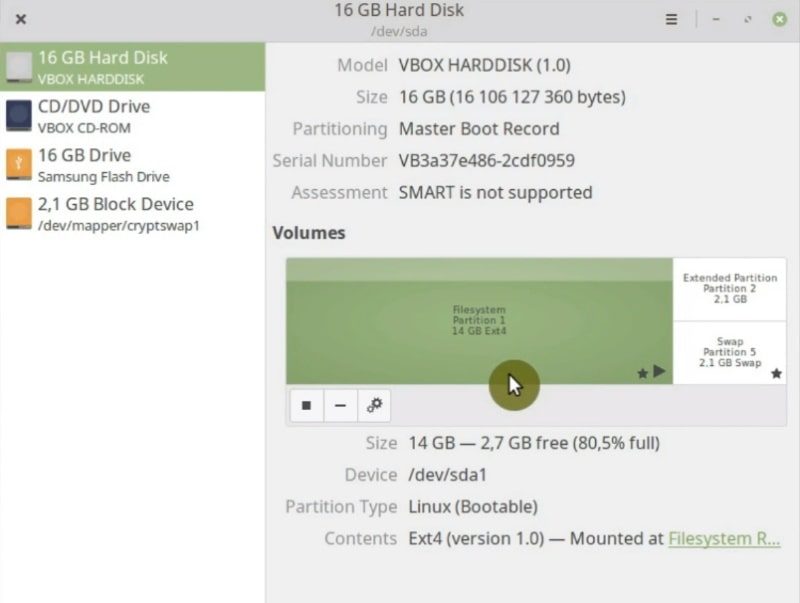
For that, open Gnome Disk Utility which is available in Linux Mint and Ubuntu, and check the file system of your hard drive. By the way, you can also read my post about how to encrypt your hard drive in Linux.
You can see that the hard disk of my system, in this case, the Linux Mint partition has the Ext4 file system.
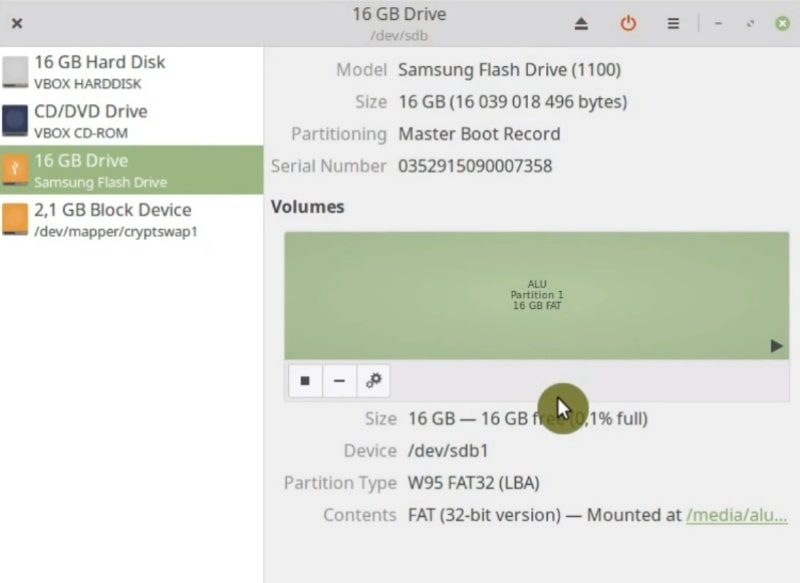
On the other hand, if I select my flash drive, it is the FAT file system. The FAT file system is not very good for Linux backups.
So, the solution is to format my flash drive to Ext4. Let me show you how to do that.
Format your backup drive with Linux file system
NOTE: Make sure you do not have any important files on your hard drive before you format it because you will lose them.
First, you need to unmount your hard drive. Press the stop button.
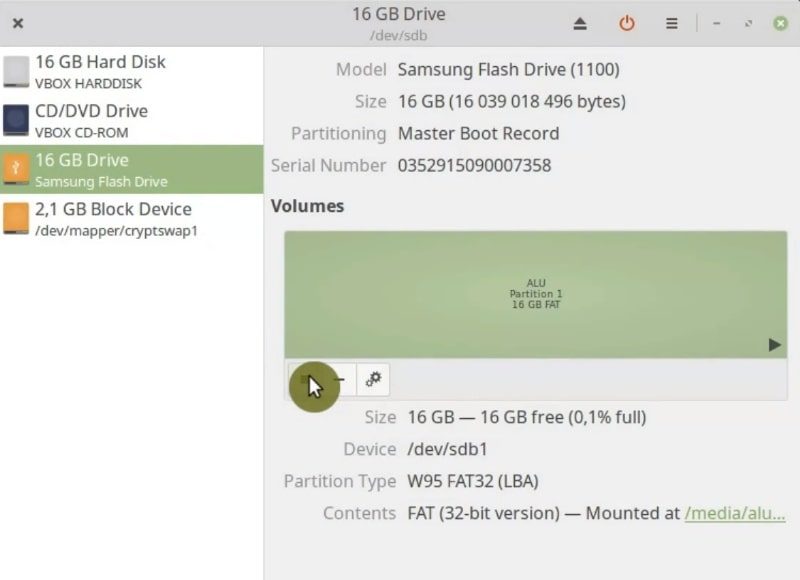
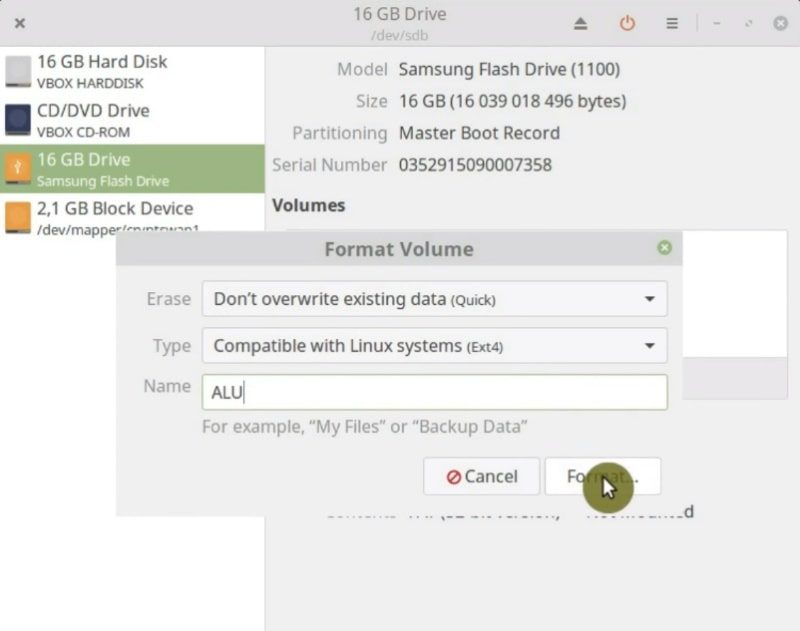
Then, click on the Options button and select the Format partition option.

In this screen, you have to choose the Linux compatible file system Ext4. You can also give a name to this drive. Next, click on the Format button.
After you formatted the hard drive, you can see that it is Ext4 now.
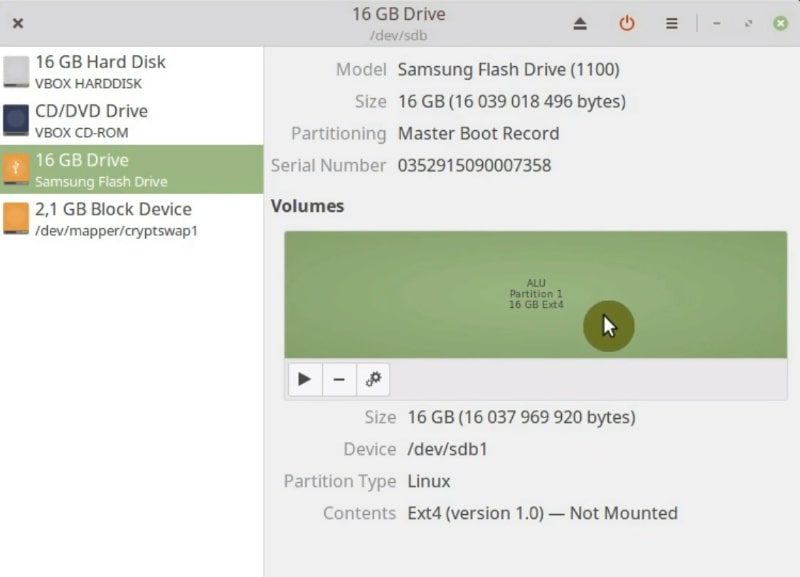
Now, the hard drive is ready for a backup.
NOTE: Windows and OS X may not be able to see the Ext4 file system.
The Grsync toolbar and menu
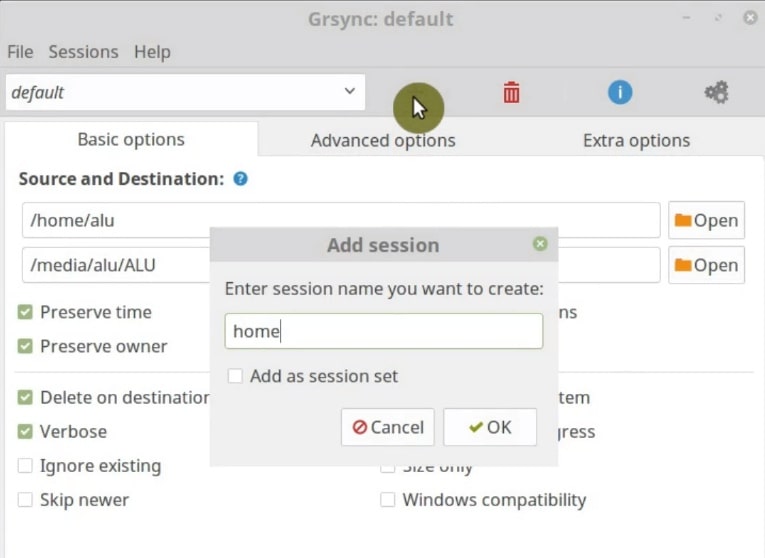
Going back to Grsync, in the top toolbar, you can create separate profiles for different backup types. To do it, just click on the + button.
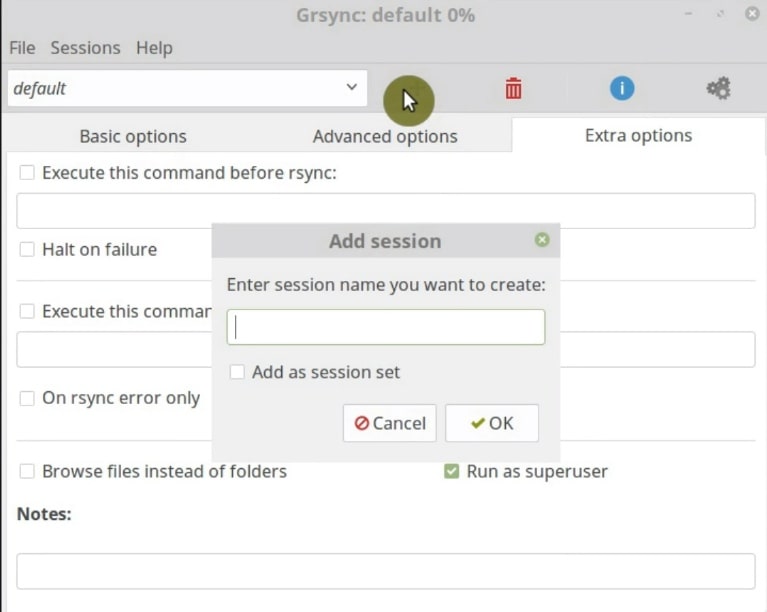
This is of great help in maintaining different configurations for each situation. However, you can also remove a profile by clicking on the trash icon.
The blue button allows you to run the backup as simulation. The program will run and report you the results, but no files will be copied. It is useful to test if everything is working as you intended. You should use it every time before a backup.
Grsync Preferences
To open the Preferences, go to the File menu and click on the Preferences option.
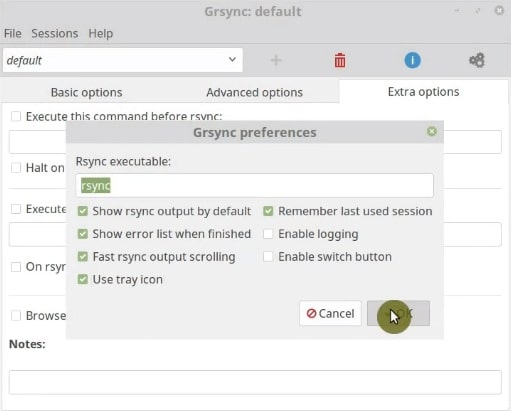
In the Preferences, I suggest enabling the Show rsync output by default option. It is better when you can see it immediately upon backup completion.
I also prefer to enable the Show errors in a separate window option. This way it is easier to track errors. And you can also enable Tray icon if you want to hide the Grsync window and run it in the background.
Running backups with Grsync
Now let us create some Linux Backup with Grsync. I will show you how to backup your home and how to backup the whole system.
Backup your home data
If you want to backup your home folder, you need to select your home directory in the source and your external or another hard drive as a destination.
You can also create a new profile for future backups like this.
Then, simulate this backup to check for errors.
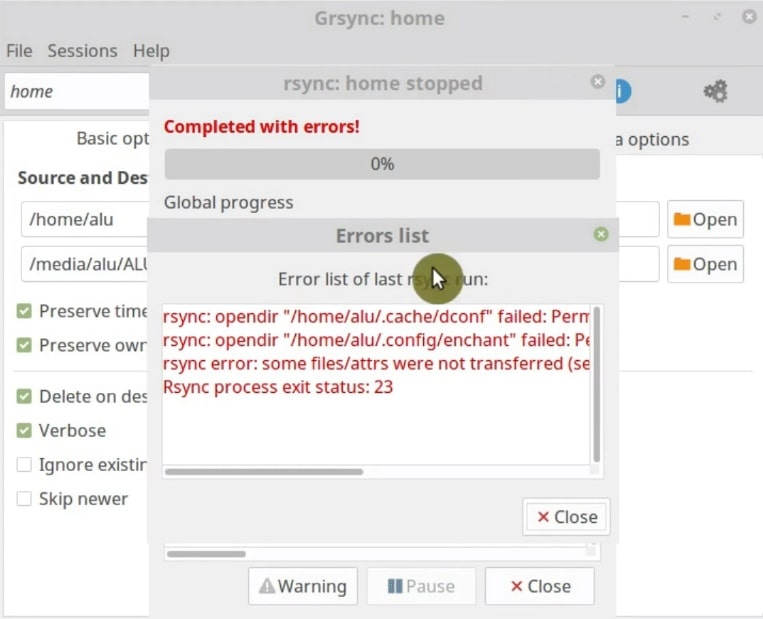
As you can see, an error Rsync process exit status: 23 occurred during the simulation. In the window, you can read that it is a permission problem because I executed it as a normal user. If you experience the same error, go to the tab Extra Options and select the Run as superuser option.

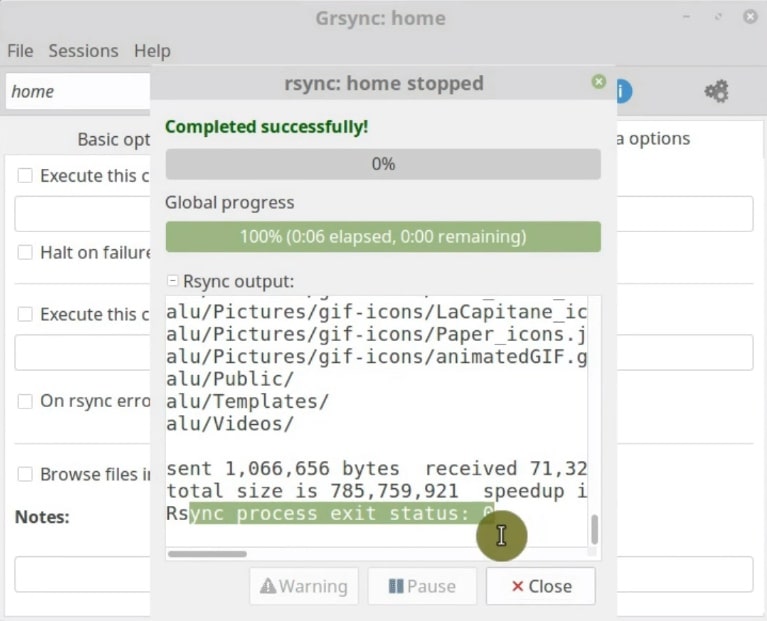
Then, you run it again. You will have to type your password and everything should complete without errors.
The final step is to run a real backup. This way you can create a backup of any other folder with your data, not necessarily your home folder. However, if you need to backup the system file, the procedure differs a bit.
Backup the whole system (/)
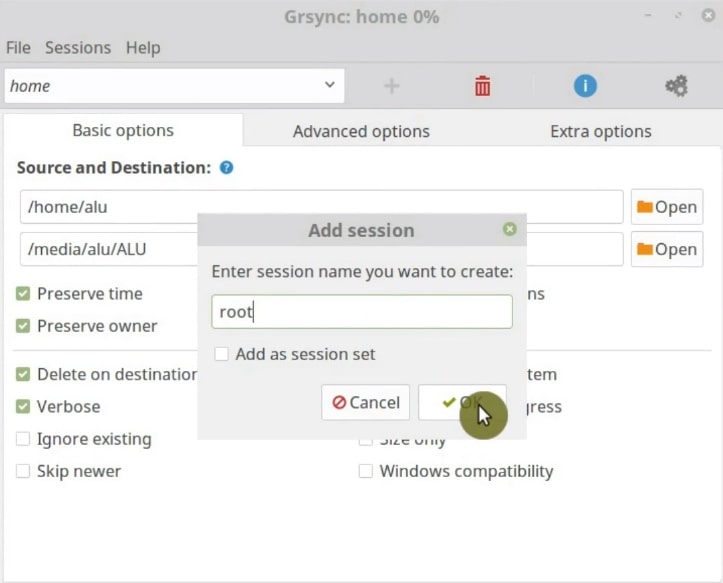
If you want to backup your whole system, you can start with creating a new session and call it root, for example.
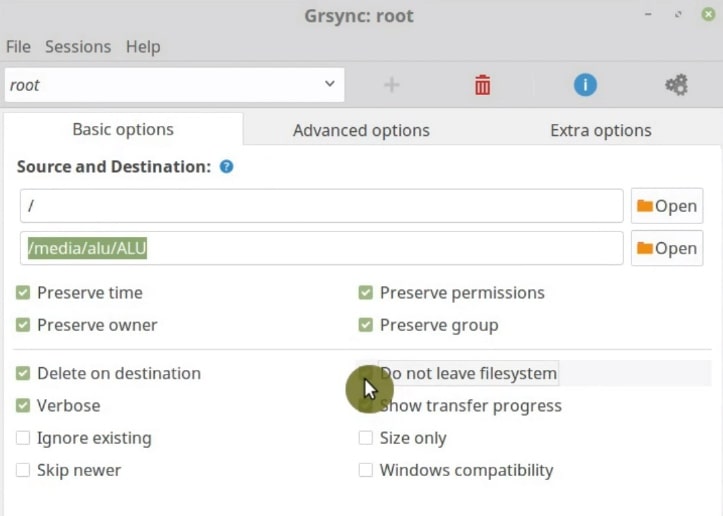
Select your root folder (/) as a source. In the destination, select your external hard drive. Here, it is also essential to enable Do not leave file system option.
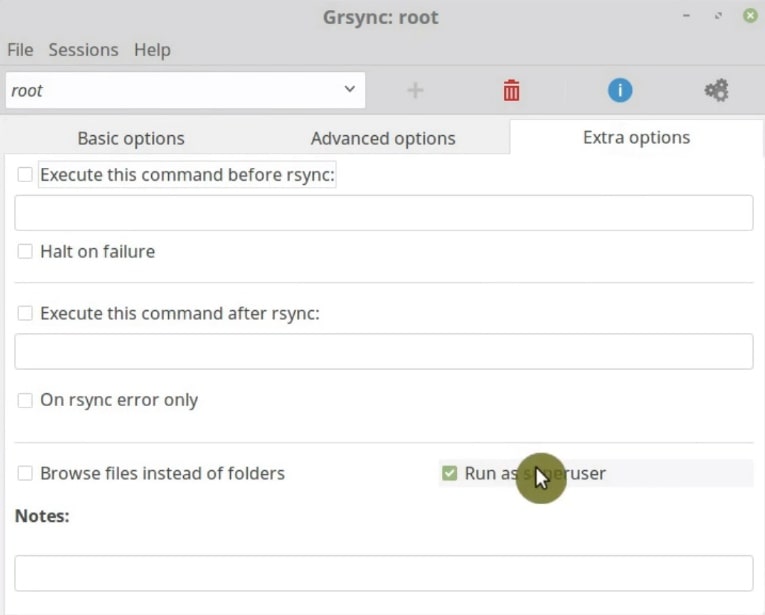
Next, make sure you enabled the Run as superuser option on the Extra options tab.
Then, run it as a simulation to verify that everything is OK.
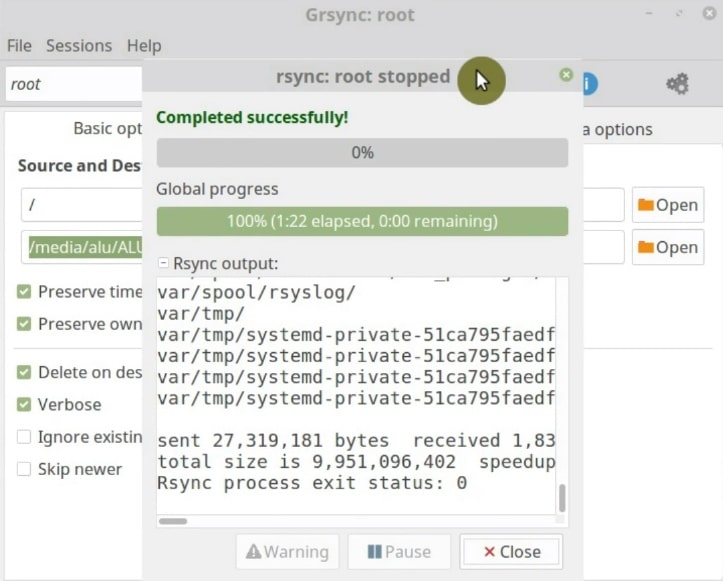
Finally, run it normally to create the real backup.
LuckyBackup: a more advanced graphical interface of rsync
Grsync is a good tool for data backup, but for the whole system backup, I recommend LuckyBackup because it has more options.
LuckyBackup also uses rsyncand it can be run as a superuser or as a regular user. If you are going to backup your data, you can run it as a regular user, but if you are going to backup the system, you have to do it as a superuser.
So, let us open it as superuser.
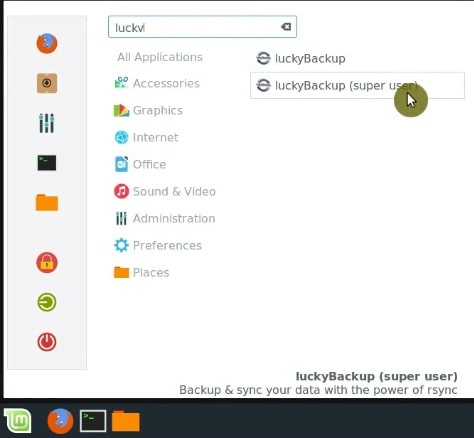
When you run it, you will be surprised how ugly it looks, but that is because you are running it as a superuser.
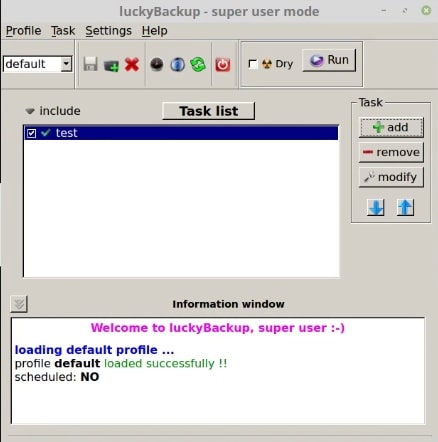
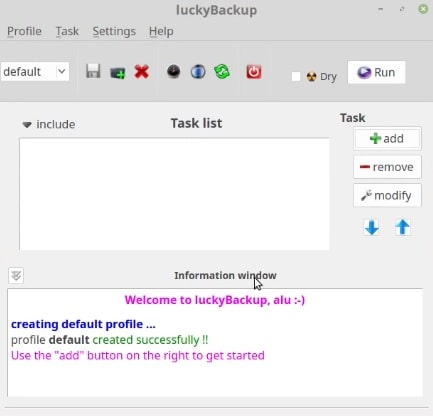
However, If you open it as a regular user, it looks consisted with your theme.
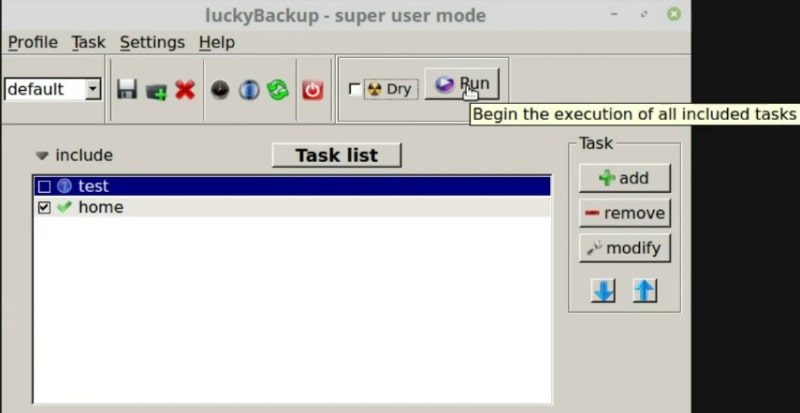
The LuckyBackup toolbar
The LuckyBackup toolbar contains options similar to Grsync. For example, like Grsync you can create a configuration profile and remove them. My favorite feature of LuckyBackup and its key difference from Grsync is that you can schedule backups and to send Email reports.

The other buttons include Refresh the profile, Quit the program. The Dry option is the same simulation mode you have seen for Grsync. he last option is to run a real backup.
Creating a backup task
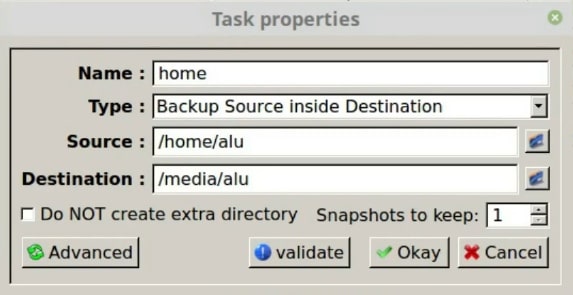
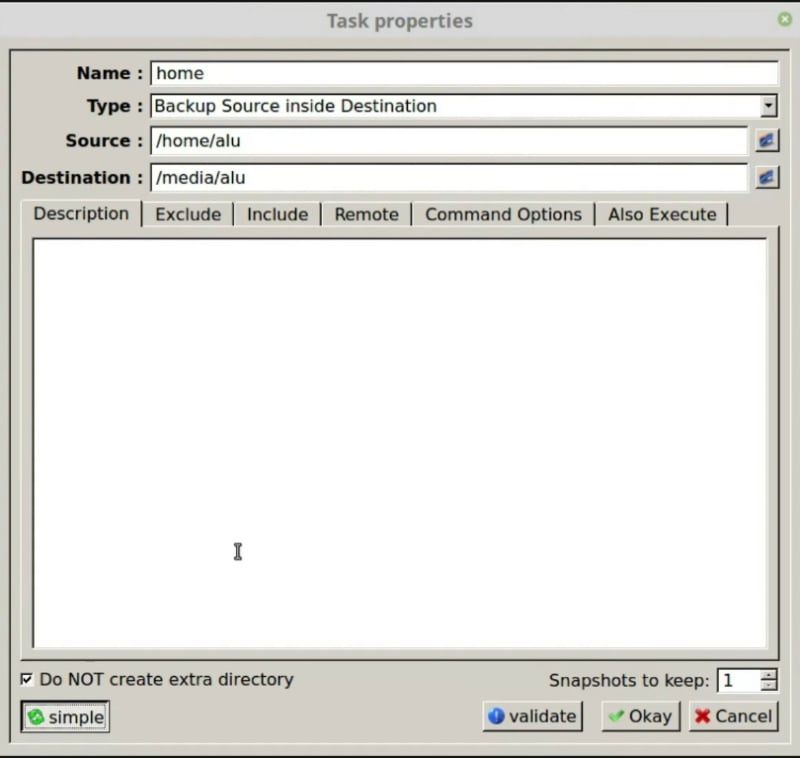
You create backup tasks on the right side is the Tasks section. Click on the Add button and give it a name and select the backup type.
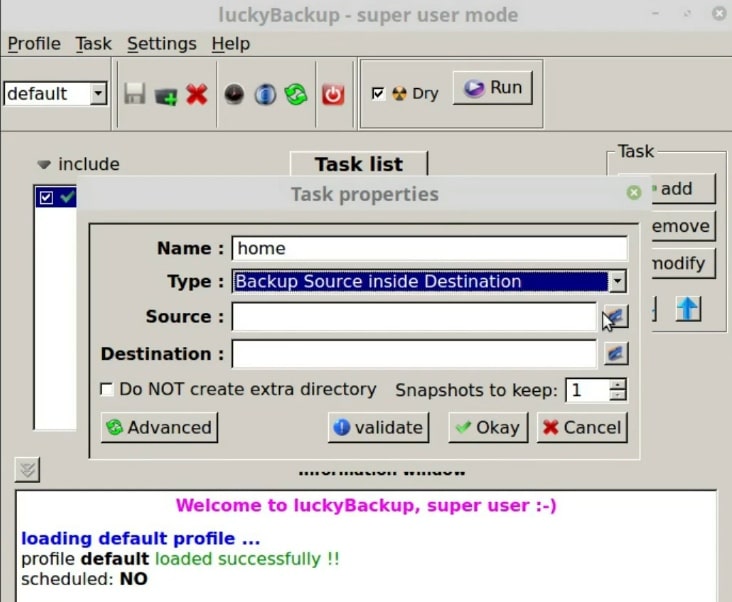
The next step is to select what to backup and where it will be stored.
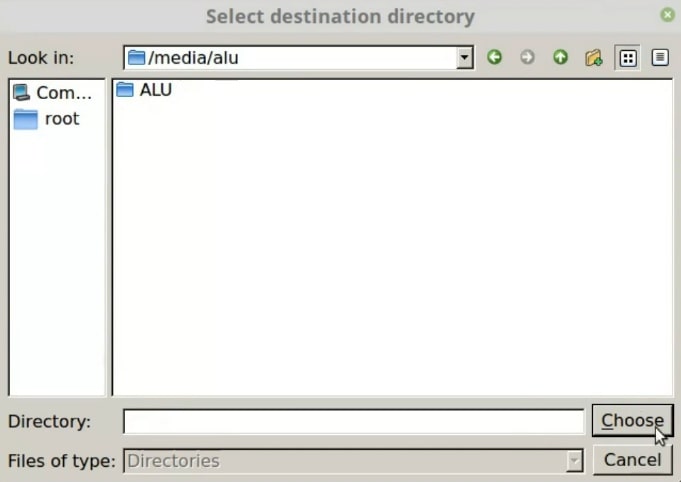
The navigation in LuckyBackup to define source and destination is a little more complicated than in Grsync. For example, to define the destination, you need to go to /media to find you mounted hard drives.
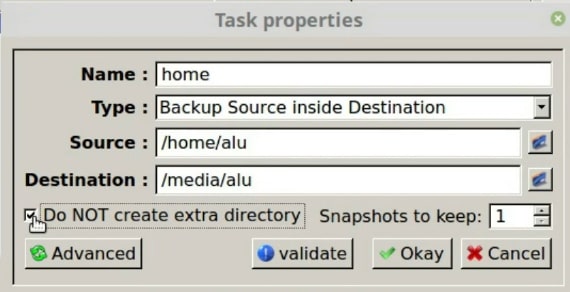
Unlike in Grsync where you had to add a slash in the Source field, if you did not want to create extra directly, you just can select the Do NOT create extra directory option in LuckyBackup.
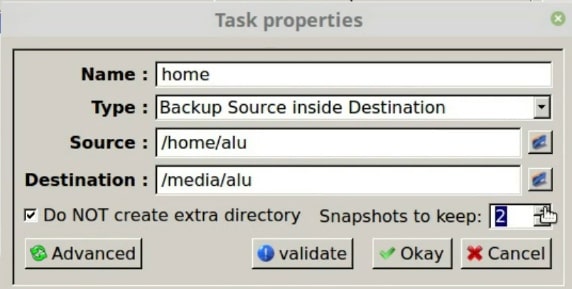
In the Snapshot to keep option, you can define several copies of your backup. You can activate it if you have enough space on the destination drive.
The Backup options
If you click on the Advanced button in the Task properties window, you will be able to display all the available options to make the backup. First, you can write a description of your backup.
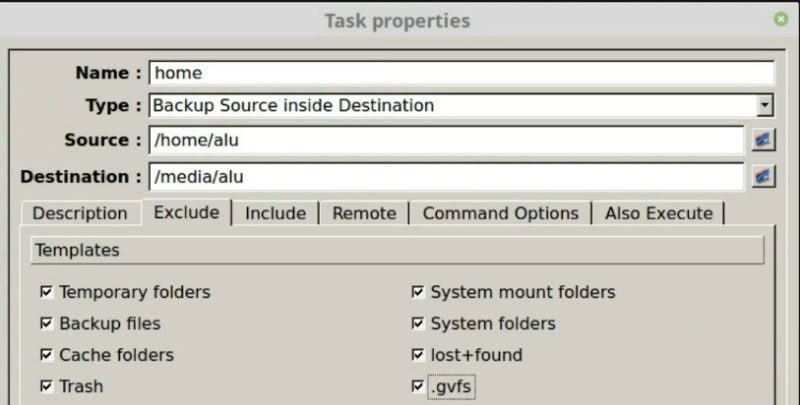
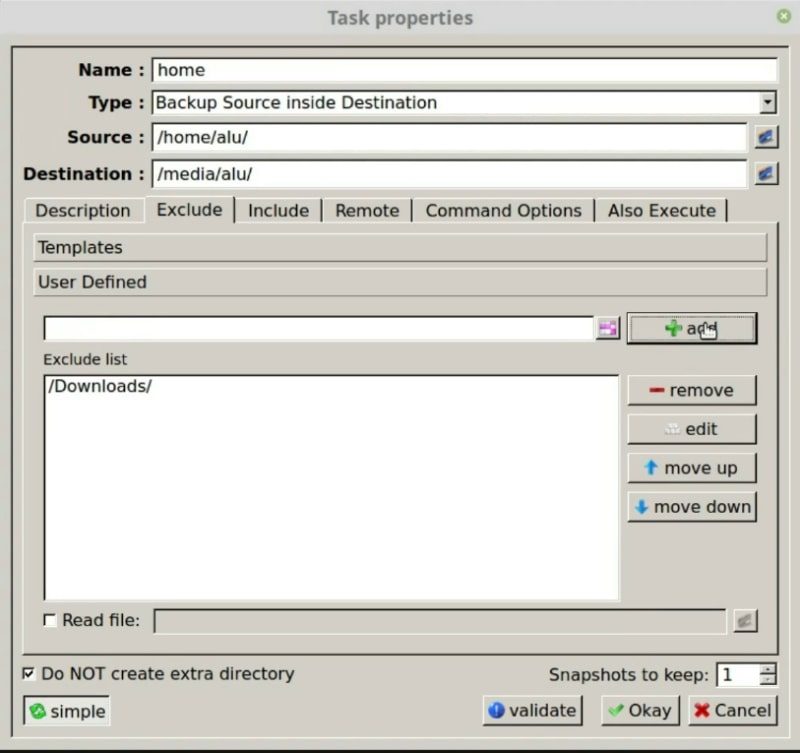
Next, go to the Exclude tab. So, you can exclude some directors from backup. There are some templates, I usually select them all. For example, System folders will exclude some system folders which are not necessary to backup.
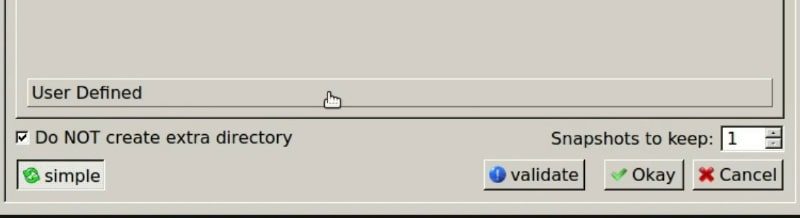
Below, in the User Define field, you also have an option to add custom directories to exclude.
This is a very useful option because you can exclude specific files and folders or set files and folder. For example, I usually exclude my Downloads folder.
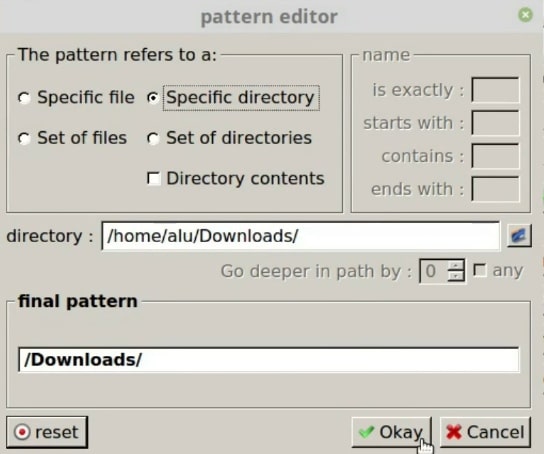
It is important to click the Add button after you created a custom rule. Otherwise, this Downloads folder exclusion will not be added to the current backup session.
In the Include tab, you can include what you want to backup. Sometimes, it is easier just to specify what you want to include instead of listing all files and folders you want to exclude.
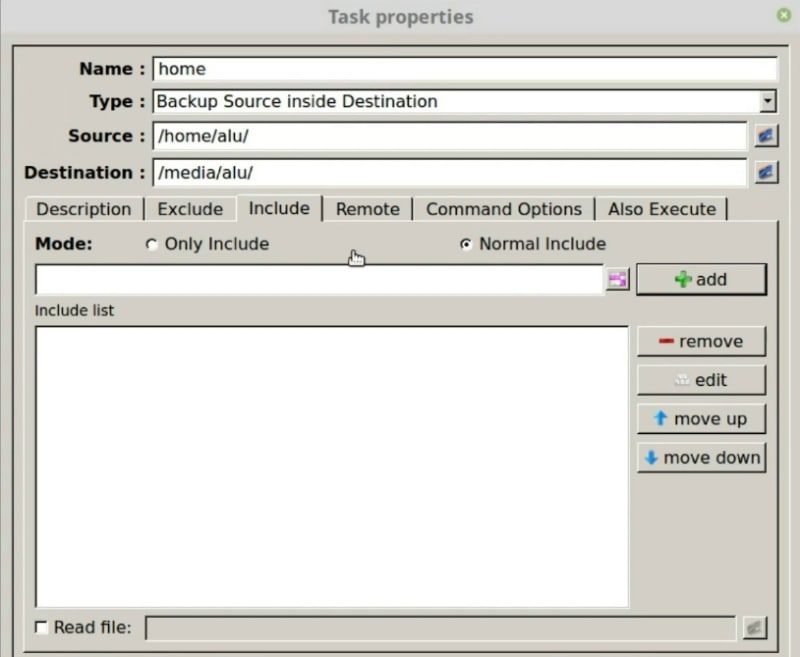
Again, if you use this option, do not forget to click the Add button in the end.
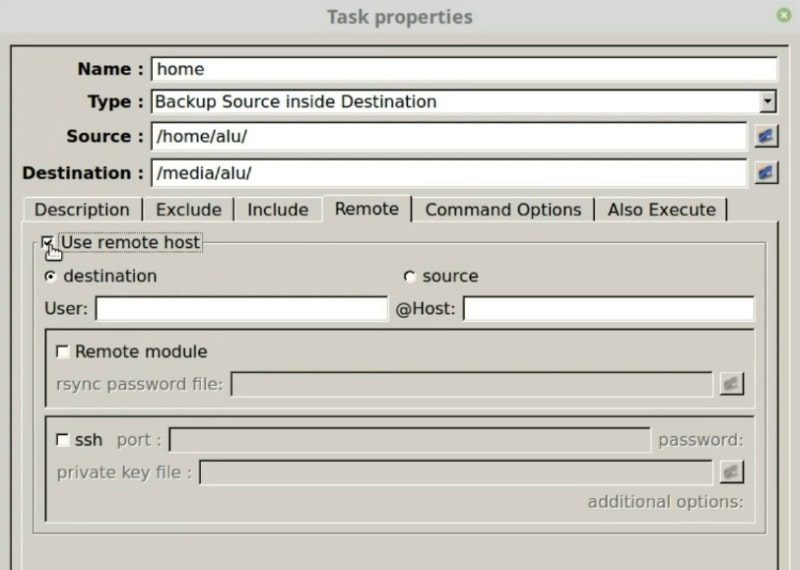
If you backup through the network, you can configure it in the Remote tab.
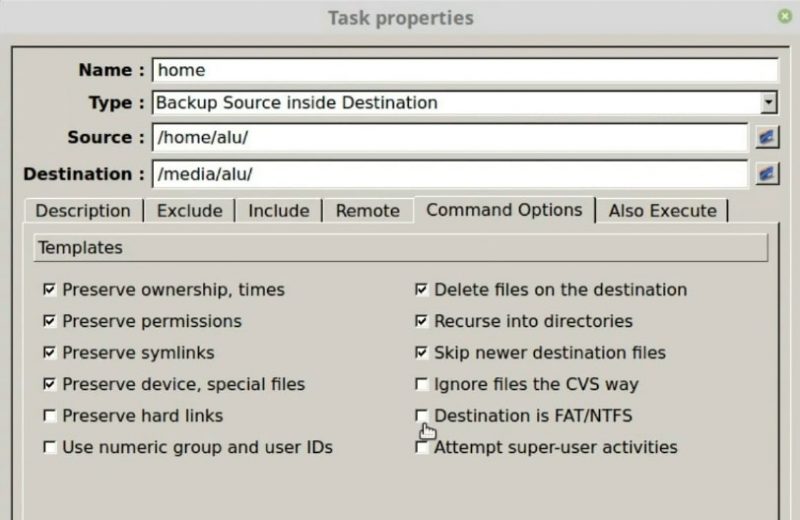
In the Command options tab, you can keep everything as it is. If you backup files to FAT file system, you have to enable the Destination is FAT/NTFS option. It is the same as The Windows compatibility option in Grsync.
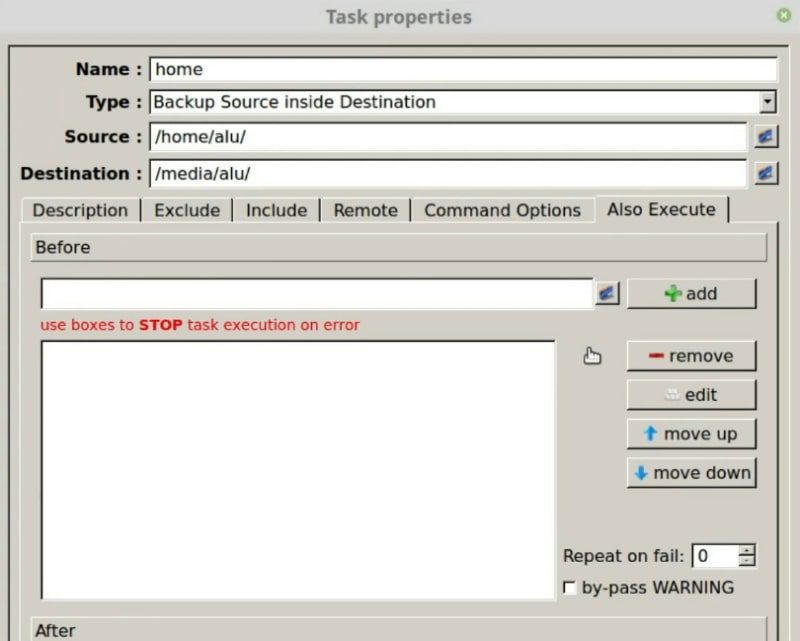
In the Also Execute tab, you can execute some command upon back completion or failure. I personally never use this option.
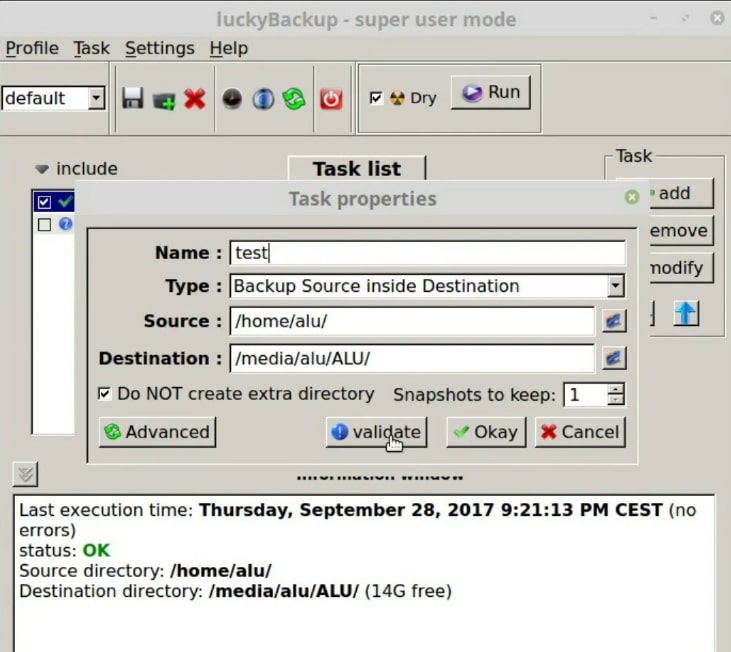
When you have configured the backup task, click on the OK button. Then, you will receive a warning message, which is good to validate your intention.

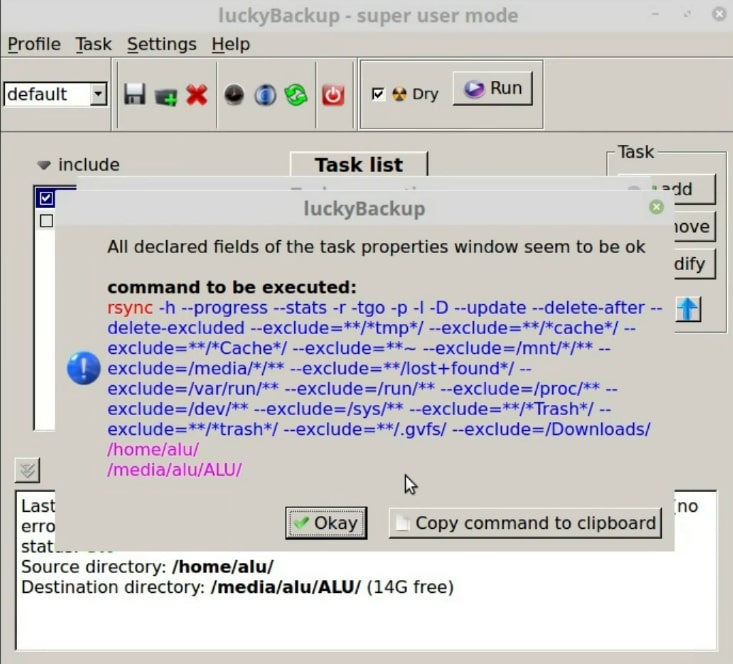
If you want to see how the rsync command that will be run looks like, you can click on the Validate button.
Here is an example of my backup rsync command.
Running backup tasks
After you created backup tasks, you will see them listed in the task list. You can add as many backup tasks as you want and run them all together.

Select tasks you want to run and run them in Dry mode to test the configuration.
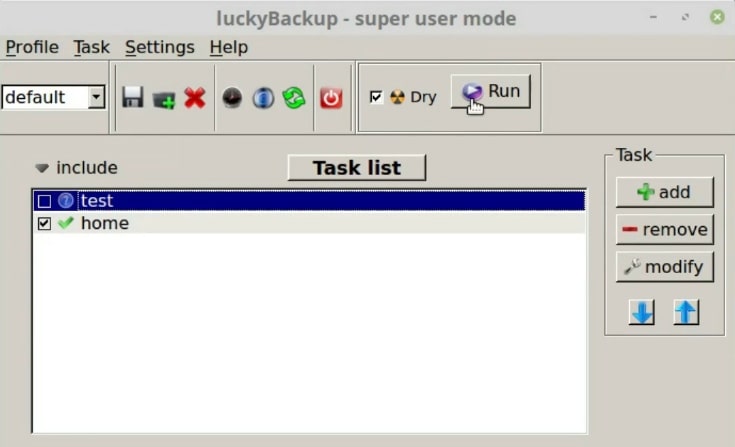
Make sure there is no error during the simulation, and you are ready to run the real backup.

Just remove the tick from Dry and create an rsync backup with the graphical interface of LuckyBackup.
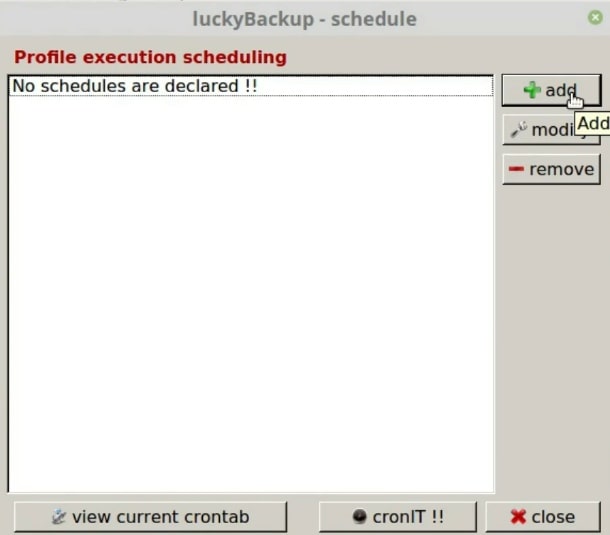
Schedule a backup with LuckyBackup
Click on the Schedule button.

In the screen that opens, you can add a task to be scheduled. Click on the Add button.
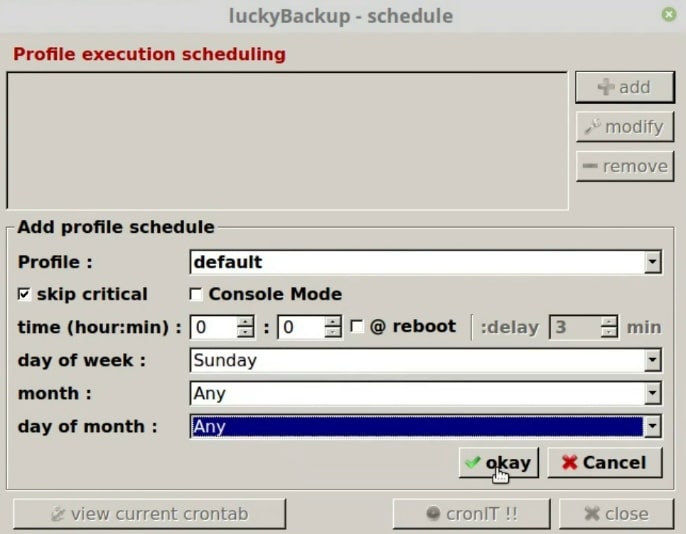
On the next screen, you can choose the time and day when to perform the backup. When you have finished, click on the Ok button.
Next, you have to add it as a Cron job. Click on the cronIT !! button.
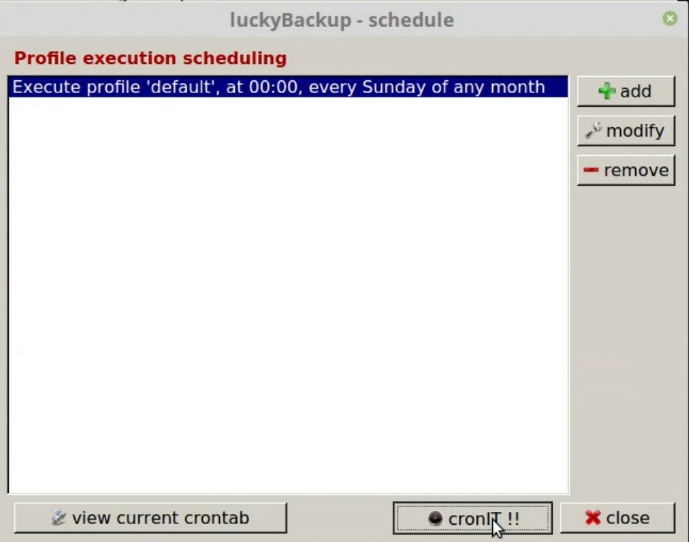
Then, you can see if it is in the Crob job list. Click on the View current crontab button.
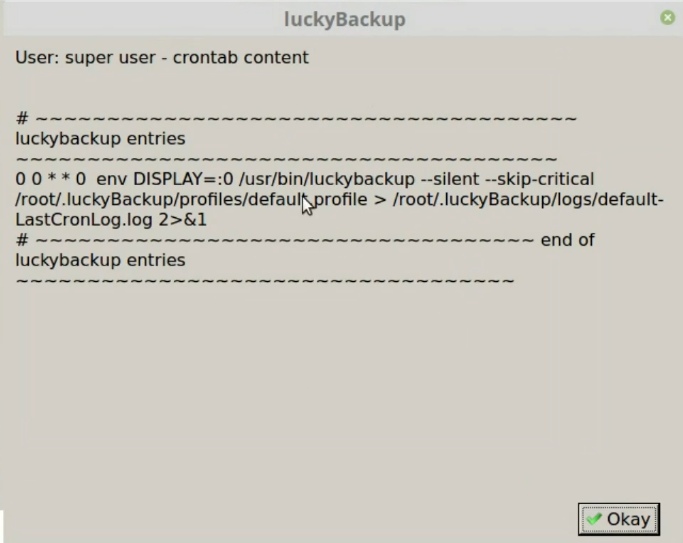
Then, update the Crob job list by clicking on the cronIT !! button.

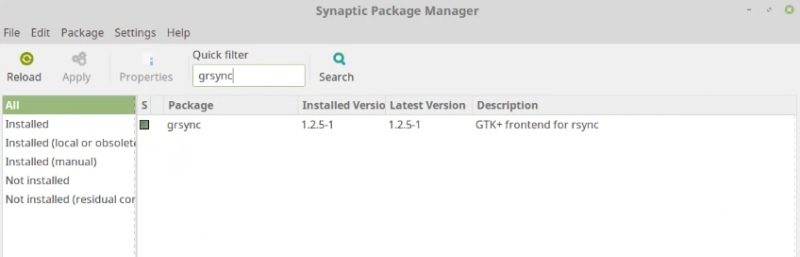
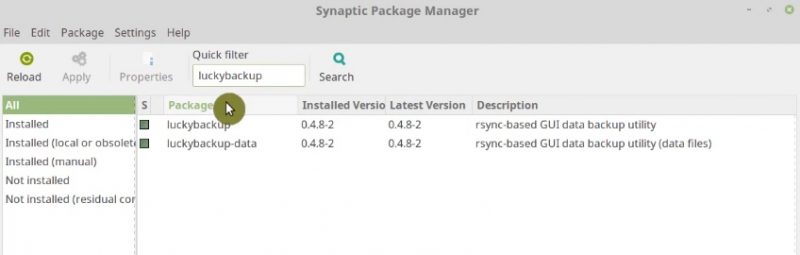
How to install Grsync and Luckybackup
Finally, I just want to tell you that these Graphical Programs programs to create a Linux Backup are available on most Linux distributions. Just search for grsync and luckybackup in the Software Manager of your distribution.
Encrypt your backup
Unfortunate, neither Grsync nor LuckyBack encrypt the backup data. This poses some security issue, especially if you backup your data to an external hard drive. However, you can easily fix this lack security by encrypting your backup hard drive with another free graphical program.
CONCLUSION
As you can see, making a Linux backup with graphical tools is not a complicated matter. I find these two backup programs the most appealing if you prefer rsync program but with the graphical interface. Both are very good and allow you to make a backup without much effort. My recommendation is to use Grsync for new users and LuckyBackup for the more advanced user.
There are other graphical programs to create backups in Linux. However, I insist that you eventually learn how to use rsync in the command line.
Comments
Daisuke
This was a really helpful tutorial. However, a short rundown on the Advanced Options would have been really helpful. Here are some questions: 1-If you are backing up a system, it seems that you would want to keep your device settings files by checking the “preserve devices” option. Why or why not?
2-Also, for the same reason, why would you not copy hardlinks as hardlinks?
3- Make backups seems to allow you to save versions of a file as the emacs editor does with a ~ sequence, e.g. foo, foo~, foo.~1~ where foo is the current version, foo~ is the next most recent, and foo.~1~ is the 3rd most recent, etc. Is this correct?
4-“Only update existing files” seems to mean do not copy new files which are not already backed up. Of course this is an odd thing for a backup so I hope you will explain this odd option better than my guess.
Thank you again for sharing your expertise with other people.
Adilson Fernandes
Thanks for the excellent article/tutorial!!!
Nico
Exactly what I was looking for, thanks for putting all this info together.