Linux Partitioning Recommendations
Manual disk partitioning can be confusing for new Linux users. In this post, we will provide you our Linux partitioning recommendations. We’ll address both EFI partitioning for dual-boot with Windows and Linux-only installation schemes.
Content
Partitioning for Linux-only Installation
Disk Selection
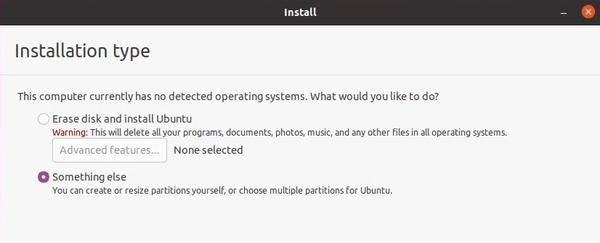
I’ll use Ubuntu 20.04 LTS installer to demonstrate partitioning, but the same process applies to every Linux distro. We need to get to the manual partition settings of the installer, it is located under the “Something else” label in the Ubuntu installer:
This is how Ubuntu’s installer partition manager looks like:
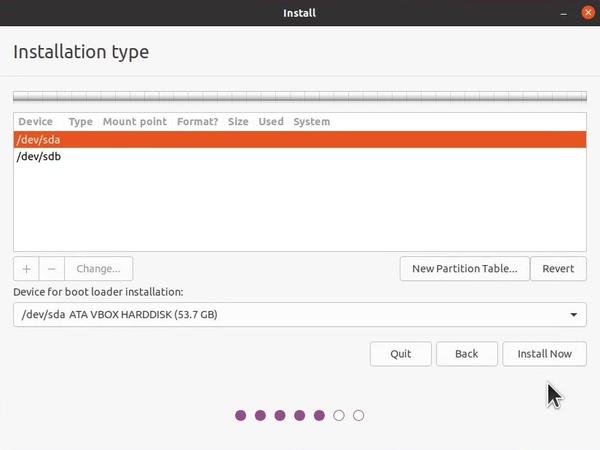
As we can see, I have two hard drives, which are named alphabetically:
- /dev/sda (53.7 GB)
- /dev/sdb (10.7 GB)
If you also have several hadrd drives on your system, you can select the one you need based on its size.
These are brand-new hard drives that are not partitioned yet. I’ll install my system with /dev/sda disk for my Ubuntu installation. For that we first need to create a partition table on it. A partition table will store information about our partitions.
Select your disk → New Partition Table → Continue
Creating Partitions
Now that we have created a partition table, it’s time to create partitions. You can think of partitions as slicing our disk into parts, each for different purpose.
The first partition will be for the bootloader. Bootloader is responsible for loading the operating system and is critical part of every computer. UEFI and BIOS (legacy) are the two common bootloaders for computers. You can find out what bootloader is supported by your hardware in the motherboard firmware specs. Recent hardware uses the UEFI and we recommend to install Linux in the EFI mode, while older hardware can only be used in the legacy mode.
For the EFI mode, we recommend to create four different partitions:
- efi (UEFI bootloader)
- / (Linux system)
- /home (personal user data)
- swap (temporary storage)
Click the “+” button, and create them in order.
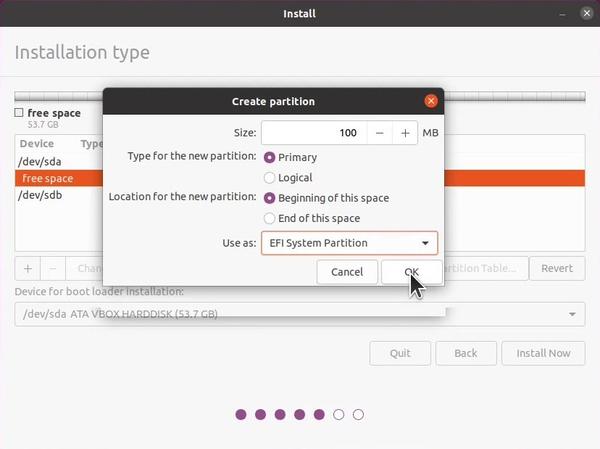
efi (UEFI bootloader)
Starting with the efi partition, 100MB is usually more than enough. The type of partition should be primary. Select “EFI System Partition” in the “Use as” dropdown menu.
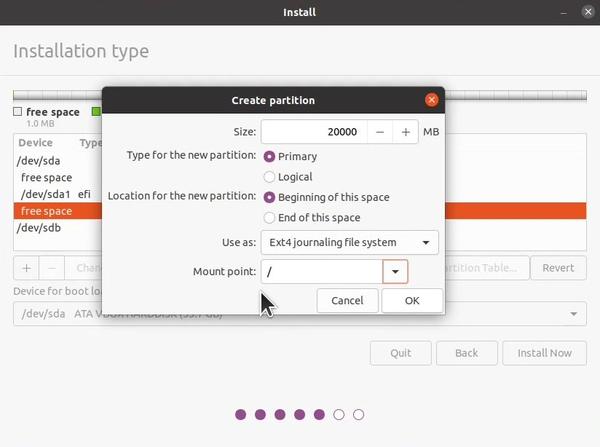
/ (Linux system)
Now select the rest of the free space to create the root partition. Ubuntu recommends at least 15GB for the system partition. However, if you want to play games and install many programs, I recommend 50GB or even 100GB. It depends on the size of your hard drive and your needs.
Select Ext4 journaling file system if it’s not already selected by default and mount point to be root (i.e., forward slash /).
/home (personal user data)
Next, select the free space again and click the “+” button to create /home partition. Home partition is used to store personal files like images, downloads, music, videos, etc. Again, depending on your needs, choose the size accordingly. I’ll go with 30 GB because it is only for the demonstration purpose.
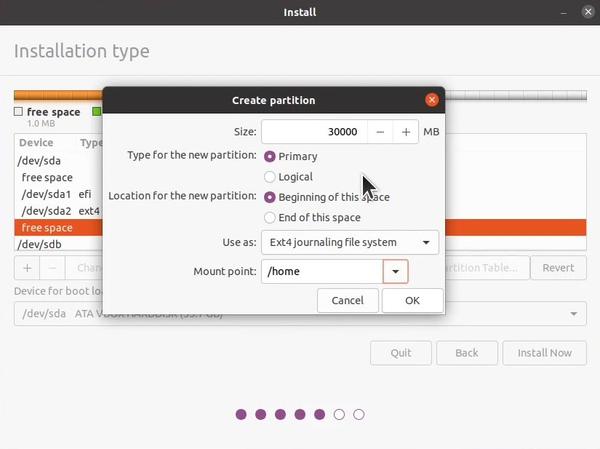
Select Ext4 journaling file system if it’s not already selected by default and mount point to be /home.
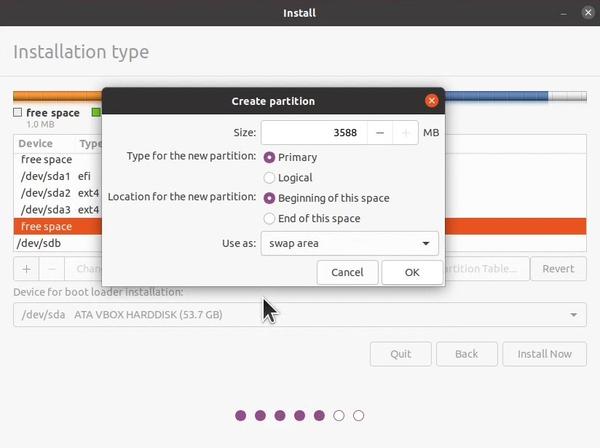
swap (temporary storage)
Last, we have a swap partition. The system automatically uses a swap partition in case RAM gets filled. This way, it doesn’t have to forcibly close processes to free up RAM/prevent a system crash. We have a dedicated post that goes in-depth about Linux swap, so make sure to check it out if you are interested in learning more about it.
There are no strict rules on how large a swap partition should be. With that being said, there are general guidelines that the community follows. If you have less than 8GB of RAM, the swap should be two times that size. Otherwise, the swap can be the same size as RAM.
Once you have selected the right size, make sure to mark the partition as a swap in the “Use as” dropdown menu, and that’s it!
Partitioning table summary
Here’s how my partitioning table looks like after the above changes.
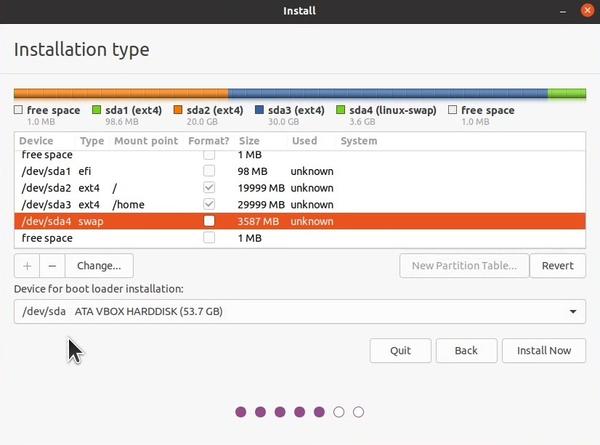
Complete the rest of the steps and fire up the installation once you are ready! Your distro should boot without any issues!
Feel free to run the following command in the newly installed system to check your partition table, and everything should match:
cat /etc/fstab
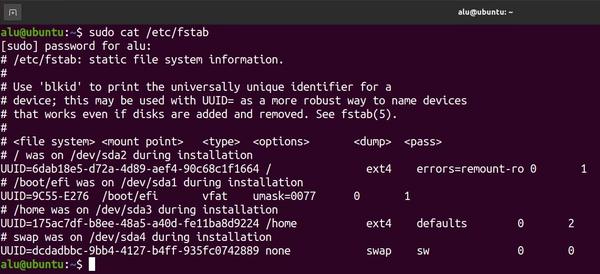
Congratulations! You have installed Ubuntu with manual partitioning, which gives you a lot more flexibility. For example, you can completely wipe the system
partition (/) and install another distribution on it while all your personal data
in /home stays intact. Just remember NOT to format the /home partition during the re-installation.
Partitioning to dual-boot Linux and Windows
Freeing up Space for Linux
While I primarily use Linux as my operating system, it can fall short in specific scenarios. That’s why some users prefer to dual-boot Windows and Linux. This partitioning recommendation will work exacltly for such users.
First, load the Linux installation live system. This time though, select “Try Ubuntu” instead of “Install Ubuntu”. That’s because we need to free up space for Linux before running the installation.
To that end, we’ll use GParted. GParted is the most advanced partition manager for Linux. It’s a lot more capable than the partition manager in the installer.
There is only Windows installed and it occupies the whole disk. That’s the most common scenario for people looking to try Linux but would like to keep Windows.
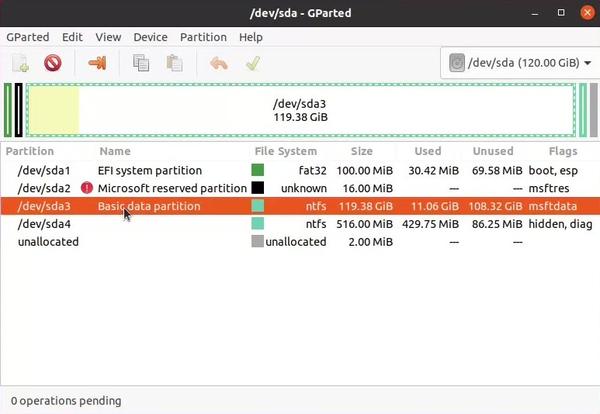
The only partition that we can modify is the “Basic data partition”. It’s usually the largest partition, and in my case, it’s /dev/sda3. We are going to resize that partition to free up some space for our Linux system.
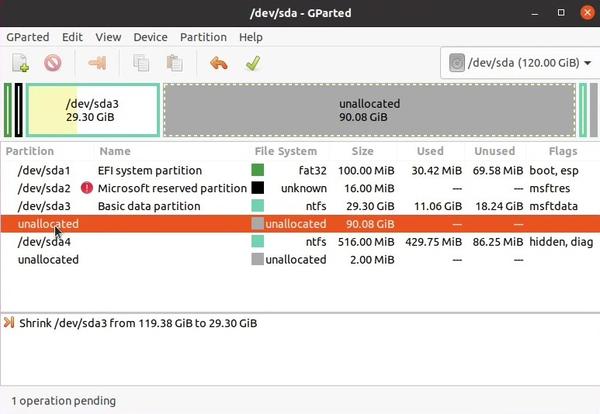
Right-click on the basic data partition → Resize → Type the new (smaller) size for that partition
I’ve decided to shrink the basic data partition to 30GB and I was left with 90GB of free space for my Linux system. You need to do similar shrink on your system.
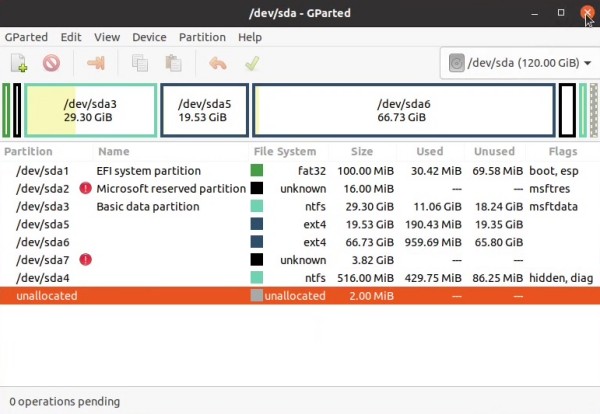
Creating Linux Partitions
We already have an efi partition that was created by the Windows installer, so we don’t need to create it.
We only need to create the remaining three partitions:
- / (Linux system)
- /home (personal user data)
- swap (temporary storage)
The detailed steps on doing this can be found by scrolling up to the “Creating Partitions” section above. The only difference is that GParted has an “Add” button instead of “+” like the installer’s partition manager and you do not need to add mount points in GParted.
After you have provided the new partition scheme in Gparted, all changes are “virtual”, meaning that your drive is still intact. It’s a fantastic feature of GParted that allows us to see how the drive would look with our changes. Once you’re happy with your changes, click the checkmark button on the top menu to apply the changes.
Depending on the size of your drive, it may take some time for changes to complete. Nevertheless, once it’s done, we can proceed with the installation. Launch the installer from the desktop menu and go to the partitioning step. (it’s called “Installation type” in Ubuntu’s installer)
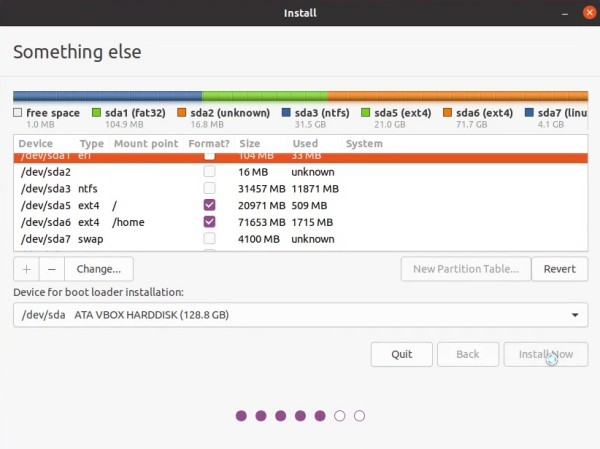
Select manual partition or “Something else”, as Ubuntu calls it and you will see the newly create partition scheme.
Now we only need to edit our system (/) and /home partitions to specify the mount points for root / and /home respectively.
Proceed with the installation steps, and that’s it! Once you reboot the system, the GRUB menu should show up, asking you to select which operating system to boot.
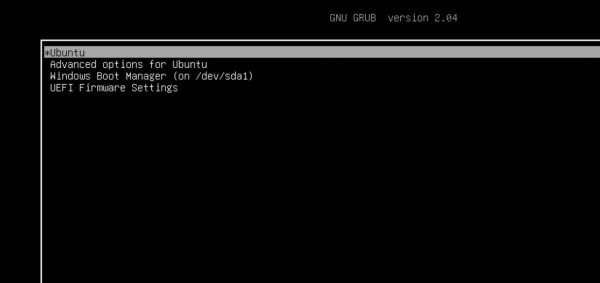
Note: If it doesn’t show up, don’t panic! Go to the boot manager in BIOS (usually F8 at the boot) and shift Ubuntu to be first in the list.
Partition a New Drive for data storage
Another scenario would be that you have purchased a hard drive and would like to add it to your Linux system as a data storage. Similar to the above, we’ll use GParted, the bets Linux partitioning tool.
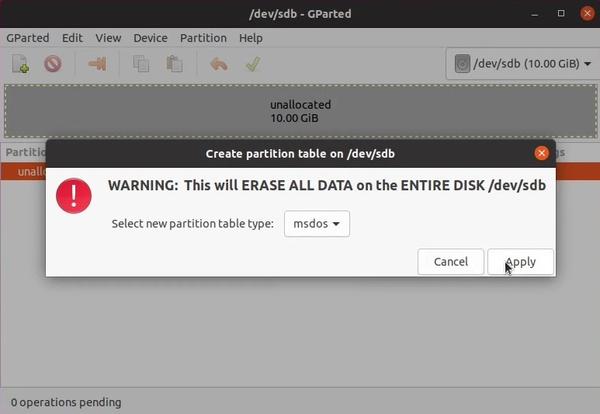
Open GParted → Select your new disk → Device → Create New Partition Table →
Select type msdos → Apply
Now we can partition the hard drive. If you would like to have use this hard drive with Linux exclusively, you can create one ext4 file system partition that occupies the whole disk.
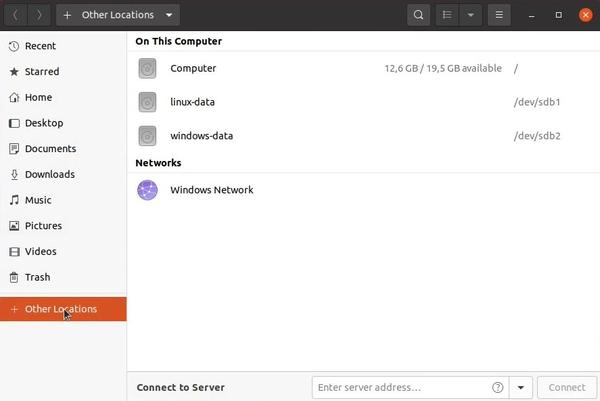
Alternatively, you can split the drive into two partitions: one for Linux with the ext4 filesystem and another one for Windows with the ntfs filesystem. When you are done with partitioning, don’t forget to click “Apply” for GParted to apply changes.

Opening files manager confirms that the partitions have been created.
Conclusion
We have finally addressed one of the most common sources of confusion regarding manual Linux partitioning. This was a more advanced topic, so kudos to you for reaching it to the end!
Let me know in the comments below if you would like to see more advanced Linux tips. Also, don’t forget to subscribe to our newsletter, so you don’t miss out on the latest posts!
Comments
Volkar
Great tutorial ! The very good thing is considering the different situations one can be, and the clearness of these suggestions. Can be understood very good. Thank you for this article. Volkar
gb
Hi,Thanks for the tutorial. However there is to be some confusion,inconsistent information on what to select in the :Device for bootloader installation fieldbox with the general consensus is that if in Bios mode,select eg. /dev/sda ATA Hardisk 53.7GB if in UEFI mode,select eg: /dev/sda* efi *partition number that has ESP & I had seen in a few tutorials ,even the root partition “/” selected for dual boot in UEFI mode. And in your post above(UEFI mode),you leave it a default>/dev/sda ATA VBOX HARDISK. Need you help in clearing up my doubts in this issue.
Juan
Hello Vladimir, many thanks for this tutorial. Once again, it is very easy to read and understand. I’m waiting for the next one!! Bye! J