15 Things to do after installing KDE Neon (2021)
In this post, we’ll explore 15 things to do after installing Plasma’s very own distro - KDE Neon in 2021. Let’s find out what’s possible!
Content
- Double-click
- Update Correctly
- Install Synaptic
- Install Drivers
- Install Apps
- Activate Night Color
- Disable KDE Wallet
- Restore Previous Session
- Automatic Spell Checking
- Index File Content
- Configure Dolphin
- Change Apps Menu
- Firefox Settings
- Decrease Swap Use
- Enable Firewall
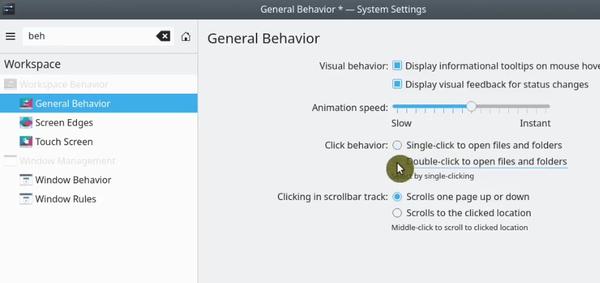
1. Double-click
Taking into account that most of the users come from other OSes, they are likely used to double-click. In my opinion, contrary to Neon’s single-click, double-click should be the default behavior.
Open System Settings → Workspace Behaviour → General Behaviour → Select Double-click to open file and folders.
2. Update Correctly
While KDE Neon is based on Ubuntu, we don’t update it in the same way.
In Ubuntu, we use the following command to update the system:
sudo apt update && sudo apt upgrade
In KDE Neon, on the other hand, we use:
sudo pkcon refresh && sudo pkcon update
In fact, if you try to update KDE Neon using apt, it will warn you and suggest pkcon.
3. Install Synaptic
KDE Neon includes its software centre - Discover. Discover is more user-oriented and does not provide advanced features for working with packages. That’s why I use Synaptic.
You can install it from the CLI:
sudo apt install synaptic
That’s right we can still use apt to install packages on KDE Neon, but don’t update the system with it!
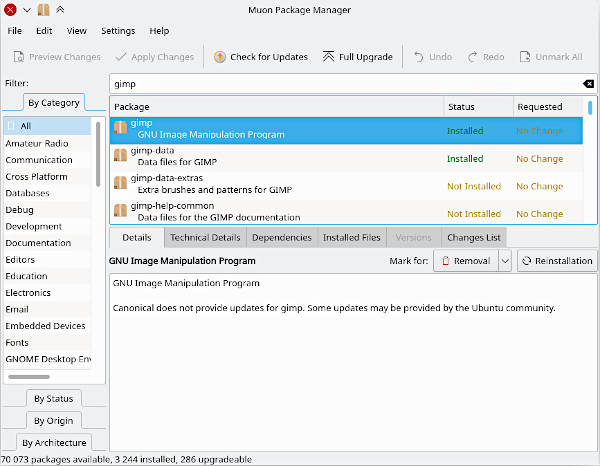
UPDATE: I now recommend to install Muon instead of Synaptic. It is not much different from Synaptic functionally but it looks much better in Plasma 5.
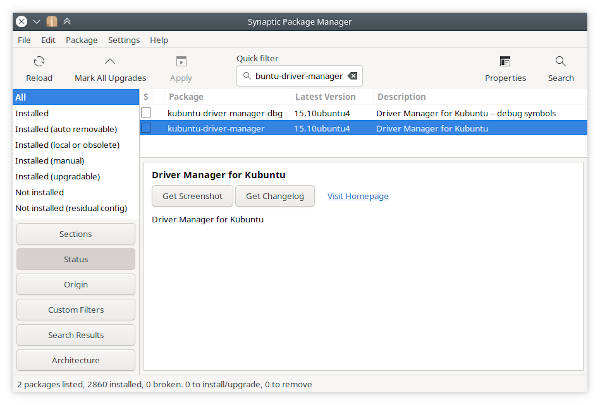
4. Install Drivers
With the help of Synaptic, we can install drivers on KDE Neon.
Open Synaptic → Search for kubuntu-driver-manager → Mark for
installation kubuntu-driver-manager → Install.
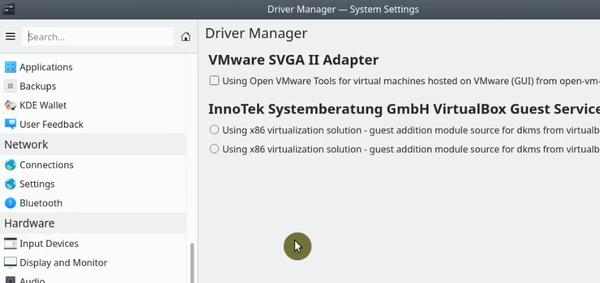
After the installation has finished, go to System Settings → Driver Manager. Wait a bit for KDE Neon to find the right drivers for your system and install them.
5. Install Apps
Unlike other distros, KDE Neon is a very clean/bloat-free distro. It only includes bare necessities.
I use the following command to install apps I use daily:
sudo apt install kubuntu-restricted-extras build-essential libreoffice libreoffice-style-breeze libreoffice-gtk3 libreoffice-kde smplayer clementine kup-backup gwenview kate gimp speedcrunch chromium-browser ktorrent kfind partitionmanager kio-extras gufw
The command above installs the following:
- LibreOffice
- Smplayer (video player)
- Clementine (audio player)
- Kup (backup, check out our article on how to use Kup)
- Gwenview
- Kate (I prefer it over Kwrite)
- GIMP
- Speedcrunch (calculator)
- Chromium (web browser)
- KTorrent (torrent client)
- KFind (file search)
- Partition Manager
- kio-extras (preview PNG images in Dolphin)
- GUFW (firewall, we covered this one too)
6. Activate Night Color
Night colour reduces the amount of blue light at night. This is better for your eyes and helps you to fall asleep easier.
Open System Settings → Display and Monitor → Night Color → Enable Activate Night Color.
The default settings are fine, but feel free to adjust them.

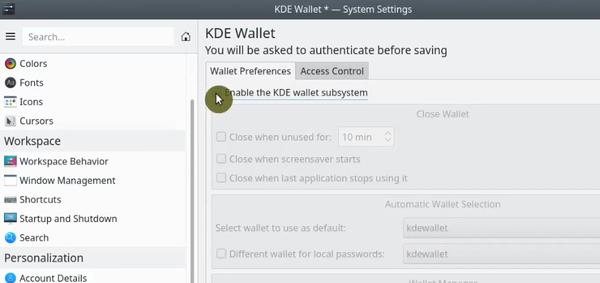
7. Disable KDE Wallet
While I do use KDE Wallet, I know that it is annoying to many users. For those of you new to Plasma, KDE Wallet is a credentials management app.
Fortunately, we can easily disable it:
Open System Settings → KDE Wallet → Disable Enable the KDE Wallet subsystem → Apply.
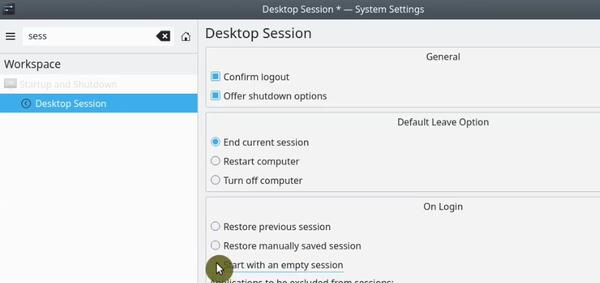
8. Restore Previous Session
KDE Neon launches the last saved session each time you boot up your system. For example, if you had shut down your system with the terminal app open, the next time you boot it will start with terminal open again.
This slows down the system and I prefer to have it disabled.
Open System Settings → Startup and Shutdown → Desktop Session → Enable Start with an empty session → Apply.
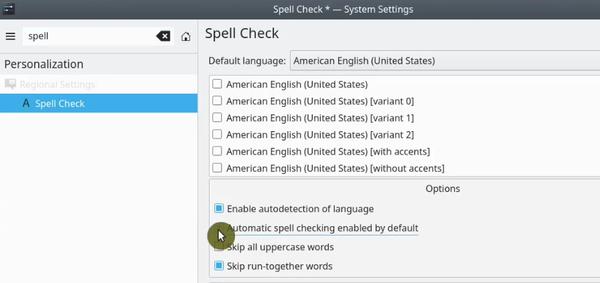
9. Automatic Spell Checking
KDE Neon has a spell-checking system built-in which will check every word you type in any app.
Open System Settings → Regional Settings → Spell Check → Enable Automatic spell checking enabled by default → Apply.
10. Index File Content
KDE Neon is pre-configured to index everything that’s available on your system. It’s not only the locations of files but their content as well. Many users have experienced a slowdown of their system due to this heavy indexing.
I prefer to disable this feature because most of us tend to search for files by their names, not by their content.
Open System Settings → Search → File Search → Disable Also index file content → Apply.

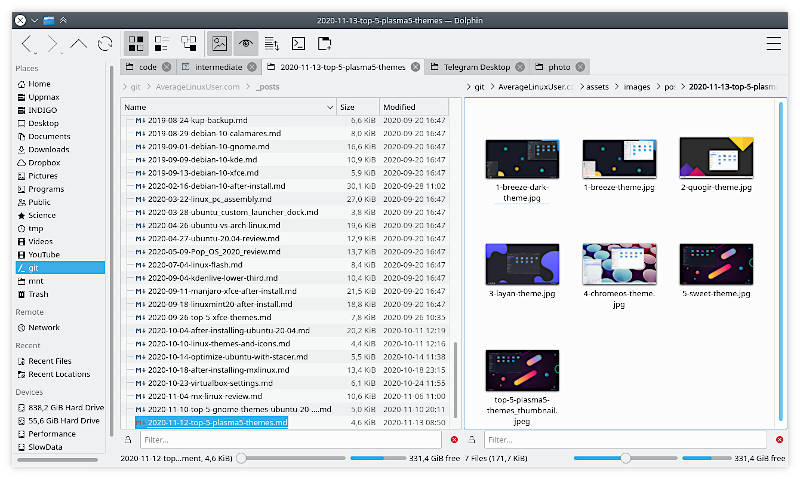
11. Configure Dolphin
Dolphin is my favourite file manager for Linux and it is the best in my opinion. In addition to the already rich interface, you can configure every aspect of it.
For example, you can place your own frequently used folders in the Places panel just by dragging them.

The next feature is related to the style view of folders. By default, Dolphin uses the same style view for every folder. If you are like me and would like to have different style view (icons, lists etc.) depending on the folder, you can do that. There are many other things you can configure.
Dolphin → Hamburger menu (the top right corner) → Configure Dolphin → Enable Remember display style for each folder.
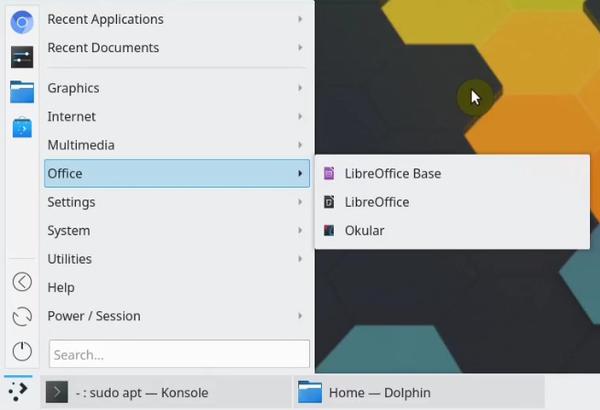
12. Change Apps Menu
The default apps menu on KDE Neon is not very easy to navigate. It does require many steps if you are using categories for your navigation.
Fortunately, we have an alternative Application Menu. It allows you to navigate categories just by hovering your mouse.
Right-click on apps menu → Show Alternatives → Select Application Menu → Switch.
13. Firefox Settings
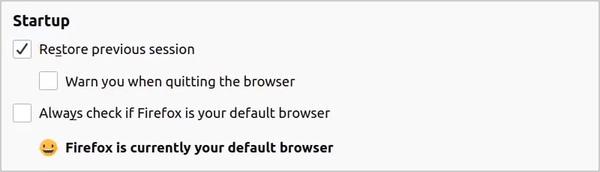
Similarly to other distros, KDE Neon includes Firefox as a default web browser. The default settings leave us with a room for improvement though.
Firefox has a useful feature that restores tabs from the previous session, each time you launch it. Open Firefox → Options (hamburger menu) → Preferences → Enable Restore previous session.
Another useful feature is to enable DRM content. You may find yourself unable to play some videos (e.g. Netflix) or audio because of DRM restriction. To enable DRM content, Open Firefox → Options (hamburger menu) → Preferences → Enable Play DRM-controlled content

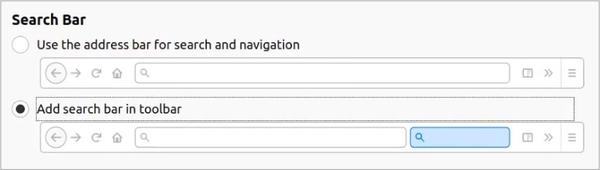
The next improvement is related to Firefox’s search bar behaviour. Let’s say you search for the particular email address. Firefox will open your default email client, instead of performing a web search. This functionality can certainly be annoying.
To change the search bar, Open Firefox → Options (hamburger menu) → Preferences → Search tab → Select Add search bar in toolbar
Lastly, for better browser-OS integration install Plasma Integration.
14. Decrease Swap Use
One of the ways to boost your system performance is decreasing swappiness value. This feature forces your Linux system to use your RAM, instead of your hard drive. If you are not familiar with Linux swap, check out our article to learn more.
Check the current swappiness value by executing:
cat /proc/sys/vm/swappiness
The default value is 60.
To reduce the swap usage, set the swappiness value to 10:
- Open it in the
nanoeditor:
sudo nano /etc/sysctl.conf
-
Use arrow key to do down to the very end.
-
Paste this:
vm.swappiness=10
-
Press the keys Ctrl+O to write the changes, and Ctrl+X to exit
nano. -
Now reboot your system and check the swappiness value:
cat /proc/sys/vm/swappiness
You should see the value of 10.
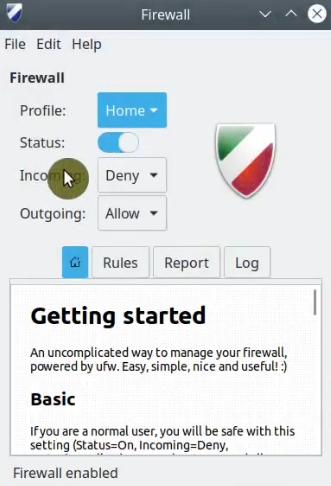
15. Enable Firewall
While there are not many viruses for Linux, it’s advisable to enable a firewall which protects against network intrusions. We’ve installed the firewall at the beginning of this post and now we only need to enable it.
Open Firewall Configuration → Enable Firewall.
The default settings are fine, but feel free to check out our article to learn more advanced features.
Conclusion
In this post, we have explored 15 essential things to do after installing KDE Neon to make it so much better. Plasma 5 offers much more, but I’ll leave that to you to explore. Let me know what else you do in you KDE Neon after installing it. The comments section is below. 👇
Comments
Ilya
Thank you!
PS: Try nomacs instead of Gwenview. I think for most cases it is more convenient.
Kishore Kumar
i am a new kde nneon user, just now I installed it on my laptop. whenever I try to install software frominfromfrominfromstalled it on my laptoplaptoplaptoplaptoplaptoplaptoplaptoplaptopfrominfromfrominfromstalled discover store, it shows the installatiinstallationinstainstallatiinstallationinstallatiinstallationondiscovonreachingllatiinstallationondiscovon process butbutbutbutbutbutbutbutbbutbutbutbutbbbutbutbutbutbutbutbutbutbbutbutbutbutbbutut after reaching 100% it starts again to install from beginning. I tried it for all appsapps and it happened on atriedll.
Sebastian
Your review of KDE Neon brought me here - great list, thank you! I decided to stay away from muon though since it looks unmaintained for quite some time now and using gufw seems unnecessary since basic firewall controls are already in System Settings - Network: enable and set “Default Income Policy” to “Reject” is all that’s necessary for everyday users. Might add: I like the Qogir themes and Papirus icon set a lot, first thing I install…
Lyubomir Benkovski
Thanks for your work! I install Kubuntu-Driver-Manager from Synaptic, but when I start it, it does not find any drivers and the refresh button is inactive. What would you advise me? This is what it looks like: https://www.facebook.com/photo.php?fbid=3802304869855028&set=p.3802304869855028&type=3
Average Linux User
It is a known bug. I am about to add this info to the post. Try these two options.
Install a recommended driver:
Lyubomir Benkovski
The first way worked and now everything is fine. Thank you very much!
Mihin Dissanayake
There is something more to enable Settings>Search for desktop effects and enable Wobbly effect and magic lamp effect you will see how cool is that when enabled KDE is the best!
Average Linux User
Right! I enable these effects too. But it is rather extras 😉
SomeGuy
I didn’t realize how great Dolphin was! Thanks!
Average Linux User
Yeap! I think it is the most powerful file manager on Linux.
Check out a dedicated post on How to configure Dolphin
Azim
Thank you very much man :)
Average Linux User
Azim, you are welcome!
JM
When changing swappiness, how does one resolve this message?
“bash: /etc/sysctl.conf: Permission denied”
Average Linux User
Make sure you use
sudo:JM
I did use the sudo statement exactly as shown. “bash: /etc/sysctl.conf: Permission denied” is the response.
Average Linux User
Ok, do it this way then.
nanoeditor:A.J.
A neat and clean list of Things To Do for my favorite distro. Kup is new to me, will have a look. Thanks for your effort.
Average Linux User
Thanks, AJ. Check out this post on KUP backup