21 Things to do After Installing Ubuntu MATE
So, you’ve installed Ubuntu MATE, now what? Check out these top 21 things to do after installing Ubuntu MATE.
- Desktop Layout
- Browser
- Update Manager
- Drivers
- Codecs
- HiDPI Display
- Language Support
- BackUp
- Firewall
- Additional Themes
- Animation
- Window Button Placement
- Center New Windows
- Synaptic
- Microsoft Fonts
- Redshift
- Clipboard Manager
- Pull-Down Terminal
- Favorite Apps
- Plank Icon on Dock (Cupertino desktop layout)
- Optimize the System [Optional]
1. Desktop Layout
One of the settings that you can customize right from the welcome screen is a desktop layout. You can set it in:
Welcome screen → desktop layout.
Ubuntu MATE allows us to choose one of the following notable desktop layouts:
- Familiar (MATE desktop)
- Mutiny (Ubuntu’s GNOME-like desktop)
- Redmond (Windows-like desktop)
- Cupertino (macOS-like desktop)
2. Browser
Arguably, the most used app for most of us is a web browser. Thus, it makes sense to install the right one, from the get-go. Once again, Ubuntu MATE helps us with this. The following browsers are available for us to choose:
- Firefox
- Google Chrome
- Chromium
- Opera
- Vivaldi
- Brave
Pick your favorite one in Welcome screen → Browser.
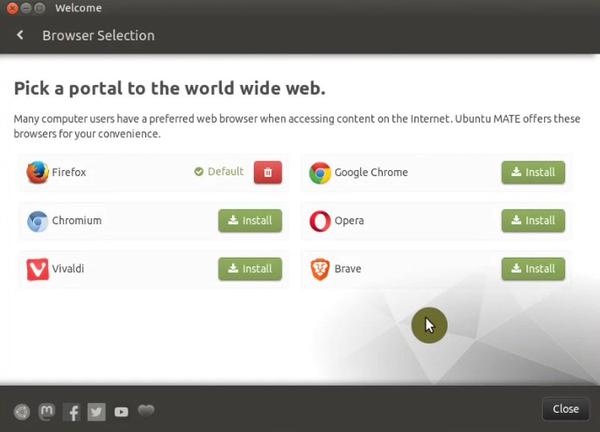
Notice that we have Chrome and Chromium. These are two different browsers. Chromium is an open-source browser, backbone of Google’s proprietary Chrome.
3. Update Manager
Next, let’s make sure that our update manager is configured correctly.
First, make sure that updates are downloaded from the server that is closest to you.
Welcome screen → Getting started → Updates & Extras → Settings → Ubuntu Software tab
If you wish to have access to more exclusive or proprietary software, you can enable the Canonical Partners option.
Welcome screen → Getting started → Updates & Extras → Settings → Other Software tab
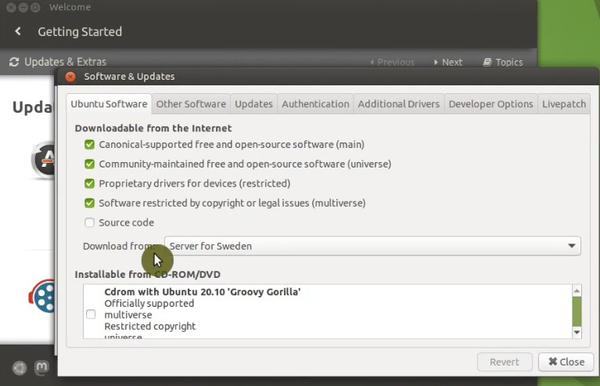
Having made these changes, we can close the settings window and press the reload button to apply our changes.
4. Drivers
To make sure the Ubuntu MATE is getting the most out of your system, we need to install drivers.
Welcome screen → Getting started → Drivers
On this window, you can check for if any drivers are available for your system and install them:
- Graphics
- Wireless, Bluetooth and Other Devices
- Printers
- Software Utilities for Peripherals
- Firmware Packages
- Additional Drivers
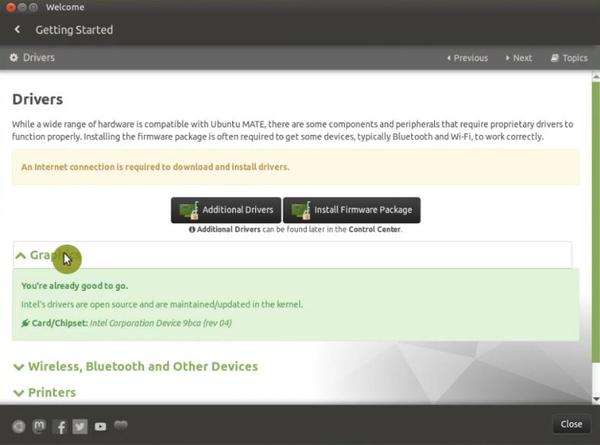
Once you have installed the drivers, reboot your system for changes to take effect. If you encounter any issues with drivers, you can always uninstall them or try out the other versions of the same drivers.
5. Codecs
Codecs allow you to play various media formats on your Linux machine. They are not included by default because of legal concerns.
Welcome screen → Getting started → Updates & Extras → Codecs
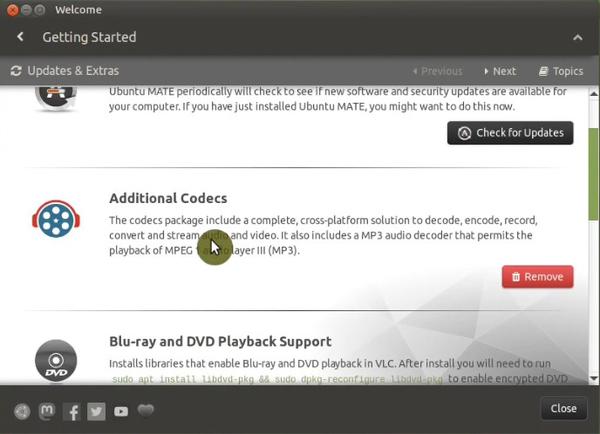
You may have all the codes already installed if you’ve opted for this during the installation.
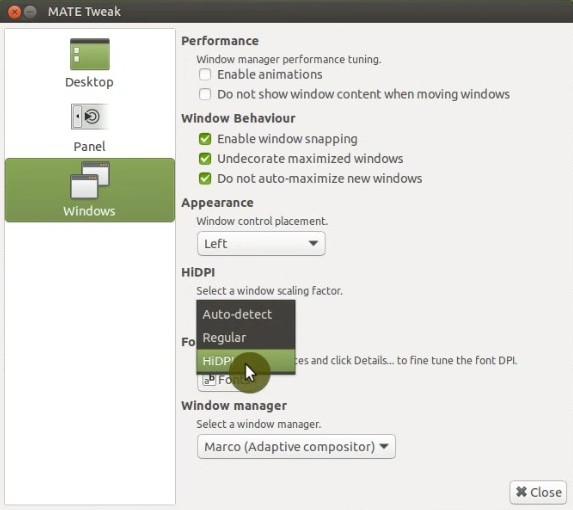
6. HiDPI Display
HiDPI screens are getting more common. If you are fortunate to have one, you need to make sure that Ubuntu MATE is configured correctly.
Control center → Mate Tweak → Windows → HiDPI → Select HiDPI (in case auto-detect doesn’t work)
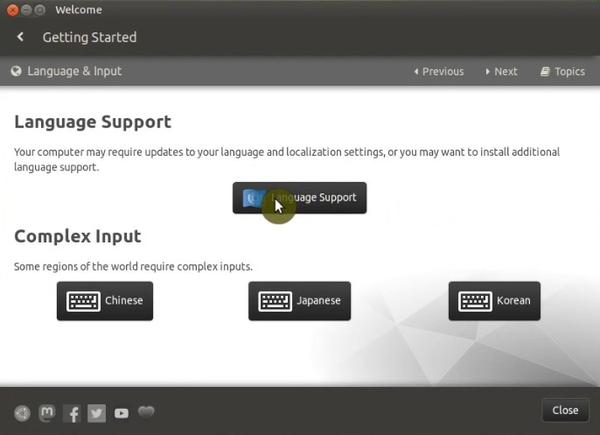
7. Language Support
Depending on how you installed Ubuntu MATE, the language support may not have been installed completely. So, it’s worth to check that out.
Welcome screen → Getting started → Language & Input → Languages support
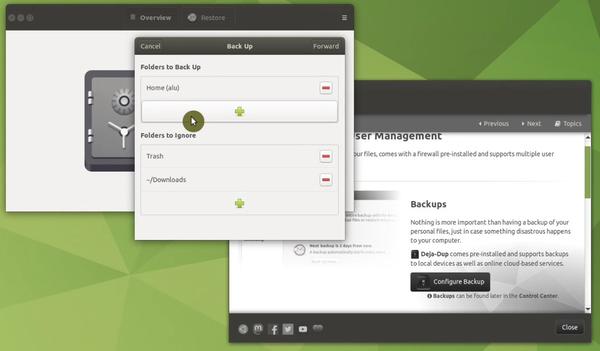
8. BackUp
Nowadays, the software is more advanced than ever but still, many things can go wrong and make you lose your work. Thus, it’s important to have a backup in place.
Fortunately, Ubuntu MATE has a very helpful backup wizard which makes setting up backup a breeze. Select which directories you would like to backup/ignore, backup location, encryption and that’s it!
Welcome screen → Getting started → Optional Tasks → Configure Backup → Create My First Backup
After doing your first backup, make sure to enable automatic backups as well, so your recent data is always safe and sound.
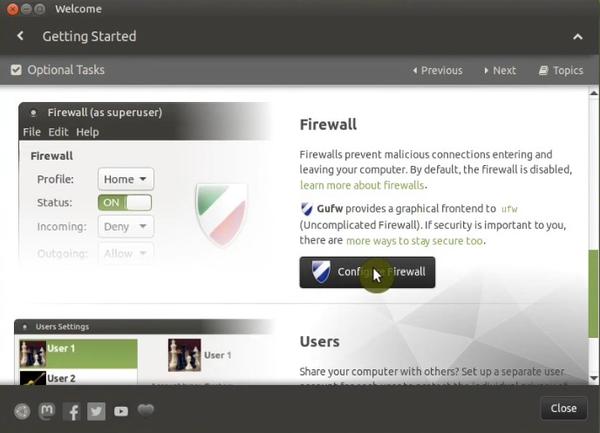
9. Firewall
While there are not many viruses for Linux, it’s advisable to enable a firewall which protects against network intrusions.
Welcome screen → Getting started → Optional Tasks → Firewall → Enable
10. Additional Themes
Just like any other distro, Ubuntu MATE allows us to adjust the look of our system with custom themes! You can also install themes, screensavers and community wallpapers from the Welcome screen.
Welcome screen → Getting started → Updates & Extras → Install Screensaver & Community wallpapers
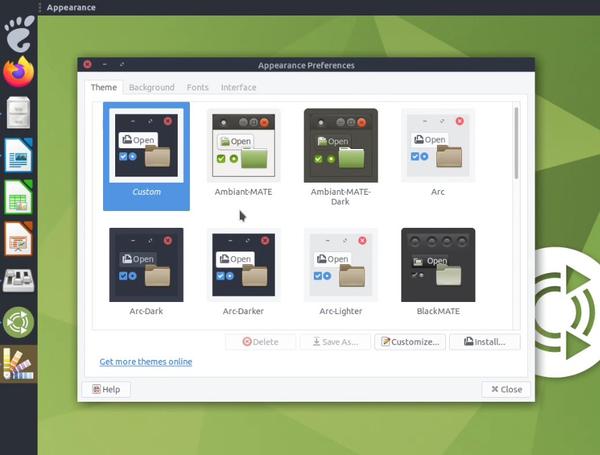
With these addons installed, we are ready to apply new themes!
MATE Menu → Appearance → Select the theme
After selecting the theme, you can also customize certain aspects of it to your liking like with the Customize button:
- Controls
- Window Border
- Icons
- Pointer
Further appearance customization options include background, font & interface. You can customize your screensaver by opening Screensaver app.
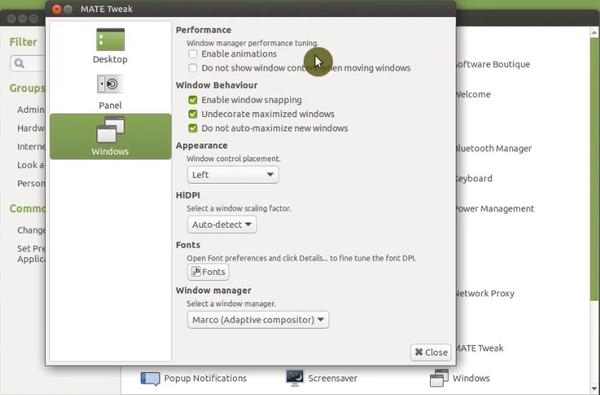
11. Animation
If you are running Ubuntu MATE on less powerful hardware, you might want to disable animations to speed up your desktop experience.
Control center → Mate Tweak → Windows → Performance → Disable animation
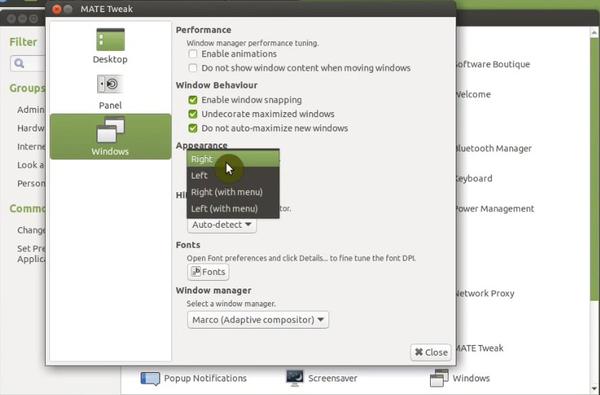
12. Window Button Placement
By default, MATE places window control buttons on the left-hand side. I prefer the left-hand side too, but I know that many of you are used to control buttons being on the right-hand side.
Control center → Mate Tweak → Windows → Appearance → Right
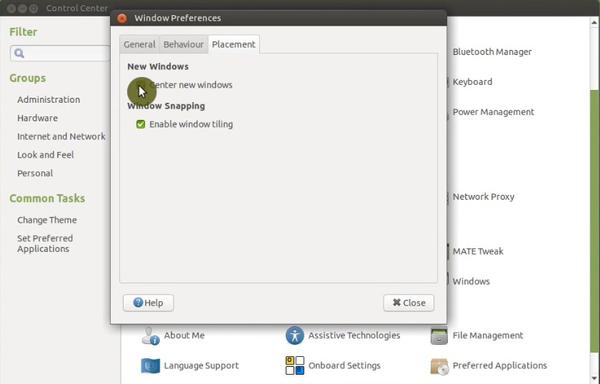
13. Center New Windows
Each time an app is launched on MATE desktop, it’s placed randomly on the screen. Personally, I don’t like this behaviour and prefer to have a fixed place - the centre of the screen.
Control center → Windows → Placements → Enable center new windows
14. Synaptic
MATE’s Software Boutique is a great software centre. Nice UI, very user-friendly and overall stable app. However, for more advanced package management tasks, you might want to check out Synaptic:
Software Boutique → Search for Synaptic → Install
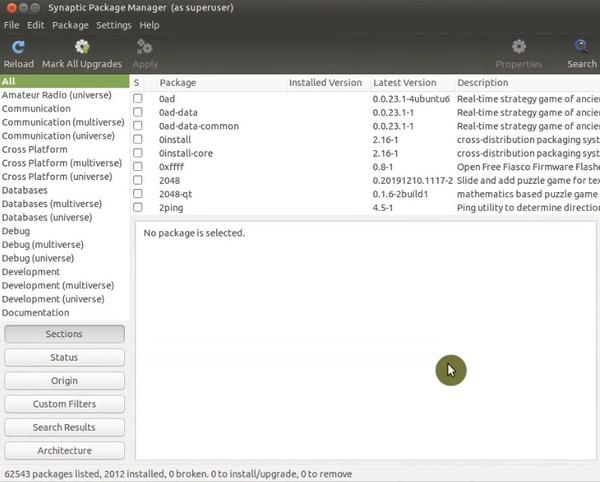
For example, if you need to install Microsoft Fonts, you won’t find them in Software Boutique, but it is available in Synaptic under the names ttf-mscorefonts-installer.
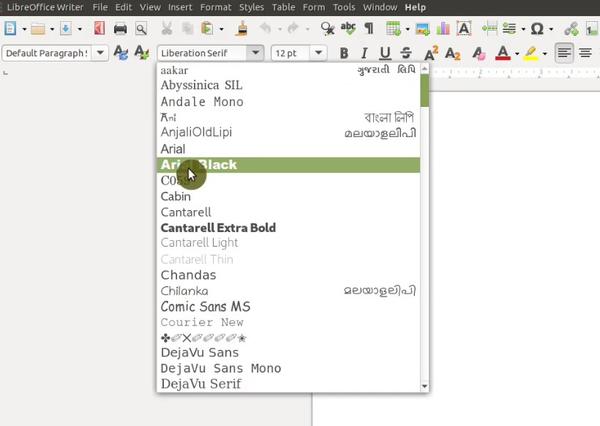
15. Microsoft Fonts
If you plan to use Ubuntu MATE for work, you’ll likely deal with documents. Those documents are usually created in Microsoft Word which rightly, use Microsoft’s fonts! We can install them with Synaptic and won’t find them in Software Boutique.
Synaptic Package Manager → Search for → ttf-mscorefonts-installer → Right-click and mark for installation → Apply
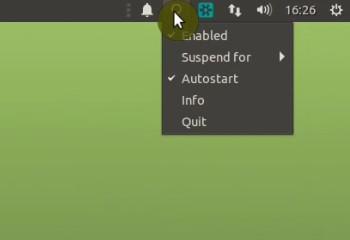
16. Redshift
Redshift is a Linux application that protects your eyes by reducing the amount of blue light at night which helps you fall asleep faster. Ubuntu MATE includes the app by default, and we just need to enable it.
Redshift → Make sure that Enabled and Autostart are selected (icons tray)
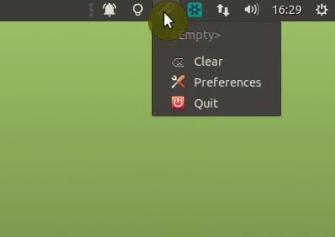
17. Clipboard Manager
Clipboard manager allows you to retrieve data that you have previously copied. I find it very useful, and I believe that you will greatly benefit from it too.
Control center → Startup Applications → Diodon
After installation, it will show up in the icons tray. By right-clicking on it, you can access and customize some preferences:
- Number of items to remember
- Hotkeys
- Plugins
18. Pull-Down Terminal
If you’ve been reading this blog or watching my Youtube channel, then you know that I am a huge fan of pull-down terminals like Yakuake. Ubuntu MATE includes its own pull-down terminal which we just need to enable!
Control center → Mate Tweak → Panel → Enable Pull Down terminal
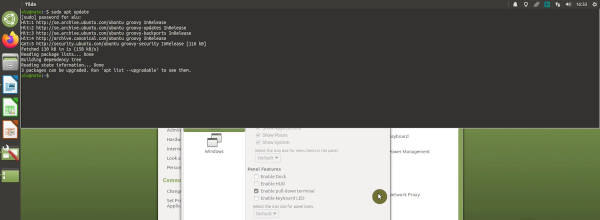
Next time, you press F12, a pull-down terminal will appear at the top of your screen.
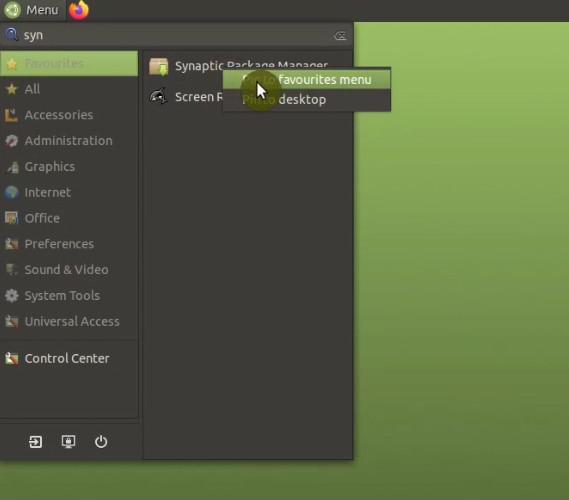
19. Favorite Apps
We all have apps that are crucial for our day-to-day work. To make them as accessible as possible, let’s add them to the “favorites menu”. It is especially useful in Familiar and Redmond layouts of Ubuntu Mate.
Menu → Select an app → Right-click → Pin to favorites menu
20. Plank Icon on Dock (Cupertino desktop layout)
If you are like me, you may not like the dock icon on Cupertino’s bottom panel - Cupertino’s settings app. To disable it, we’ll first need to install Dconf Editor with Synaptic.
Synaptic → Search for dconf-editor → Install
Then disable the Plank Icon:
Dconf Editor → Click on the search icon → Search for plank → /net/launchpad/plank → docks → dock1 → Disable show-dock-item
![]()
21. Optimize the System [Optional]
MATE is well-configured out of the box, but if you would like to squeeze a bit more performance out of your system, then you’ll find the following tips helpful.
Decrease Swap Usage
One of the ways to boost your system performance is by decreasing swappiness value. This feature forces your Linux system to use your RAM, instead of your hard drive. Check out our article on the swap, to learn more.
Check the current swappiness value by executing:
cat /proc/sys/vm/swappiness # 60 (default)
Open /etc/sysctl.conf for editing:
sudo pluma /etc/sysctl.conf
Add vm.swappiness=10 at the end and save the file:
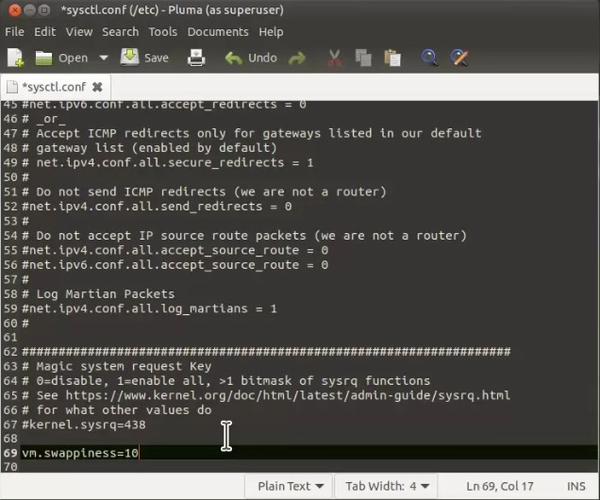
Reboot your system and check the swappiness value:
cat /proc/sys/vm/swappiness
It should be 10.
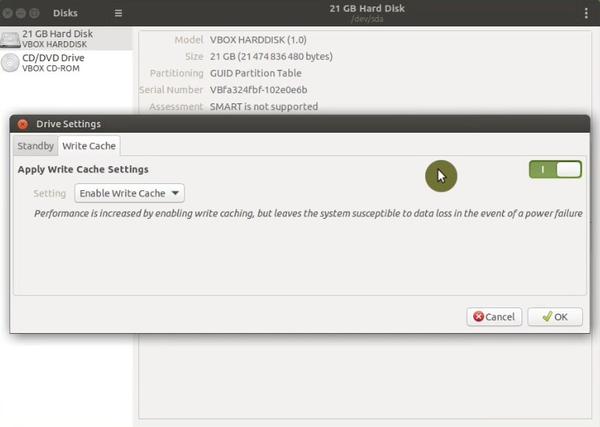
Enable Drive Cache (for HDD)
In addition to optimizing swap, we can also optimize the performance of a hard drive so it stores the information in the disk buffer little longer that increases the performance:
Open Disks → Select your current HDD → (three dots menu) → Drive Settings → Write Cache tab → Enable Write Cache
Optimization for SSD (advanced users only)
Open Terminal → sudo pluma /etc/fstab → Identify your root partition → Next to
the errors=remount-ro add noatime. So, it looks similar to this:
UUID=22537fc3-4b5d-448c-ba36-8c05eeccf5cc / ext4 errors=remount-ro,noatime 0 1
Note, there is no space between remount-ro and noatime.
This change will significantly reduce disk writes when files are read. Meaning that your SSD will serve you much longer that it would normally.
Conclusion
These were my top 21 things to do after installing Ubuntu MATE. I hope you’ve found them useful. If this list was not long enough for you, make sure to check out 30 things to do After Installing Ubuntu where you will find some more interesting topics like:
- Enable Netflix support in Firefox
- Change the look of LibreOffice
- Test Webcam and Microphone
- Connect Android phone
- Clean system Ubuntu-Cleaner
- Laptop Tweaks
Let me know in the comments section what else you do after installing Ubuntu MATE.
Comments
Art
Thanks Vladimir, useful tips. Q: Could you give the source for the ssd optimization? Doesn’t moving data (writing) around an ssd prolongs it’s life?
Average Linux User
SSDs have a limited number of write cycles. Disabling timestamp wring reduces the number of writes and thus extend the lifespan of an SSD. It also brings some other performance benefits.
Art
Appreciate the reply (and link), thanks!
Vladimir
Well done Vladimir! ;)